- "Our task is difficult. It will take all of us and all our skill. But we believe it can be done. Let me tell you about Operation Starlight."
- ―Commander Grek
Operation Starlight was a Rebel Alliance mission whose objective was to reassemble the Alliance Fleet after its scatter following the Battle of Hoth. However, every attempt to reassemble the fleet put the Rebellion at the mercy of the Empire because they became able to crack the rebel transmissions and destroy the rebel divisions, so the Alliance looked to new uncracked codes to bring together the fleet. Commander Grek of the Fourth Division derived the plan's name from the Starlight Beacon, a navigational station that had been constructed in the High Republic Era.
The Pathfinders of the Fourth Division conceived a plan to steal an ancient Autonomous Translator Module, Mark II droid from the Imperial Museum on the Imperial capital Coruscant. The droid could translate the Trawak language which the Imperials had yet to crack. After breaking into the museum, the Pathfinder Needle provided a distraction for Kes Dameron and Frell to sneak into the curator's gallery and steal the talker droid. Although Needle died in the process, the Pathfinders were able to bring the droid to the Rebellion.
After a struggle, the rebels were able to get the droid to translate the codes to the Trawak language. The codes were then delivered to Starlight Squadron who were given the task of bringing the codes to the Sixth Division, but when the squadron arrived near Felucia, the Sixth Division had been destroyed. Imperial probe droids tried to steal the codes stored in the rebel pilot's astromech droids but the pilots destroyed their astromech to prevent this. Starlight Squadron was then ambushed by the Tarkin's Will led by Imperial Navy Commander Ellian Zahra. During the fight, Starlight Squadron destroyed many of the Star Destroyer's hangar bays but Starlight Leader Shara Bey was struck down and forced to stay behind as the rest of the squadron barely escaped.
Desperate for a victory, Skywalker joined Starlight Squadron as they answered a distress signal from the Eleventh Division on the planet Ab Dalis. The Eleventh Division was trapped by the Imperial Star Destroyer Ultima II and was under siege from the surface of the planet. As Starlight Squadron was fighting off the TIE fighters, Skywalker received the coordinates to blow up the planet surface underneath the Ultima II. Although Skywalker missed his shot, the other members of Starlight Squadron destroyed the target which caused a volcanic eruption to occur and destroyed the Ultima II. Rebel leader Mon Mothma thanked the squadron for the rescue. The rebel fleet would reunite for the Battle of Panisia.
Prelude[]
- "They gave that station an inspiring name, fitting its purpose. We can find inspiration in it as well, to find the rest of the Rebel fleet and bring them back together."
- ―Grek to the Fourth Division

Commander Zahra's forces destroyed the Sixth Division
After the Alliance to Restore the Republic's defeat at the Battle of Hoth[8] in 3 ABY,[4] the Rebel Alliance Navy had scattered itself to various rendezvous point located across the galaxy. This was done to prevent the Galactic Empire from tracking down the entire fleet. Part of the original plan was to send coded communications from division to division in order to slowly bring the fleet back together, but the Empire cracked the codes with a signal analysis protocol so they could intercept the signals and destroy the divisions. Princess and General Leia Organa and the Fourth Division were left with two choices, either wait until the rebel leaders to contact them or go out and solve the problem themselves. Organa's fellow rebel personnel wanted to save the rest of the Rebel Fleet.[8]
Imperial Navy Commander Ellian Zahra was assigned by Sith Lord Darth Vader to hunt down the divisions of the Rebel Fleet using any resources necessary since she was as skilled as her late mentor Grand Moff and Governor of the Outer Rim Territories Wilhuff Tarkin. Zahra commanded her Hunter Fleet from the Tarkin's Will, a Star Destroyer originally named the Fortitude that was damaged during the Battle of Yavin.[11] During an attack on the Fourth Division at Rendezvous Point Delta-Three, Zahra attempted to blockade and destroy the division but her plan failed when the starships were able to escape.[12]

Grek proposes a new plan: "Operation Starlight"
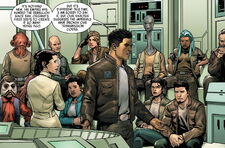
After the battle, the remaining forces of the Rebel Alliance met up for a meeting about the next actions to take. Commander Grek then stepped forward and introduced the rebel plan. Grek's plan was inspired by Starlight Beacon space station from the High Republic Era. He explained the history of Starlight Beacon to the rebels and proposed using the inspiration the space station gave to the galaxy, as the goal for the new rebel operation. Grek called this plan "Operation Starlight."[8] After being reprimanded by Vader for failing in her first attempt, Zahra located the Sixth Division of the rebel fleet and destroyed it, even though she was unable to locate any new leads on the other divisions' locations afterwards but felt confident of doing so due to her many plans in motion.[13]
Zahra was able to intercept a transmission between the Seventh Division and the Fourth and led her Imperial forces to Elessia to destroy the rebels.[14] She led a boarding party on General Organa's EF76 Nebulon-B escort frigate Redemption and confronted her but before she could take her revenge on Organa as she felt it was the young Alderaanian's fault that she lost Governor Tarkin when the Death Star was destroyed, Zahra was stopped by her mentor's killer and Lord Vader's son Jedi Commander Luke Skywalker. Zahra was able to escape but suffered injuries.[1] Meanwhile, after the formation of Operation Starlight, Starlight Squadron was formed and prepared for their first mission the following day.[14]
Operation Starlight[]
Heist at the Imperial Museum[]
- "But now it's time to get back to work. It's time for Operation Starlight to begin."
- ―Organa to the rebels

The Pathfinders infiltrate the Imperial Museum
Since the Hunter Fleet was able to crack the Rebel Fleet's transmission codes, leaving them unable to to communicate with the other divisions of the Rebel Alliance without alerting Zahra's forces, Organa's protocol droid C-3PO developed a plan to use the extinct Trawak language to create annew code they can't crack with her signal analysis protocol. The language involved ultrasonics, sounds of the environments, and interactions between air and mouth in order to communicate. The last source of the language was a Autonomous Translator Module, Mark II, which the rebels planned to steal, but the only remaining droid in existence was stored in the Imperial Museum on the Imperial capital Coruscant. Although Skywalker wanted the mission, Organa enlisted the Pathfinders for it since she knew Vader's Master Galactic Emperor and Sith Lord Sheev Palpatine would sense his presence as soon as he arrived. The Pathfinders, Sergeant Kes Dameron, Frell, and Needle were joined by Lando Calrissian and Lobot for the mission.[3]
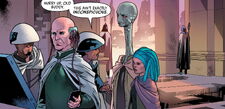
After successfully getting by the Imperials on Calrissian's old ship the Millennium Falcon, the group met outside the museum. Calrissian wanted to wait on the starship with Lobot but Dameron told him Lobot was joining in the heist. Once they got inside, Lobot was going to slice through the museum's databank in order to locate the droid. Calrissian did not want to leave Lobot behind and reluctantly agreed to join the Pathfinders. Inside the museum, Lobot hooked himself up to the databank and successfully found the location of the droid. Dameron and Frell contemplated and agreed they were going to steal the droid from the curator's private gallery. Calrissian thought the Pathfinders were crazy but Needle agreed to provide a distraction while Dameron and Frell infiltrated the curator's gallery.[3]
Shortly after, Needle started to cause a ruckus over a holy relic that he believed should be with his people. He attracted the attention of the staff who called down the curator to speak with Needle. The rest of the Pathfinders used this time to sprint to the curator's private gallery as he left to deal with Needle. Dameron and Frell confronted the Museum guard who ordered them to leave at once.[3]

Dameron and Frell fight the Museum guards
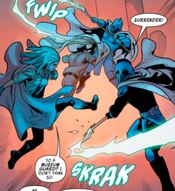
Dameron and Frell then fought the guards as Needle continued to distract the curator. The curator tried to reason with Needle and told him that it was better to have the relic in the Imperial Museum instead with the Quermian because he believed the Empire was better at protecting the relics. Needle became more angry and refused to leaves, even willing to get shot if he had to. The curator told him he would not have him shot right there. Dameron and Frell took out the guards but more time would be needed to break in. Dameron asked Needle to buy the Pathfinders more time for Lobot to break through the doors.[3]
Knowing he might die, Needle destroyed his comlink and started a chase with the curator and his guards to buy the rebels time. Needle was able to evade the guards but was eventually caught, protesting the ideology of the Empire. The curator caught up and accused Needle of thieft which was punishable by death. Needle was then killed but he bought the rebels enough time to steal the talker droid.[3]
Back at the Fourth Division, C-3PO attempted to activate the talky but the droid's memory banks had been corrupted rendering it unable to speak the Trawak language. Dameron and the other rebels were very angry and worried about the situation since 3PO said he had no idea on how to fix it.[3]
Imperial ambush near Felucia[]
- "Good luck, pilots. You have the fate of the Rebellion in your hands. Get out there and find our friends."
- ―Princess Leia briefing Starlight Squadron

Starlight Squadron arrive too late for the Sixth Division
After a tussle with the talker droid to activate it, the droid agreed to help the rebels. After the droid translated the codes to Trawak, the new codes were given to Starlight Squadron who got briefed by General Organa on a mission to bring the code to the other divisions. The rendezvous points were placed with the pilot's astromech droids and the fate of the Rebel Alliance was in the pilots' hands.[5]
The squadron soon arrived near the planet Felucia, where the remains of the Sixth Division were. The rebel pilots investigated the wreckages, looking for survivors but were unable to find any but as Commander Wedge Antilles was picking up signals the starships were attacked by Imperial Viper probe droids who latched onto the pilot's astromechs. The probe droids then began to drill into the droids in order to reach the codes.[5]
The Fourth Division then lost contact with Starlight Squadron, with General Organa realizing it was a tarp. Back near Felucia, the astromechs were able to hold off against the probe droids temporarily as the pilots came up with a solution. Antilles proposed shooting the probe droids off but that idea was put off for another. Dameron's wife and Starlight Leader Lieutenant Shara Bey ordered the pilots to set their droids to self-destruct and eject their astromechs into space. Even though the droids held the coordinates to return to their friends. Bey believed it was a better option than allowing for the Empire to get a hold on the droids' data and know where the surviving divisions were and planned to have the A-wings share their nav data with the X-wings so they could get out of Felucia as a team. The pilots successfully destroyed but were then ambushed by the Imperial-class Star Destroyer, Tarkin's Will who had finally tracked the rebels down.[5]

L'ulo L'ampar battles AT-STs aboard the Tarkin's Will
The Tarkin's Will released its TIE fighters who began to dogfight Starlight Squadron. During the fighting rebel pilot, Captain L'ulo L'ampar realized the TIE fighters were not attempted to kill them but instead blocking off the squadron's escape because Zahra wanted to learn what they were up to. Just then, the ships started to get pulled into the Star Destroyer by tractor beams. As the starfighters were being beamed up, Antilles developed a plan of escape and ordered the ships to use full throttle. They broke through the tractor beams and attacked the ship and destroyed the tractor beams while the shields were down. Starlight Squadron then bombarded the hangar bays to prevent the TIE Fighters from taking off.[9]
Antilles, Bey, and Freyta Smyth then left their starships and located Imperial astromech droids that would allow them to run the nav calculations they need to get home since the a-wings' computers got fried in taking out the tractor beams. The rebels then took a astromech droid as Bey provided cover for the escape but her A-wing was destroyed during the fight, forcing her to stay behind as the rest of the squadron left. Starlight Squadron was able to get into contact with the Fourth Division and report on the failure of the mission before regrouping and reporting their thief of the astromech that had loads of nav data and Leia planned to use it for Operation Starlight and to hunt down Commander Zahra by tracing her command ship before she caused any more damage to the Rebel Fleet.[9]
Battle of Ab Dalis[]
- "General Organa can talk about hope all she wants, but it feels like the Empire's two victories away from ending us for good. The Rebellion needs a win. A real one."
- ―L'ulo Lampar

The Eleventh Division was under siege by the Empire
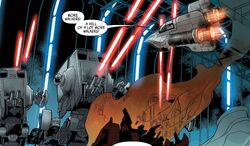
Padawan Skywalker took the place of Bey until the Rebellion found a way to rescue her. The rebels were in need of a victory after many loses and Skywalker agreed to help Starlight Squadron before he departed to Jekara to save his friend and Organa's lover Captain Han Solo. The squadron came out of hyperspace over the planet Ab Dalis and received a distress signal from the planet from the Eleventh Division of the Rebel Fleet at Rendezvous Point Lambda-Four, which was under siege from the Empire and requesting reinforcements immediately. Starlight Squadron made their way to the surface where the Ground Defense Command was taking heavy fire. The foot soldiers of the Alliance Army proved to have little resistance against the All Terrain Armored Transport walkers that fired on the rebel's deflector shield.[6]
The Imperial Star Destroyer Ultima II rained fire on the rebels from above. Commanded by Admiral Kalaxo, he refused to message Zahra about the incoming craft and would only contact her after the Imperial victory. As Starlight Squadron approached the Ultima II, the Star Destroyer's TIE fighters were released to fight the rebels off.[6]
Back at the rebel outpost, a rebel private approached her colonel with an idea to win the day. The colonel was reluctant at first but then the Ultima II destroyed the forward command post causing everyone to duck for hiding. The colonel allowed the private to transmit the coordinates of the plan to Skywalker. At first Starlight Squadron requested more information from the ground forces on the data because the coordinates were directly underneath the Star Destroyer which would mean a certain death for the pilots. The ground forces were sending no response but Skywalker decided to take the situation into his own hands and charged towards the coordinates.[6]

An underground volcano erupts, destroying the Ultima II
As the squadron protected him the incoming TIE fighters, Skywalker recalled the similar situation with his destruction of the First Death Star but he lost his focus and shot his torpedoes from his X-wing starfighter onto the surface of Ab Dalis where he missed the shot. Antilles and the rest of Starlight Squadron then followed and successfully fired on the target. As the starfighters pulled away, a large volcanic eruption occurred that pierced through the surface of the planet and destroyed the Ultima II and her crew.[6]
The Eleventh Division took out the rest of the Imperial forces and Starlight Squadron delivered the Trawak code to them. The inclusion of the new division to the rest of the Rebel Alliance increased the size of it's fleet by fifty percent. Starlight Squadron then received a thank you from Rebel leader Mon Mothma who was saved alongside Mon Calamari Admiral Gial Ackbar.[6]
Defeat of the Tarkin's Will[]
- Imperial officer: "I've got activity on the scanners! Ships dropping in from hyperspace—all classes, all the way up to Mon Calamari cruisers!"
- Zahra: "Ambush."
- Gorr: "This many ships, commander…why…it has to be…the entire rebel fleet."
- Zahra: "Every last Rebel Alliance ship in their pathetic fleet…here, now, to destroy this ship and kill us all. They think they've won. Couldn't have planned it better myself."
- ―An Imperial officer, Ellian Zahra, and Gorr[7]
When Crimson Dawn engineered the Syndicate War to spread chaos across the underworld[15] and distract from its efforts against the Empire,[16] it took up a great deal of Emperor Palpatine's attention so the Rebel Alliance took advantage of his distraction as a chance to have more time to regroup its fleet.[17]

The Tarkin's Will is attacked during the Battle of Panisia, where the entire rebel fleet gathered to defeat Zahra once and for all.
The Second Division was stationed at the Temporary rebel cell base on the planet Panisia. The base was used to hide the youngling Cadeliah. Hired by Lady Qi'ra of Crimson Dawn to locate the child, the assassin Deathstick contacted the Imperial Anti-Terrorism Watchline with the location of the base.[18] Qi'ra stopped at the Rebel Fleet and delivered the coordinates of the Second Division to the rebels, but Damerson and the Pathfinders along with Starlight Squadron were already enroute to the Tarkin's Will, with a plan to take down the ship and save Dameron's wife. The Pathfinders were on the Star Destroyer when it launched into hyperspace after receiving the location of the Second Division.[7]
Sometime after, Imperial forces, led by the Tarkin's Will arrived above the base and launched TIE fighters and bombers, beginning an assault on the rebels.[18] Commander Zahra ordered her troops to leave no prisoners, but just then the rebel fleet in its entirety arrived out of hyperspace in an ambush of the Imperials. After delivering an inspiring speech to her crew, Zahra had the Tarkin's Will positioned into a direct nose dive towards the rebel base on Panisia.[19]

The Tarkin's Will and other rebel ships descend to Panisia's surface
The rebels followed the Imperials into the planet's gravity wells, where the Tarkin's Will fired its ion cannons on the rebel ships, disabling them and causing the ships to fall to the surface below. The Second Division was not yet fully evacuated, leaving the rebels with the tough choice of either fire on their own disabled ships currently rushing towards the rebel base, or evacuate the crews of the disabled ships and risk them hitting the base. The rebels then decided to sacrifice the disabled ships in order to get the Second Division off the ground. Right before the Tarkin's Will would crash into the base, Zahra ordered the ship to change position and use full engines, destroying many of the rebel ships still at the base.[19]
As the Tarkin's Will returned to the surface, Zahra ordered the ship to concentrate its fire on the rebel flagship Home One. Onboard the Star Destroyer, the Pathfinders destroyed the primary reactor causing the ship's systems to go down. As the rebel firepower increased, Zahra ordered an evacuation of the Tarkin's Will. The ship descended towards the planet and blew up when it hit the surface but Commander Zahra still survived.[19] Later on, Organa and Zahra fought on the planet, resulting in the defeat of Zahra.[20]
Aftermath[]
- "Sullust is an opportunity for us—we have contacts with its underground. Our armada will gather there. The commando team will go first, to bring down the battle station's shields. Then the fleet will travel down the Sanctuary Pipeline to Endor."
- ―Admiral Gial Ackbar, explaining the plan to destroy the Second Death Star on Zastiga
Despite the effort to regroup the fleet,[21] Mothma and the other rebel leaders decided the armada needed to remain broken apart in small task forces, which could remain on the move from star system to star system, thereby preventing the entire fleet from being destroyed in one battle. Such movement kept the Rebel Alliance alive and stopped the Empire from achieving another major victory for its propagandists, as had happened with the Battle of Hoth.[2] Eventually the Rebel Alliance regrouped the Rebel Fleet at the planet Sullust, which the fleet used as a staging area for the Battle of Endor.[22] To allow the fleet the chance to regroup there, Organa launched Operation Yellow Moon to distract the Empire.[2]
Appearances[]
- Star Wars (2020) 2 (First mentioned)
- Star Wars (2020) 3 (Mentioned only)
- Star Wars (2020) 6 (Indirect mention only)
- Star Wars (2020) 8 (Indirect mention only)
- Star Wars (2020) 9 (First appearance)
- Star Wars (2020) 10
- Star Wars (2020) 11
- Star Wars (2020) 12 (Indirect mention only)
- Star Wars (2020) 13 (Mentioned only)
- Star Wars (2020) 14 (Indirect mention only)
- Star Wars (2020) 15
- Star Wars (2020) 19 (Indirectly mentioned only; in the opening crawl)
- Star Wars (2020) 21 (Appears in hologram)
- Crimson Reign 2
- Star Wars (2020) 22
- Star Wars (2020) 23
- Star Wars (2020) 24
- Star Wars (2020) 26 (Indirect mention only)
- Bounty Hunters 30 (In flashback(s))
Sources[]
- Skywalker: A Family at War
"Accessories and Structures" — Star Wars Encyclopedia
- Star Wars: Timelines
Notes and references[]
- ↑ 1.0 1.1 Star Wars (2020) 7
- ↑ 2.0 2.1 2.2 2.3 2.4 Moving Target: A Princess Leia Adventure
- ↑ 3.00 3.01 3.02 3.03 3.04 3.05 3.06 3.07 3.08 3.09 3.10 3.11 3.12 Star Wars (2020) 9
- ↑ 4.0 4.1 Star Wars: Timelines
- ↑ 5.00 5.01 5.02 5.03 5.04 5.05 5.06 5.07 5.08 5.09 5.10 5.11 Star Wars (2020) 10
- ↑ 6.00 6.01 6.02 6.03 6.04 6.05 6.06 6.07 6.08 6.09 6.10 6.11 6.12 6.13 6.14 6.15 Star Wars (2020) 15
- ↑ 7.0 7.1 7.2 Star Wars (2020) 22
- ↑ 8.0 8.1 8.2 8.3 8.4 8.5 8.6 8.7 Star Wars (2020) 2
- ↑ 9.00 9.01 9.02 9.03 9.04 9.05 9.06 9.07 9.08 9.09 9.10 Star Wars (2020) 11
- ↑ Star Wars (2020) 12
- ↑ Star Wars (2020) 8
- ↑ Star Wars (2020) 1
- ↑ Star Wars (2020) 3
- ↑ 14.0 14.1 Star Wars (2020) 6
- ↑ Crimson Reign 1
- ↑ Crimson Reign 5
- ↑ Hidden Empire 5
- ↑ 18.0 18.1 Crimson Reign 2
- ↑ 19.0 19.1 19.2 Star Wars (2020) 23
- ↑ Star Wars (2020) 24
- ↑ Star Wars (2020) 26
- ↑ Star Wars: Episode VI Return of the Jedi


