- "I will start my operations here, and pull the rebels apart piece by piece. They will be the architects of their own destruction."
- ―Grand Admiral Thrawn
The Lothal campaign was a campaign launched by Grand Admiral Thrawn after Governor Arihnda Pryce requested the Seventh Fleet during the early rebellion against the Galactic Empire. At the start of the campaign, Grand Admiral Thrawn made a number of changes to his flagship, the Chimaera, including renovations to his staterooms, moving his art collection to his private cabin, and constructing a gallery and study. The campaign included several crucial battles, including the Battle of Atollon where Chopper Base and Phoenix Cell were destroyed, and the Liberation of Lothal, where the Imperial planet was liberated.
Prelude[]
Lothal fell under control of the Galactic Empire in 18 BBY when they dispatched an Imperial Planetary Occupation Facility onto the capital. In the following years, there was resistance to the Imperial forces from people such as Ephraim and Mira Bridger. The Empire dealt with these threats however and the Bridgers were arrested leaving their son Ezra Bridger parentless.[20] In 5 BBY, Ezra was a pickpocket and discovered the Spectres following an attack on patrols in the city. Ezra became inspired by the Spectres and joined them in their fight against the Empire. One of the Spectres, a former Jedi Padawan called Kanan Jarrus, discovered that Ezra was Force-sensitive and began training him in the ways of the force.[21]

Jarrus fighting the Grand Inquisitor
The Spectres performed daring acts against the Empire on Lothal, including infiltrating the Imperial Cadet program on Lothal and stealing a TIE Fighter during a mission to collect fruit. Kanan and Ezra's force powers attracted the attention of the Grand Inquisitor who attempted to kill them many times. The Grand Inquisitor even captured Kanan with the help of Grand Moff Wilhuff Tarkin. Ezra and the others infiltrated Tarkin's Imperial-class Star Destroyer to save Kanan, killing the Grand Inquisitor in the fight. The Spectres were then rescued[22] by Phoenix Cell, led by Commander Jun Sato and another former Jedi Ahsoka Tano.[23] The Spectres went on many missions for Phoenix Squadron including the mission on Lothal where they stole three Sphyrna-class Hammerhead corvettes.[24] The Lothal resistance group began under the former Governor Ryder Azadi. Kanan, Ezra and Ahsoka attracted the attention of of Sith Lord Darth Vader and two more inquisitors, Fifth Brother and Seventh Sister. The two inquisitors were killed hunting the trio at Malachor by Darth Maul who killed their subordinate Eighth Brother soon after. Ahsoka was lost in that fight at the hands of Lord Vader.[25]
The Campaign[]
Enter Thrawn[]
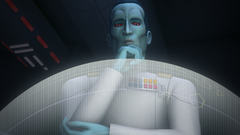
Grand Admiral Thrawn taking command.
Lothal's Governor Arihnda Pryce returned to Lothal with Grand Admiral Thrawn following his decisive victory over the rebels on Batonn. Thrawn and his Seventh Fleet had been requested by Governor Pryce to destroy the rebels on Lothal with the blessing of Grand Moff Wilhuff Tarkin. Thrawn's plan was to eliminate the rebels piece by piece and make them destroy themselves in the process. Thrawn then sent Admiral Konstantine, Governor Pryce and ISB agent Kallus to to Reklam Station. There, they attempted to stop the Spectres from stealing a squadron of Y-wing bombers. As Phoenix Squadron arrived to retrieve the bombers, Thrawn knew this was not the entire rebel fleet. He decided to let them go with their meager prize and await for the full rebel fleet.[2]
Thrawn encountered one of the Spectres, Hera Syndulla, on Ryloth at her home in the Tann Province. She and the Spectres aided her father, Cham Syndulla and the Free Ryloth Movement. During the mission, Thrawn captured Hera, confiscated her family's Kalikori, and sought to analyze Hera in order understand her. Hera was rescued by the rest of the Spectres during a exchange and Thrawn deliberately allowed them to escape, claiming they earned it for their small victory.[10]
Testing the Rebels[]

Iron Squadron fought against the 7th Fleet.
The Spectres and Phoenix Squadron helped the people of Mykapo during the Imperial occupation there. Thrawn decided to send Admiral Kassius Konstantine as a test for the rebels and challenged him into taking only an Arquitens-class command cruiser. Konstantine arrived in Mykapo to face the local rebel group known as Iron Squadron. Konstantine disabled their freighter and set a trap on it. A portion of Phoenix Squadron arrived to rescue Iron Squadron and disabled the cruiser. Thrawn stepped in on his Star Destroyer, the Chimaera, before he could lose Konstantine.[11] Thrawn eventually came to design and began constructing the TIE/d "Defender" Multi-Role Starfighter on Lothal. The rebels got curious and infiltrated the factory where Thrawn was cracking down on sabotage in Imperial vehicles there and they discovered that Agent Alexsandr Kallus was a spy for them. Thrawn did not catch either of them and they escaped with the plans for the TIE Defender. Thrawn suspected there was spy in their ranks.[12]
Thrawn began committing resources to finding the location of Phoenix Cell's base. He sent out reconnaissance droids to many planets to search for it. However, one of them came back rigged with explosives and crippled one of Thrawns star destroyers. Thrawn took this as progress as he knew one of those planets he sent the droids to housed the rebel base.[13] Thrawn soon became aware of a spy amidst his inner circle not realizing it was Kallus. He brought an old friend, Colonel Wullf Yularen, to question each high ranking officer. Ezra, posing as a bounty hunter, allowed himself be captured to extract Kallus and they would sabotage Thrawn's search for the rebels base. Kallus put evidence on Lieutenant Yogar Lyste, who Bridger impersonated, being the spy using his Code cylinders for access to rooms. He also told Lyste that Governor Pryce was the spy and the man became paranoid and attempted to capture Pryce as she intercepted Ezra in his escape. Thrawn then arrested Lyste but when discussing the situation with Yularen in private, he deduced that Kallus was the spy all along.[14]

Captain Orrelios dealing with one of Thrawn's infiltrator droids.
The Spectres played a big part in starting the Alliance to Restore the Republic, as they rescued the fugitive Senator Mon Mothma. After escaping the Empire at the Archeon Nebula, Mon Mothma declared the Alliance as an official faction and many rebel cells rallied at Dantooine.[1] A short while later, a team of Imperial slicers under LT-319 almost discovered the location of the rebel base when they got control of the Spectres droid Chopper. Their attempt was thwarted when the rebels sent a power surge to the slicers destroying them and their vessel.[15]
Soon after Phoenix Squadron began preparing an attack on the TIE Defender factories on Lothal. They received support from General Jan Dodonna's Massassi Group to their base at Atollon and continued to be in contact with former Governor Ryder Azadi's Lothal resistance group. Thrawn however, predicted this attack and allowed Kallus to know about the upcoming attack. Kallus attempted to warn the rebels, but Thrawn revealed that he knew that Kallus was Fulcrum. Thrawn and his guards subdued him. Thrawn then traced Kallus's transmission and the Massassi Group's trajectory back to Atollon.[8]
Battle of Atollon[]
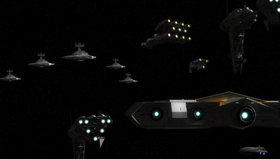
Phoenix Squadron and Massassi Group fought Thrawn's 7th Fleet during the Battle of Atollon.
Thrawn took the Seventh Fleet to Atollon where he met the large flotilla of CR90 corvettes, Nebulon-B frigates, Dornean Gunships and many other ships owned by Phoenix Squadron and Massassi Group. He cut them off from the Lothal resistance and began destroying their ships with his TIE Bombers. Thrawn prevented the Rebel forces from withdrawing from Atollon with two Interdictor-class Star Destroyers. Commander Sato then began attacking the Star Destroyers using a tactic against. However, Thrawn recognized the tactic and compromised his plan in order to thwart their attempts. When they got desperate, the rebels tried charging the blockade but Thrawn continued tearing them apart. As a last resort, Syndulla told Bridger to take the Gauntlet and contact Mothma for reinforcements. To help Bridger escape, Sato had his crew abandon the Phoenix Nest and rammed his command ship into Admiral Konstantine's Interdictor vessel. It allowed Bridger to use this window of opportunity to escape Atollon to get help. Unfortunately, Senator Mothma refused to commit anymore forces to Atollon, knowing this was what Thrawn wanted. Despite this, Bridger then decided to seek aid from Clan Wren.[8]
Thrawn began the ground assault on the rebels' base and quickly threw their forces into chaos. He surrounded Hera, Kanan and the other main rebels there and ordered their surrender. But something happened that Thrawn could not predict: the Bendu, a force sensitive being, attacked both factions and the rebels flew out on their ships before Thrawn used his All Terrain Armored Transports to shoot down the Bendu. Ezra returned with reinforcements and destroyed the last Interdictor vessel, allowing all remaining rebels to escape to Yavin IV. When Thrawn faced the injured Bendu, the being told Thrawn of his defeat and Thrawn shot at it before it disappeared.[8]
Campaign continues[]
- "My war with the rebels is not yet over. I will defeat them."
- ―Thrawn, to Darth Vader
Despite the heavy losses, the Massassi Group and what remained of the Phoenix Squadron were able to regroup at Yavin 4's Great Temple. However, the Alliance High Command were unable to resume their plans to take out Lothal's factories due to the losses inflicted by Thrawn and the Seventh fleet. Open warfare against the Empire was not possible due to their limited resources and thousands of other planets suffering similar oppression.[27]
Thrawn's TIE/D Defender project[]

The Spectres stole a TIE/D Defender Elite
Following the rebel mission at Faos Station,[27] Mothma received a message from Azadi about the Empire testing a new type of TIE/d "Defender" Multi-Role Starfighter on Lothal. Thus, Mothma allowed Syndulla and her fellow Spectres to return to Lothal to acquire information on this TIE/D Defender. The Spectres were able to return to Lothal by being smuggled through the blockade by Cikatro Vizago aboard the Broken Horn in exchange for several Puffer pigs. Despite Vizago being captured after landing at Jhothal, the Spectres searched for Azadi and his resistance members. The Spectres were then able to make contact with Jai Kell at Old Jho's Pit Stop. Several stormtroopers and tanks under DT-L21 attempted to capture the Spectres, but lost them in the sewers. The Spectres were able to meet up with Azadi and escape in his U-wing.[28]
The Spectres and Azadi went to the Imperial airfield to watch the test flight of the new TIE Defender. Syndulla and Kanan learned that the factory had received new fuel tanks in order to start full production of TIE Defenders. When Commander Skerris arrived with the new TIE Defender, Azadi and the Spectres took pictures of it. Sabine came up with a plan to steal the Defender's flight recorder. As Sabine and Ezra sneak onto the airfield, Thrawn, his guards, and Governor Pryce arrived to witness the test flight. Despite this, Sabine was able to get into the Defender. Ezra, however, was then spotted by a pilot, Thrawn and several stormtroopers. As Thrawn's guards moved in to secure the Defender, Sabine decided to steal the Defender.[16]
After Sabine picked up Ezra, the two of them used the Defender to destroy the airfield TIE fighters and interceptors. Thrawn then attempted to shoot the Defender down, to no avail. However, the Defender's hyperdrive is offline and Thrawn decides to let the Spectres test the Defender. Thrawn and Skerris then sent three interceptors to recapture it. However, Ezra was able to destroy the three of them and Sabine was able to turn off the homing beacon in record time. Thrawn, impress with the Defender Elite's test flight, had Governor Pryce active the Defender's kill switch. Ezra and Sabine were then able to land with only one wing.[16]
Sabine and Ezra then abandoned the Defender, took it's flight recorder and hyper-drive. They were unable to carry the hyperdrive, so they hid it. As Imperial gunships arrived, Ezra and Sabine then took the flight recorder and hid from the Empire. They were then approached by a mysterious white Loth-wolf, who was able to knock Sabine out and carried them back to Azadi's camp.[16]
As Governor Pryce and her troops searched for the rebels and the hyperdrive, Thrawn then dispatched his assassin, Rukh to assist them. The Spectres and Kell were able to find the hyperdrive, but Ezra and Kell were discovered by Rukh despite their disguises as scout troopers. The two of them then made their escape and Zeb was able to get the hyperdrive back to Azadi's camp by stealing Pryce's ITT. At the camp, Sabine was able to install the hyperdrive into the U-wing. Syndulla and Chopper took the U-wing and made their escape through the 7th fleet's blockade and give Rebel command the flight recorder at Yavin. The remaining Spectres and Azadi's resistance were then surrounded and bombed by Pryce's forces. The rebels were able to make their escape through the tunnels by following the White Loth-wolf and its pack to a mountain in the southern hemisphere.[29]
Syndulla's attack[]
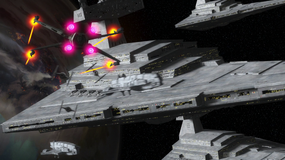
The Rebel Alliance launched an unsuccessful assault on Lothal.
Hera was able to return to the Great Temple and give Mothma[29] and Rebel Command the Defender's flight recorder. However, General Dodonna could not find a weakness in the Defender's design and that it was far superior to their starfighters. Hera urged Rebel Command to launch a attack on Lothal's Imperial factories before it could go into full production on the TIE Defenders. As Rebel Command debated on the attack, Mothma told Syndulla that the Empire had activated Protocol 13 on Lothal. Upon hearing this, Syndulla told Organa and the others that they must attack now since her team was still there waiting for them to assist in their attack. Mothma agreed to it and granted permission for the attack.[18]
During this time, the Spectres were able take control of the Mining Guild's Ore Crawler 413-24. Using it's transmitter, the Spectres were able to make contact with Syndulla and prepare for the attack. Thus, in 1 BBY,[4] Hera Syndulla was promoted to the rank of general and led twenty-four starfighters of Phoenix Squadron in attacking the blockade and the TIE/d "Defender" Multi-Role Starfighter factory. The Spectres and Azadi's forces were to take out the turrets protecting the factory. At first, Syndulla and several of her fighters and bombers were able get past the blockade, but Thrawn had a second wave of fighters which destroyed Syndulla's remaining forces. Only Syndulla, Mart Mattin, and a few others survived and crashed in the Capital City. As Syndulla, Chopper and Mattin were making their escape, Rukh pursued them. Syndulla was captured by Pryce and Mattin was able to meet up with Kanan.[17]
Kanan's rescue & sacrifice[]
- "Let's go get Hera."
- ―Kanan Jarrus, to Ezra Bridger and Sabine Wren
Pryce brutally tortured Syndulla for information. During this time, Thrawn was informed by Governor Tarkin that Director Orson Krennic was lobbying Emperor Palpatine for more funding towards his Project Stardust instead of Thrawn's TIE/D Defender project. In order to convince the Emperor, Tarkin said Thrawn would have to convince the Emperor to do so. Thus, Thrawn and the Chimaera traveled to Coruscant and left Pryce in charge of their forces. As Pryce continued to interrogate Syndulla for information on the Rebel fleet, she was rescued by Kanan Jarrus. Pryce and Rukh attempted to stop their escape, but they were able to rendezvous with Ezra and Sabine at the Capital's fuel depot. As Pryce attempted to capture them, she inadvertently fired on the resulting's in both it's destruction, Jarrus' death, and Syndulla's escape.[7] Despite the loss of Jarrus, his actions were able to stop the Empire from using the factory to make more TIE/D defenders. Pryce attempted to cover this up by having a parade to celebrate her victory over the rebels. However, Thrawn was able to deduce that Pryce had deprived his project of fuel by destroying the fuel depot, despite eliminating Jarrus.[30]
Excavation & destruction of Lothal's Jedi Temple[]
- ""There has been a great disturbance in the Force. The death of Kanan Jarrus has altered the fate of Lothal, though how I cannot say."
"Perhaps access to the Temple will provide some clarity, my Lord."
"We must seize the power within, a conduit between the living and the dead. Proceed, Minister Hydan." - ―Minister Veris Hydan speaking with Emperor Palpatine on the discoveries at Lothal's Jedi Temple

Minister Hydan reported to Emperor Palpatine on Lothal.
Following Lord Vader's and his inquisitors' discovery of a Jedi Temple on Lothal,[31] the Mining Guild and Imperial forces under Minister Veris Hydan excavated the temple to discover its secrets.[6] The Loth-wolves discovered this and informed Bridger and the Spectres of this by giving them a piece.[30] The loth-wolves then took the Spectres to the Temple. There, Ezra and Sabine disguised themselves as scout troopers and infiltrated the excavation. There, they found the Empire had removed one of the temple doors and saw that it had sealed itself. They saw a painting of the Mortis Gods and learned that the Emperor himself wanted to unlock the power within the temple.[6]
Ezra was able to use the force to activate a portal that allowed him to enter the World Between Worlds. There, Bridger heard familiar and different voices.[6] He then saw Ahsoka on Malachor fighting Lord Vader.[25] At the last moment of their duel, Bridger was then able to pull Ahsoka away from Vader at the last moment. Ezra then saw Kanan's last moment and tried to save him. Ahsoka, however, convince Ezra to let him go because he would not be able to save them.[32]
Back at the excavation site, Hydan had Sabine captured and interrogated her about how Bridger opened the portal. Hydan also informed the Emperor of this. As Hydan and Sabine studied the artwork, the Emperor was able to use Sith alchemy to reach into the World Between Worlds and attempted to enter it. Ezra and Ahsoka then made their escape back to their portals as the Emperor attempted to capture them. During this time, Hera, Zeb and Chopper attacked the site and freed Sabine from Hydan and his death troopers. After Ahsoka returned to Malachor, Ezra then returned to the site. Once there, Sabine had him close the portal by concentrating on the Son's image. As the portal closed, the temple sank into the ground and Hydan and his forces fell into a chasm. The Spectres found no trace of the temple nor the portal in the aftermath of the narrow escape.[32]
Liberating Lothal[]
- "You cannot see. But I can."
"What? What do you see?"
"I see your defeat. Like many arms surrounding you in a cold embrace." - ―Bendu telling Thrawn of his prophesied defeat
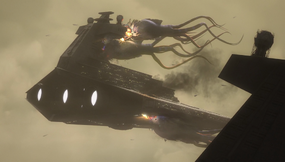
Several ships of Thrawn's 7th Fleet were destroyed by purrgil during the Liberation of Lothal.
Syndulla and Chopper then left Lothal and picked up Captain Rex and Kallus. The three of them then went Joopa Base on Seelos. There, they met up with Commanders Wolffe, Gregor, Captain Hondo Ohnaka, Melch, and bounty hunter Ketsu Onyo. There, Hera informed the group that Rebel command was not aware of this mission and that they were on their own in helping Bridger liberate Lothal.[33]
During this time, Ryder contacted Pryce and offered to surrender himself, the rebels, and the Spectres in order to avoid prison. Pryce agreed and went with Rukh and her forces to the resistance's hideout. Pryce's and Rukh's forces were able to subdue the Rebels at first until General Syndulla and her forces arrived to help them. As Rukh attempted to capture Bridger, the White Loth-wolf and it's packs attacked Rukh. The Rebels, Spectres and the wolves were able to finish off the remaining stormtroopers and capture Pryce and Rukh.[33]
Together, the Spectres, there allies and Azadi's rebels came up with a plan to infiltrate the Imperial Complex. Using Pryce's codes, the rebels were land at the dome and fight their way to the command center. Once there, they had Pryce initiate Protocol 13 in order to recall the Lothal garrison for evacuation. As the rebels prepared to launch the dome, Rukh was able to free himself and warn Thrawn about the Rebels' actions. Thrawn returned and had the Chimaera position above the capital to prevent the Dome's launch.[5]
Thrawn demanded that Bridger surrender himself or he would bombard the capital. Thrawn proved his point after Rukh's forces disable the shield generator. Bridger agreed and took a gunship to the Chimaera. There, Thrawn took Bridger to meet with the Emperor via hologram. There, the Emperor told Bridger that he could the portion of the Lothal's Jedi Temple to save his parents. Despite this offer, Bridger refused and destroyed the remaining pieces of the temple. General Syndulla and the rebels were able to retake control of the shield generator and save the capital from Thrawn's bombardment. The Ghost, flown by Mart Mattin, sent out a signal to the purrgil and they came to Lothal. There, the purrgil destroyed the blockade and cleared Lothal's skies of Imperial ships. The purrgil then attached themselves to the Chimaera and took Bridger, Thrawn, and the crew into hyperspace[5] to Peridea.[9] After the Chimaera and the purrgil left, the Rebels launched the dome and abandoned Pryce and the garrison to their fate. Sabine Wren then activated the self-destruct sequence and the dome was destroyed. The remaining imperial stormtroopers and officer were captured and the people celebrated.[5]
Aftermath[]
- "The attack we all anticipated never came. The once invincible Empire had begun to fracture. The small Rebellion had become bold. And with the decisive victory at the Battle of Endor, the Emperor's reign of terror came to an end."
- ―Sabine Wren
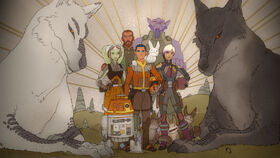
Mural commemorating the Spectres.
The Empire did not launch a counter attack on Lothal. It had begun to fracture and came to end following the Battle of Endor. Sabine Wren created a mural to honor the Spectres for liberating Lothal. Sabine met up with Ahsoka Tano to search for Bridger and bring him home.[5]
Despite his defeat at Lothal, whispers spread that[34] Thrawn was able to return following the Galactic Civil War. Magistrate Morgan Elsbeth[35] and the Shadow Council knew of his coming return[36] nine years after his disappearance.[37] Elsbeth and her forces were able to use the Eye of Sion to find Thrawn and the Chimaera on Peridea.[38]
Appearances[]
- Star Wars Rebels: Steps Into Shadow (First appearance)
 Star Wars Rebels — "Hera's Heroes"
 Star Wars Rebels — "Iron Squadron"
 Star Wars Rebels — "An Inside Man"
 Star Wars Rebels — "Warhead"
 Star Wars Rebels — "Through Imperial Eyes"
 Star Wars Rebels — "Secret Cargo"
 Star Wars Rebels — "Double Agent Droid"
 Star Wars Rebels — "Zero Hour"
- Thrawn: Alliances (Indirect mention only)
- Thrawn: Alliances audiobook (Indirect mention only)
 Star Wars Rebels — "Flight of the Defender"
 Star Wars Rebels — "Rebel Assault"
- Thrawn: Treason (Mentioned only)
- Thrawn: Treason audiobook (Mentioned only)
 Star Wars Rebels — "Family Reunion – and Farewell"
Sources[]
- Dawn of Rebellion (First identified as Lothal campaign)
 Disney Gallery: The Mandalorian — "Connections"
"Imperial Troops" — Star Wars Encyclopedia
Notes and references[]

