- "Now they understand. I feel their terror. Most satisfactory."
"The next target, my Lord?"
"Hope. Hope dies." - ―Darth Vader and Admiral Kendal Ozzel
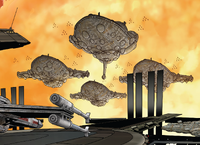
The Assault on the Mako-Ta Space Docks, also known as the Battle of Mako-Ta, was a major battle during the Galactic Civil War between the Alliance to Restore the Republic and the Galactic Empire when the Empire launched an attack on the Alliance's Mako-Ta Space Docks after the Imperial spy Queen Trios revealed to Darth Vader the location of the rebels. Death Squadron launched its attack on the rebel base, and while the newly formed Rogue Squadron was eventually deployed, Vader and his forces destroyed the majority of the rebel fleet and killed numerous rebel leaders. The remaining rebel survivors were left scattered from their high losses.
Prelude[]
- "Friends, dignitaries, allies what you have seen today is strength. The fleet is our hidden blade…but all of you should know, it is there. When it is needed, we will be here for you."
- ―Chancellor Mon Mothma

The Alliance had obtained a number of Mon Calamari cruisers following the mutiny on Mon Cala.
In conference with Kendal Ozzel and Maximilian Veers on Mustafar, Darth Vader determined that the Rebel Alliance's scattered nature made it difficult for the Empire to get a hold on them. With this in mind, Vader developed a risky plan: Allow the Rebel Alliance to grow in strength, then crush them when their power was concentrated in one place.[12]
To this end, he contacted Queen Trios of Shu-Torun, instructing her to take over mining operations in the ruins of Jedha, and from there defecting to the Alliance and sabotage them from within.[12]
After the mutiny on Mon Cala, the Rebel Alliance found itself with several Mon Cala cruisers that could easily be refitted into full-fledged warships. The ships were brought to the Mako-Ta Space Docks to be refitted, where Trios provided many Shu-Torun engineers to help with the work, providing many critical components and systems.[3]
As work on the ships concluded, Mon Mothma called many dignitaries who supported the Alliance to the station to celebrate their victory and show their fleet to their allies. During this party, Leia Organa spoke with Trios, thanking her for providing the materials and technology to outfit the fleet. Alliance starfighters, which included Luke Skywalker among its pilots, did a flyby before landing in the hangar of General Jan Dodonna's Republic. The mood among the Rebels was high and some believed the Empire did not stand a chance against the Rebellion now.[3]
At the same time of the party, Han Solo, Chewbacca, and C-3PO traveled to the Ring of Kafrene. There Solo negotiated a deal for a set of transponder codes. They had a run-in with two of Jabba the Hutt's bounty hunters, and as they escaped Solo promised them he would pay Jabba the money he owed him.[3]
As the rebel sub-groups reported to Organa, and General Vanden Willard, of Delta Group, told Organa to wish Mothma good luck in her speech. Mothma gave her speech and promised that the fleet would help their allies whenever they needed it, but when the ships were about to jump to hyperspace they could not. Leia asked where Trios was but she had already left for her ship. The party was then interrupted by the arrival of Death Squadron, which had been secretly contacted by Trios shortly before.[3]
The battle[]

The Executor and its escort fire on Yavin's Hope.
After the Empire's arrival at the docks, Darth Vader told his ships to wait for the rebels to take in their situation. The cruisers attempted to scramble their fighters and realized that their cargo bay doors would not work, neither would their turbolasers or their propulsion engines. Now satisfied, Vader ordered the closest cruiser to be destroyed, the closest being Yavin's Hope. Willard had his crew to divert all power to the shields, but they didn't hold and they were incinerated as his ship blew into a fireball. Admiral Ozzel asked Vader what their next target was and he told him hope, before saying that hope was to die.[3]
Hope dies[]
As the Star Destroyers began engaging the rest of the cruisers, Queen Trios made it to her ship and they attempted to flee the spacedocks. However, the rebel command refused its departure and Organa sent on a boarding party, led by her and General Bandwin Cor, to capture Trios and find a way to regain control of the cruiser's systems. Trios ordered a defensive line and her soldiers engaged the rebels. Organa was almost killed but Cor pulled her back, telling her she was too valuable to lose. They broke the defensive line and the remaining Shu-Torun soldiers fled the scene. Trios was notified of this and she made for an escape pod as the rebels entered the room. Organa chased Trios but she made it into an escape pod before she could catch her and launched it.[7]
Generals Cor and Davits Draven began looking into the database on Trios ship but could not find a way to regain control of all of the cruiser's systems. However, he discovered that while the hanger doors could not be opened manually, they would still open automatically when a ship with a rebel transponder flies towards the cargo bay doors, meaning there was still a chance to get the fighters out of the cruisers. Cor volunteered to take his shuttle there and try. He flew it towards the cruiser but was soon shot down by TIE fighters. Shortly after, another cruiser exploded after taking too much turbolaser fire from the Star Destroyers. Organa said that they had to keep trying if they wanted to survive.[7]
A spark of hope[]
Shortly after, the Millennium Falcon arrived after escaping the Ring of Kafrene. Han Solo was surprised to see Death Squadron there and raised Organa on the comms. She told him to fly at the hanger doors of the cruiser in order to have them open. Solo complied and they were soon engaged by TIE fighters. Vader was notified of the Falcon's arrival and he left the bridge to reach his TIE advanced. The Falcon managed to shoot down at least one of the TIE fighters and destroyed a couple of the turbolasers on one of the Star Destroyers. It then flew towards General Dodonna's flagship, the Republic, to get it's hanger doors open. However, Vader engaged the light freighter in his TIE Advanced before it could make it to the cruiser.[7]

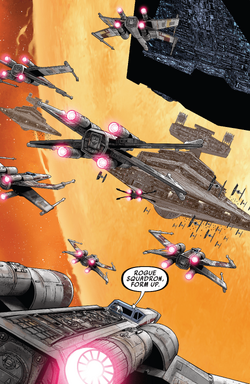
The newly founded Rogue Squadron forms up
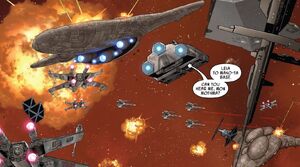
The Millennium Falcon tried to evade Vader's TIE Advanced but could not shake it off. At that same time, Commander Lajaie's cruiser was being crippled under fire. Lajaie ordered his men to abandon ship and they jettisoned on the escape pods. As they did that, Vader told Ozzel to get rid of the escape pods. As TIE fighters massacred the pods, Lajaie's cruiser exploded and Solo saw an opportunity from it. He flew into the fireball to lose Vader. Vader followed him in and tried to follow the Millennium Falcon. However, he failed to do so and Solo made some distance between the two ships. Solo then put a plan into action: he had Chewbacca put C-3PO into an escape pod and launched him into Dodonna's cruiser. Though broken in half by the impact, 3PO managed to stay on the ship and crawled his way into an airlock, where he made contact with Skywalker and R2D2 and told him about how the hanger doors could open automatically.[9]
Skywalker rushed to his X-wing starfighter and Dodonna ordered him to stand down. Skywalker, disobeying orders, flew at the doors which opened for him. The rest of the pilots followed in their X-wings and when Wedge Antilles asked what their callsign was, Skywalker thought of Jyn Erso and named them Rogue Squadron.[9] As the fighting began, Alliance command scrambled all Rebel Alliance Intelligence Service agents to find a solution and bring their ships back online. Luke, now going by the call-sign Rogue Leader, determined that more time was needed and opted for Line Of Sight communication. He activated his trail and flew towards Ackbar's ship, demonstrating that the hangar bay doors have a fail-safe system that opens them up. Upon seeing this, Ackbar ordered his crew to launch probes close to the hangar bay doors to see if they would open, and ordered all fighters to launch should that happen. Meanwhile, Han Solo was forced to land the Falcon, albeit upside-down, and man an X-Wing.[8]
Finding an answer[]
Alliance Intelligence managed to find an answer. They discovered that there were codes that would reboot all systems and bring the ships online, yet there was just one issue: the codes were in the computer data-banks aboard the Executor. With the intel, Leia, Draven and his commandos boarded the Executor using Queen Trios' ship. Leia impersonated the queen and successfully fooled the control tower into allowing them to land. The ruse worked too well, however, as when Vader was informed of the supposed arrival of Queen Trios, he broke off combat to return to the Executor and receive her. Leaving a rear guard to slow Vader down, Leia and her team began their mission. When Vader arrived, he realized he had been tricked and proceeded to cut down the rebels with ease.[8]
When the commando team reached the main computer, they quickly downloaded the codes. With Vader fast approaching, Leia and Draven bid each other an honorable farewell, with Draven remarking that this was his chance to atone for his mistakes regarding Jyn Erso. He stated that Jyn proved him wrong about her, something of which he felt guilty of being unable to tell her in person. He told Leia to board a TIE fighter and get the codes back, and he joined his doomed commandos to slow Vader down further, sacrificing himself and buying Leia time to get the codes back to the ships.[11]
Escape[]
Flying out into a space battle in a TIE fighter, Leia was nearly shot down by Skywalker and Solo. Unable to communicate with them as the systems were built into the pilot's helmet, she managed to convince them due to Luke's connection to the Force and shooting down a TIE of her own. Luke and Han escorted her to Dodonna's ship, the Republic, which was brought back online. The ship promptly jumped to hyperspace, but Skywalker and Organa changed Dodonna's mind about escaping, convincing him to bring the Republic back into the fight to draw fire from support ships relaying the counter-codes to the other ships of the fleet. As Skywalker's fighter was damaged while escorting Leia's TIE, Skywalker transferred Artoo to Solo's X-Wing while he and Organa took a ship to Mako-Ta to rescue Mothma and the Alliance dignitaries.[11]

Support ships arrive to bring the cruisers back online.
Making their return, the Republic performed a strafing run on the Executor whilst Han, Luke and Leia took the support ships to the surviving starships. Hera Syndulla's cruiser, the Geist, was one of the first cruisers to come back online. Starting with the Geist, the Alliance ships rejoined the fight one by one as they rebooted and came online, then immediately jumped to separate secure locations as soon as they were all capable. However the Republic's engines were hit, immobilizing her. Dodonna and his crew fought to the bitter end to cover the escape.
At the same time, the X-wing piloted by Solo and R2-D2 was damaged, preventing them from escaping. Organa and Skywalker commandeered a Quasar Fire-class cruiser-carrier to rescue them, but were also damaged by TIE fighters. They managed to Hyperspace out, but needed to set down on soon due to damage.[6]
Aftermath[]
- "It seems your "Master Stroke" falls short. The Rebels were not annihilated, my apprentice."
"They lost over half their cruisers, they have lost over 90 percent of their fighters. What is left cannot be described as a rebellion. They can no longer hurt us, we will annihilate them at our leisure. The loss of the Death Star made the galaxy think they could rebel. This has shown that the rebellion can never win."
"Hmph. It is...satisfactory." - ―Darth Sidious and Darth Vader on the assault
Landing on Corosi 7, Organa, Skywalker, and Solo managed to get into contact with Mothma, who informed them that the Rebel Fleet was under order to go into hiding, reorganize themselves, and carry on the fight separately. To get back to Ackbar's cruiser, and the Millennium Falcon still on board with Chewbacca, they would have to find their own way back. To honor their actions taken in the battle (and fill positions lost), Mothma also gave each of them promotions. Leia Organa was promoted to general, Skywalker to commander, and Solo was promoted to colonel, although he rejected the promotion. The trio made their way to Nar Shaddaa, where they were able to get assistance from Sana Starros.
The Alliance lost over half the cruisers they gained from the Mon Cala, as well as several experienced and talented commanders. The loss was also a severe blow to their morale, as the Empire showed they still held the upper hand in this conflict. Despite these losses, however, the Rebel Alliance still gained a substantial number of warships and material. Nonetheless, Emperor Palpatine deemed Vader's efforts satisfactory.[6]
Behind the scenes[]
The assault on the Mako-Ta Space Docks is the main event in Star Wars Book XI: Hope Dies, the eleventh story arc from the Marvel Comics' Star Wars comic book series. The story arc saw the death of several Rebel high-ranking officers who appeared in Rogue One: A Star Wars Story and Episode IV A New Hope but were absent in the next two movies of the Star Wars original trilogy. Lead writer Kieron Gillen conceived the attack as a way to kill off characters such as Lajaie or Jan Dodonna, as he thought about how the heroes rose through the ranks so quickly.[13]
Appearances[]
- Star Wars (2015) 50 (First appearance)
- Star Wars (2015) 51
- Star Wars (2015) 52
- Star Wars (2015) 53
- Star Wars (2015) 54
- Star Wars (2015) 55
- Star Wars (2015) 56 (Indirect mention only)
- Star Wars (2015) 57 (Mentioned only; in the opening crawl)
- Star Wars (2015) 58 (Mentioned only)
- Star Wars (2015) 59 (Indirect mention only)
- Star Wars (2015) 61 (Indirect mention only)
- Star Wars (2015) 62 (Mentioned only)
- Star Wars (2015) 63 (Indirect mention only)
- Star Wars (2015) 64 (Indirect mention only)
- Star Wars (2015) 65 (Mentioned only; in the opening crawl)
- Star Wars (2015) 67 (Indirectly mentioned only; in the opening crawl)
- "The Extra Five Percent" — From a Certain Point of View: Return of the Jedi (Mentioned only)
- "The Extra Five Percent" — From a Certain Point of View: Return of the Jedi audiobook (Mentioned only)
Sources[]
 Star Wars: Build Your Own X-Wing 20 (Starfighter Aces: Zev Senesca – Fighting for the Cause) (First identified as Battle of Mako-Ta)
- Ultimate Star Wars, New Edition (First identified as Assault on the Mako-Ta Space Docks)
 Star Wars: Build Your Own X-Wing 62 (Starfighter Aces: R2-D2 – Going Solo) (First identified as attack on the Mako-Ta Space Docks)
"The Battle of Hoth and the Second Death Star" — Star Wars Encyclopedia (Indirect mention only)
"The Heroes of Rogue One" — Star Wars Encyclopedia
 "Rebel Rousers: Our Top Ten Rebels" — Star Wars Insider 203 (Indirect mention only)
- Star Wars: Battles that Changed the Galaxy
"Pilots of the Rebel Alliance" — Star Wars Encyclopedia
"Accessories and Structures" — Star Wars Encyclopedia
- Star Wars: Timelines
- Star Wars: The Rise and Fall of the Galactic Empire
Notes and references[]
- ↑ Star Wars (2015) 49
- ↑ Star Wars (2015) 59
- ↑ 3.00 3.01 3.02 3.03 3.04 3.05 3.06 3.07 3.08 3.09 3.10 3.11 3.12 3.13 3.14 3.15 3.16 3.17 3.18 3.19 3.20 3.21 3.22 3.23 3.24 3.25 3.26 3.27 3.28 3.29 3.30 3.31 3.32 3.33 3.34 3.35 3.36 3.37 3.38 Star Wars (2015) 50
- ↑ Star Wars: Timelines
- ↑ Star Wars: Battles that Changed the Galaxy
- ↑ 6.00 6.01 6.02 6.03 6.04 6.05 6.06 6.07 6.08 6.09 6.10 6.11 Star Wars (2015) 55
- ↑ 7.00 7.01 7.02 7.03 7.04 7.05 7.06 7.07 7.08 7.09 7.10 7.11 7.12 7.13 7.14 7.15 7.16 7.17 7.18 7.19 7.20 7.21 7.22 Star Wars (2015) 51
- ↑ 8.00 8.01 8.02 8.03 8.04 8.05 8.06 8.07 8.08 8.09 8.10 8.11 8.12 8.13 8.14 8.15 8.16 Star Wars (2015) 53
- ↑ 9.0 9.1 9.2 9.3 9.4 9.5 9.6 9.7 9.8 9.9 Star Wars (2015) 52
- ↑ 10.0 10.1 10.2 10.3 10.4
"Starships of the First Order and the Resistance" — Star Wars Encyclopedia
- ↑ 11.0 11.1 11.2 Star Wars (2015) 54
- ↑ 12.0 12.1 "Shu-Torun Lives" — Star Wars (2015) 50
- ↑
Kieron Gillen (@kierongillen) on Twitter: "I did. I came from me thinking "how did our heroes climb the ranks so quickly?" and the answer being "a huge disaster which created a lot of places in CoC."" (screenshot)

