- "Lothal looks like it's dying."
"Your home isn't exactly the place you remember, kid. Better prepare yourself." - ―Ezra Bridger and Cikatro Vizago
The theft of the prototype TIE Defender Elite was carried out during the Galactic Civil War by the Spectres of the Alliance to Restore the Republic on Lothal around 1 BBY. Their goal was to obtain intelligence about the Galactic Empire's prototype TIE/d "Defender" Multi-Role Starfighter and, if possible, prepare to aid Ryder Azadi and the Lothal resistance group in liberating the Outer Rim planet from the Galactic Empire. The Alliance had previously planned an attack on Lothal, but they were forced to call it off when their forces were decimated by Grand Admiral Thrawn during the battle of Atollon. When Ryder sent Alliance High Command a message that the Empire had developed a new kind of TIE Defender, Mon Mothma, knowing the seriousness of the threat, authorized a mission.
They smuggled themselves onto the planet on Cikatro Vizago's starship the Broken Horn, and quickly met up with Lothal resistance member Jai Kell, who helped them escape the town of Jhothal. The next day, Ryder took Ezra Bridger, Sabine Wren and Garazeb Orrelios to stake out the remote airfield where the Defender Elite was supposed to have a test flight. After the prototype arrived, Sabine and Ezra decided to steal its flight data recorder, sneaking onto the base to do so as Ryder and Zeb kept watch. The theft was complicated by the arrival of Thrawn and Governor Arihnda Pryce, so Sabine decided to steal the entire prototype. She and Ezra were pursued by TIE Interceptors, and after Ezra shot them all down, Pryce activated the prototype's kill switch, causing two of its wings to detach. It crashed on the one remaining wing. Ezra and Sabine escaped into the wilderness with the flight recorder, hiding the Elite's hyperdrive near the crash site for later retrieval to install on Ryder's UT-60D U-wing starfighter/support craft. They were assisted by a Loth-wolf, which put Sabine to sleep and carried the two Spectres to the hidden rebel camp.
Later, Ezra, Zeb, and Jai were sent to retrieve the hyperdrive. At the same time, Thrawn sent his personal assassin, Rukh, to assist Governor Pryce in locating the Rebels. Upon arriving, Rukh smelled Zeb immediately, as Lasat were no longer a common sight in the galaxy. He approached the rebels' position, and Ezra and Jai, disguised as scout troopers, attempted to stall the Noghri. He pursued the two young men, assisted by two real scout troopers, as Zeb evaded the Imperials and escaped in a stolen troop transport. Zeb successfully got the hyperdrive back to the camp, and Sabine installed it on the U-wing. Ezra and Jai also reached the camp, unaware that Rukh had planted a homing beacon on their bike. Sabine finished installing the hyperdrive as Imperial troops arrived, and Hera and Chopper escaped in the U-wing, successfully bringing the flight recorder to Rebel Command. Jai escaped on a landspeeder. The rest of the Spectres, and Ryder, escaped with the help of several Loth-wolves, who brought them to a location halfway across the planet.
Prelude[]

The Spectres had a special connection with Lothal
In 2 BBY,[5] the Alliance to Restore the Republic intended to attack the Galactic Empire on the planet Lothal, a major source of Imperial weapons development. These plans were thwarted, however, when Grand Admiral Thrawn[7] of the Empire's Seventh Fleet[8] discovered Chopper Base, from where the Alliance intended to launch its attack. Phoenix Cell, a rebel cell, was left largely decimated in the attack, while the Massassi Group, poised to join the Lothal operation, also lost a number of forces.[7] The Alliance forces regrouped on Yavin 4 and put aside their plans to liberate Lothal.[9]
Lieutenant Commander Ezra Bridger, a Jedi Padawan and Phoenix Squadron member who grew up on Lothal, continued to urge the Alliance to honor the commitment they made to Lothal and its resistance leader, Ryder Azadi, when the Rebellion promised to free the planet. Senator Mon Mothma, leader of the Rebel Alliance, was sympathetic to Bridger's pleas but could not authorize an operation after so many Alliance forces were destroyed at Atollon.[9] This changed, however, when Azadi sent word to the Alliance that the Empire was testing a new TIE/D Defender Elite starfighter. Mothma herself was once witness to the destructive capabilities of the TIE/d "Defender" Multi-Role Starfighter and recognized it as an imminent threat to the future of the Alliance. She authorized a mission to Lothal to gather intelligence about the starfighter, which Bridger and the rest of the Spectres volunteered for. Due to the tight lockdown the Empire had placed Lothal under, Mothma warned the crew that the Alliance would not be able to send further forces.[1]
The Lothal resistance, meanwhile, prepared for the arrival of Alliance assistance. Azadi suspected that Alliance High Command would send Bridger and the Spectres, who used to operate on Lothal, and sent resistance member Jai Kell to Old Jho's Pit Stop under the assumption that Bridger would go there due to its historic rebel sympathies. The bar's former operator, Jho, had been arrested and executed after helping a suspected rebel cell, and the bar had been taken over by famed Imperial pilot Baron Valen Rudor. Azadi knew that Kell would be able to help the Spectres navigate such new realities on Lothal, including the planet's crippling lockdown, public curfew, and the burning of many of Lothal's grasslands.[1]
Mission[]
Arrival on Lothal[]
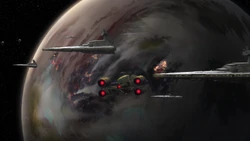
The Broken Horn arrives above a heavily polluted Lothal
The Spectres could not travel to Lothal on their starship, the Ghost, as it was too familiar to Imperial authorities. Bridger, through the pirate Hondo Ohnaka, learned that the crime lord Cikatro Vizago, a former associate of the crew, had acquired a contract to legitimately ship supplies to the planet. They rendezvoused with the crime lord's ship, the Broken Horn, in deep space. The rebels persuaded Vizago to smuggle them onto Lothal by paying him with highly valuable puffer pigs. Rex and Alexsandr Kallus were left to mind the Ghost,[1] and returned to Yavin 4.[6] The Spectres donned civilian disguises, with their weapons and normal clothing concealed in crates carried by Chopper on an attached rig. When Vizago's ship arrived above Lothal, it was given landing clearance. However, the Imperial cruiser dealing with the vessel detected anomalies in its thermal scan, and deduced that there were multiple unregistered lifeforms aboard. The cruiser's captain allowed the Broken Horn past, but ordered an ISB patrol to be alerted.[1]
When the Broken Horn passed through a layer of pollution in Lothal's atmosphere, above the planet's burned plains, it was soon escorted by a patrol of TIE fighters. Vizago claimed to the Spectres that this was a common occurrence, but was swiftly forced to admit that this had never happened to him before. When the ship landed at Jhothal, it was secured with a gravity lock, which led Hera Syndulla to guess that they had been scanned. The ship was boarded by an Imperial search party, composed of stormtroopers and a technician. The Spectres hid in the hold with the puffer pigs, as Vizago, claiming ignorance, was arrested. In order to escape the ship, they set loose the puffer pigs and had Garazeb Orrelios, who the animals found frightening, deliberately scare the pigs, causing them to inflate. As the Imperial crew was distracted by the barrage of inflated pigs, the Spectres escaped. Vizago attempted to flee as well, but couldn't resist turning back to try and take along one uninflated pig, scaring the animal and causing it to inflate, trapping him.[1]
Behind enemy lines[]
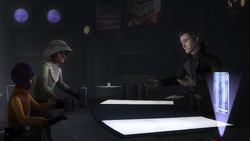
Ezra and Sabine being served by Baron Rudor at the Imperial Pit Stop
After entering Jhothal, Syndulla decided that the Spectres would split up. Bridger, Sabine Wren, and Chopper were sent to the Pit Stop to try to make contact with the Lothal resistance, while Syndulla, Orrelios, and Kanan Jarrus attempted to procure transportation. When they reached the cantina, Bridger and Wren discovered the Pit Stop's new Imperial ownership. They initially attempted to leave, but saw Chopper, outside, being questioned by a stormtrooper as to the location of two citizens he had seen, out past curfew. Bridger decided that they would get drinks. At the bar, the two rebels were surprised to find Rudor as the bartender, and pretended to be awed to meet him. Rudor found Bridger vaguely familiar,[1] distantly remembering him from some long-ago encounters.[10] Bridger claimed, truthfully, that he had come into the Pit Stop while it was still run by Old Jho. Rudor, correctly guessing that Bridger and Wren had not heard the news, recounted Jho's capture and execution. Bridger found it difficult to hide his anger, and Wren quickly got him away from the bar, thanking Rudor for their drinks. Rudor, suspicious, attempted to order the stormtroopers on guard to detain the two. At this point, Kell, who had realized who Bridger was when he mentioned Jho, stepped in. He called Bridger "Oleg,"[1] after an obnoxious cadet who was at the Academy for Young Imperials at the same time as Kell and an undercover Bridger.[11] Kell paid for Bridger and Wren's drinks, telling Rudor to keep the change, and swiftly extricated the two Spectres from the bar.[1]
In the streets of the town, Syndulla, Jarrus, and Orellios had split up to look for the rebels' speeders. As Jarrus and Syndulla were in an alleyway, having ducked there to avoid an Imperial patrol, Orrelios contacted them with news that he had located the vehicles. They had been seized by the Empire, and were in an area guarded by stormtroopers. Jarrus and Syndulla set out to meet Orrelios, so they could steal a speeder.[1]
Outside the cantina, it took Bridger a moment to recognize Kell, who explained that Azadi had sent him to keep watch. Kell attempted to call for a pickup, but Bridger, hearing an explosion and blaster fire, told him not to worry. At this point, Syndulla, Jarrus, and Orrelios pulled up in their recently acquired speeder, and Hera told them to get in. However, the rebels were approached by two assault tanks, and were forced to flee the vehicle as it was destroyed by Imperial fire. As the rebels were cornered by stormtroopers, Kell suggested they head back into the Pit Stop. In the entry passage, the rebels were forced to avoid the death trooper DT-L21 and his troops, heading outside. Bridger claimed to the death trooper that there were rebels outside who had just blown up a speeder. After entering the empty cantina, Orellios, the last one through the door, smashed the controls to delay the Imperials. Kell led the Spectres to a sewer hatch, explaining that Azadi had once told him about a network of tunnels that Jho had maintained beneath town as an escape route. The rebels quickly climbed down and shut the hatch behind them before Imperial troops reentered the Pit Stop. Rudor told DT-L21 that the rebels had gone that way, and made it clear that he had not known the hatch was unsealed. The death trooper sent down stormtroopers and three probe droids.[1]
Escaping Jhothal[]
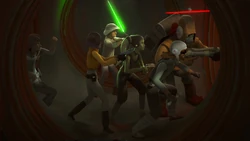
The Spectres and Kell fleeing through the sewers
The rebels fled through the sewers. However, as Kell had never actually been down in the tunnels, he was unfamiliar with the route, and they soon got lost. He did, however, remember that there was a large junction on the road outside of town, so the group decided to head that way. The Spectres retrieved their weapons from Chopper's crates. At this point, the probe droids caught up to them, and there was a brief firefight. Realizing that the droids were transmitting their position, Jarrus decided they would split up. He, Syndulla, Kell and Chopper headed one way, and Bridger, Wren and Orrelios headed another. Eventually, Jarrus' group found a ladder leading to a hatch, but Kell wasn't sure if this was the right exit. He started to climb up to check, but the rebels were quickly forced to hide when the hatch opened and some stormtroopers shone a light down into the tunnel. Just then, one of the probe droids arrived, and Jarrus was forced to step into the light in the process of destroying it. The group then fled, as stormtroopers were sent down the ladder to follow.[1]
Elsewhere in the tunnels, Bridger, Wren, and Orrelios were pursued by the other two probe droids. They quickly destroyed them, and came to a small junction. Orrelios thought Bridger might know the way, but the Padawan had to clarify that although he was familiar with the Lothal City sewers, that did not apply to Jhothal's system. However, Wren discovered a painting of her starbird insignia at the entrance to a tunnel, and Bridger quickly deduced that Azadi and his rebels must have left it there as a sign. They followed the symbols. Elsewhere in the tunnels, Jarrus' group also discovered the starbird markings and followed them as well. Above ground, DT-L21 was informed that the rebels had destroyed all of the probe droids, and ordered troops sent to their last known position and a squad sent to the junction outside of town, before entering the tunnels.[1]
Bridger's group followed the starbirds to a large, open tunnel. They couldn't find the next symbol, and when stormtroopers arrived from the other end, attempted to retreat. However, they were soon joined by Syndulla, Jarrus, Chopper and Kell, who were being pursued by more troopers. As the rebels were surrounded in the center of the tunnel, Chopper looked up and discovered the last starbird painted on a hatch above. Bridger jumped up and slashed a control panel with his lightsaber, causing the ladder to drop down so everyone could climb up. Wren led the way up the ladder, and Jarrus and Bridger brought up the rear, severing the ladder to prevent the stormtroopers from following. There was some difficulty opening the hatch due to the destroyed control panel. However, it was promptly opened by Azadi from the other side, and the rebels climbed out and sealed the hatch behind them. Ryder was waiting with Marida Sumar and his UT-60D U-wing starfighter/support craft. Once the rebels boarded and the ship flew away, Azadi suggested that they could attack the TIE Defender factory with the rest of their forces, and Bridger apologetically told him there weren't any other forces coming. The former governor told the Spectres that they would see the new Defender the next day.[1]
The TIE Defender Elite[]
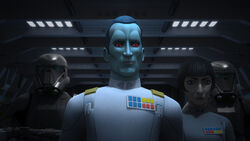
The rebels' mission was complicated by the arrival of Grand Admiral Thrawn and Governor Pryce
The next day, the Rebels split up. Jarrus, Syndulla, and Chopper went to Ezra's old tower outside of Lothal City to do a distant reconnaissance, and discovered that the Empire was fortifying its anti-aircraft defenses, and that there were new fuel tanks outside of the factories, suggesting that the Empire planned to put the new fighter into full-scale production. Meanwhile, Azadi took Bridger, Wren and Orrelios to a remote Imperial airfield in the wilderness, which his spies had identified as the location where the Empire planned to conduct a test flight of the Defender Elite. While the Rebels staked out the base, they were approached by Loth-cats. The animals were drawn to Bridger, due to his talent for connection.[4]
After hours of waiting, the Defender Elite finally arrived, passing over the waiting Rebels with such force that it blew Azadi's hat and Wren's helmet right off their heads. Studying the fighter, the rebels noted its speed, and Sabine speculated that it could give the Ghost a run for its money. When the Elite landed at the airfield, Wren recognized the pilot disembarking from it as Vult Skerris. As they now had images of the fighter, Azadi and Orrelios prepared to leave. However, Wren thought they could do better, and suggested stealing the Elite's flight data recorder so the Rebellion would have a better idea of its capabilities. Orellios was skeptical of the idea, but Bridger supported it and asked him and Azadi to remain on watch while he and Wren snuck onto the base. As the two Spectres crept onto the airfield, they were followed by two of the Loth-cats.[4]
Bridger and Wren discovered that the Elite was guarded by two stormtroopers. As they attempted to come up with a distraction to lure the guards away, the two Loth-cats marched up to the troopers. The stormtroopers, familiar with the animals and finding them irritating since the airfield was built in the wilderness, decided to see if the cats could fly, attempting to use them as target practice. Angered, the cats attacked the troopers before fleeing, causing the irate troopers to chase after the animals. Wren took the opportunity to sneak on board the Elite, as Bridger kept watch. Just as Wren had positioned herself beneath the fighter's controls to remove the flight recorder, Azadi and Orrelios alerted her and Bridger to the arrival of a Sentinel-class landing craft. Upon landing, the shuttle turned out to be carrying Grand Admiral Thrawn and Governor Arihnda Pryce, there to watch Skerris' flight demonstration of the Elite. Bridger, alarmed, alerted Wren, who asked him to find a way to distract the Imperials.[4]
Stealing the Defender[]
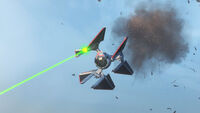
Ezra and Sabine fly the stolen TIE Defender Elite
As Bridger, hiding behind several crates, was attempting to come up with a suitable diversion, he was distracted by the sight of a rare Loth-wolf on a rock across the valley. He was then caught by surprise by a TIE pilot, and in defending himself, was seen by Thrawn, Pryce, and Skerris, who were all surprised to see him. Pryce ordered stormtroopers after Bridger, and Thrawn ordered death troopers to secure the Elite. Bridger was pursued by the stormtroopers amidst the crates on the landing field. Azadi and Orrelios, alarmed, intended to head down to the airfield to help Bridger and Wren fight their way out, but Bridger told them to leave, promising they would find another way to escape. Wren finished extracting the flight recorder, only to see the approaching death troopers, and made the split-second decision to steal the craft. She was then contacted by Ezra, and told him to stay down, as she used the Elite's cannons to fire upon the Imperial troops. Sabine then told Bridger to jump onboard. After he got in, Wren made several passes to destroy most of the TIEs at the airfield. On her final pass, Thrawn, in the line of fire, made no attempt to take cover and took some potshots at the Elite with his sidearm, before Wren destroyed his shuttle and buzzed the control tower, causing the officers inside to duck.[4]
Skerris told Thrawn that the thieves would not get very far, as the Elite's hyperdrive was disconnected, and Pryce offered to activate its kill switch. Thrawn, however, saw the theft as an excellent opportunity to perform a combat test of the fighter's capabilities. On orders, Skerris sent three TIE Interceptors after the stolen prototype. Meanwhile, on board the Elite, Wren told Bridger that the theft of the prototype, with its hyperdrive, made it much easier for them to get the flight recorder back to the Rebellion. She gave Bridger the controls while she worked to deactivate the fighter's homing beacon.[4]
Shortly, the Interceptors caught up, and pursued the Elite through a landscape of rock spires. Bridger shot one fighter, and was asked by Wren to keep the prototype steady, as she was still working on the beacon. He responded that he was trying not to get shot down, before shooting down a second Interceptor. Back at the airfield, Thrawn, Pryce, and Skerris monitored the pursuit. The Grand Admiral was curious as to what other rebel was accompanying Bridger on board the stolen prototype. After the second Interceptor was shot down, Skerris suggested that Hera was piloting, but Thrawn pointed out that if that was the case, all three Interceptors would have already been destroyed. Bridger used the Elite's missiles to destroy the final pursuer, just as Wren finished disabling the homing beacon.[4]
Thrawn realized that the Mandalorian was the other person onboard due to the speed with which the beacon had been disabled. He also found the "combat test" illuminating, noting that if a pilot of Bridger's modest skills could so quickly best three trained pilots, the Elite would give the Empire's forces a considerable advantage, and ordered Pryce to activate the kill switch. The Governor ordered gunships launched to secure the crash site. However, back on board the Elite, Wren had realized that it had a kill switch immediately after disabling the beacon, remembering them from her mission to Skystrike Academy, and had told Bridger, who began to bring the fighter in for a landing. Two of the Elite's wings fell off, but Wren managed to prevent the third from being detached, and the fighter crashed on the remaining wing.[4]
Evading searchers[]

Ezra and Sabine encountering a loth-wolf and loth-cat
Meanwhile, Jarrus, Syndulla, Chopper, Orrelios, Azadi, and Kell had reunited on Azadi's U-wing. Jarrus, Syndulla, and Chopper were aware that Bridger and Wren had stolen the Defender Elite, and heard on Imperial chatter that the fighter had crashed. The rebels could not contact Bridger and Wren as it would leave a signal trace. They set off in the ship to search for Bridger and Wren, but were aware that their search would not be easy, due to the Imperial forces also closing in on the position.[4]
Wren had Bridger help her remove the Elite's hyperdrive, as she thought it could be installed on Azadi's U-wing to replace the ship's broken one. The two Rebels lugged the heavy drive away from the crash site. Bridger saw a white Loth-cat, which directed him to a niche in the rocks, large enough to hold the hyperdrive. He pushed a smaller rock in front of the opening to conceal it. When he told Wren how he had found the place, she was skeptical, as she hadn't seen anything. As the two departed the hiding place with the flight recorder, Bridger heard howling in the distance.[4]
Imperial gunships arrived at the crash site after nightfall, and Pryce, onboard one, reported to Thrawn that there was no sign of the Rebels. He told her that ground units were on their way to the site. Bridger and Wren, steadily heading away from the area, were forced to hide from the searchlights of passing gunships. Just then, Bridger saw the Loth-wolf from earlier again. He told Wren, who had not seen the animal, and noted that no one had seen a Loth-wolf in a hundred years. At that moment, the wolf reappeared, coming right up behind Wren. Bridger, apprehensive, told her to turn around, and when she did the wolf promptly put her to sleep. The appearance of the white Loth-cat accompanying the wolf reassured Bridger that the creature was not an enemy. More Imperial gunships approached, and the wolf offered Bridger a ride, so he put the sleeping Wren on the creature's back and climbed on with her helmet and the flight recorder. The wolf ran, deftly avoiding Imperial searchlights.[4]
After daybreak, the wolf brought Bridger and Wren to a spot near where Ryder's U-wing was hidden in a rock formation. Bridger asked the creature why he had helped him, and the wolf gave him a cryptic message, "Dume", before vanishing.[4] Unbeknownst to Bridger, "Dume" was Jarrus' original last name, before he had changed his name after Order 66.[12] The other rebels ran up just then, and Wren woke up. Syndulla was relieved that Bridger and Wren were safe. Orellios asked how they had gotten to the camp so fast, and Bridger asked them if they had seen the wolf, only to notice that it was gone. Sabine remembered nothing of the journey or the wolf, merely Bridger saying the word. Syndulla was also pleased to learn that the flight recorder had been recovered, and the news about the hidden hyperdrive. As the rebels headed back to their ship, Bridger told Jarrus about the wolf, but not its final message. Jarrus believed Bridger, but was unsure of the meaning of the encounter.[4]
Retrieving the hyperdrive[]
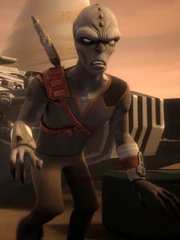
Thrawn dispatched the Noghri Rukh to hunt down the rebels
Later that day, Ezra, Jai and Zeb were sent to retrieve the hyperdrive. As the Imperials had secured the crash site, Ezra and Jai were disguised as scout troopers. While the three rebels covertly searched the rocks for the hiding place, Governor Pryce reported to Thrawn that the hyperdrive and flight recorder were missing. Due to the hyperdrive's size and weight, she correctly guessed that the rebels had hidden it somewhere nearby. Thrawn sent his personal bodyguard and assassin, the Noghri Rukh, to aid Pryce in her search, telling the Governor when she said she did not need help that the recent security failures with the rebels' arrival on Lothal and the theft of the Elite said otherwise.[6]
Ezra and Zeb located the hyperdrive, with the assistance of the white Loth-cat, shortly before Rukh's arrival on an Imperial gunship. When he disembarked, he immediately smelled the Lasat warrior in the vicinity, and that he was not alone, and set out to investigate. Jai spotted the assassin approaching with electrobinoculars, and immediately warned Ezra and Zeb. Leaving Zeb to handle the hyperdrive, Ezra set out to handle Rukh. With Jai behind him, ready to shoot if necessary, Ezra attempted to pass the two Rebels off to Rukh as scout troopers who had just finished searching the area. Due to his keen sense of smell, Rukh did not fall for the ruse, and attacked Ezra and Jai. During the fight, Ezra Force pushed Rukh off Jai and into a rock, revealing himself as a Jedi. The two young men then fled on a speeder bike, with Rukh and two scout troopers in pursuit, as Pryce and stormtrooper reinforcements approached in a troop transport. Zeb had evaded the Imperials by hiding with the hyperdrive high up on the side of a rock. He took advantage of Pryce's distraction as Ezra and Jai fled to steal the troop transport and escape in it, nearly flattening Pryce in the process. Reporting back to the camp, Zeb told Hera and Kanan that he was on route with the hyperdrive, and that Ezra would be along eventually.[6]
Ezra and Jai were pursued by Rukh and the scout troopers into a labyrinth of stone spires. The assassin managed to catch up to them on his bike, and briefly engaged Ezra electrostaff-to-lightsaber. However, he was forced to break off to avoid a boulder in his path. Rukh then fired a homing beacon at Ezra and Jai's bike, which the two did not notice as they fled deeper into the rocks. As the scout troopers took the lead in the pursuit, Ezra saw an opportunity to escape, and planted a detonator on a partially collapsed rock spire that he and Jai passed under. One of the scout troopers was killed by falling rock when the bomb exploded, and the other was forced to halt. Rukh, however, jumped his bike and continued over the obstruction. While the assassin was midair, Ezra shot his bike and destroyed it, leaving Rukh watching as the Rebel duo fled.[6]
Escaping with the flight recorder[]
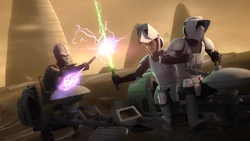
Rukh pursuing Ezra Bridger and Jai Kell
When Zeb arrived at the rebel camp, he was initially mistaken for the enemy and narrowly avoided being shot, as he had neglected to report that he had stolen a troop transport. Ezra and Jai, on their bike, arrived shortly thereafter, and Sabine got to work installing the hyperdrive on Ryder's U-wing. None of the rebels noticed Rukh's tracker on the bike. Rukh, meanwhile, reported the camp's coordinates to Governor Pryce, who prepared to attack. The assassin was confident that he could take out the camp by himself. Pryce, however, was unimpressed by the fact that the Rebels had escaped him earlier, and insisted on doing things her way.[6]
Sabine finished installing the drive shortly before the Imperial forces arrived. The Rebels were thus forced to scatter. Hera and Chopper, as planned, took off in the U-wing to return to Rebel headquarters. Jai escaped in a landspeeder. The remaining Spectres, and Ryder, were supposed to escape on the speeder bike and stolen troop transport. Pryce, witnessing the U-wing take off, contacted Thrawn to inform him of the Rebel ship. Imperial fire destroyed the transport. Faced with no way to escape, Ezra saw several Loth-wolves running among the rocks and, remembering their assistance earlier, persuaded the other Rebels to follow him as he followed the wolves. They escaped into the rocks, prompting Pryce to order the mountains bombed.[6]
Above Lothal, Hera was pursued by TIE fighters as she attempted to slip past the blockade. She eventually approached one of the Imperial construction modules in orbit, and jumped the U-wing into hyperspace through its hangar bay, setting everything inside, including the stormtroopers preparing to shoot at the ship, on fire with the force of her passage. Thrawn, onboard his flagship, the Chimaera, was displeased that she had escaped.[6]
Aftermath[]

The stolen hyperdrive enabled Hera and Chopper to travel on a U-wing to Yavin 4
The Loth-wolves helped Ezra, Kanan, Sabine, Zeb, and Ryder escape, mystically transporting them from the caves of the wolf den in Lothal's northern hemisphere to a set of the caves of the cliff dwelling in the southern hemisphere, halfway across the planet. After the white wolf, the apparent leader, repeated its "Dume" statement to Kanan, he told Ezra about how he had changed his name. Kanan suspected that the wolves were trying to tell the Jedi that the Empire was doing something far worse to Lothal than what the Rebels already knew of, but he did not know what that might be.[6]
The Lothal resistance decided to use the caves as a base. Ezra was confident that Hera intended to come back for the rest of the Spectres and launch an attack. They attempted to contact Hera and Rebel Command, but the Empire was blocking all non-Imperial signals. Therefore, when they detected an ore crawler, Crawler 413-24, in the vicinity of the base, the Rebels hijacked it in order to use its long-range transmitter. During the hijacking, they encountered Vizago, who had been forced into slavery on the crawler after his earlier arrest.[2]
Hera successfully got the flight recorder to Yavin 4, delivering it directly to Mon Mothma and Erskin Semaj.[6] When the Alliance analyzed the data, they could not find any weakness, and discovered that the Elite would outmatch all of their fighters. Thus, Hera proposed an attack to prevent the fighter from ever being manufactured. The Rebel leaders spent a long time discussing it, with Hera and Chopper asked to step out of the briefing room. During the debate, it was discovered that the Empire was enacting Protocol 13, the evacuation of all Imperial personnel, on Lothal. When Mothma told Hera about this, she barged back into the briefing, and persuaded the Alliance leaders to approve an attack on the grounds that they did not have any more time to waste and that they had to prove to the Empire that the Rebellion would not stand down. When the Lothal rebels, after some difficulties in taking control of the crawler, managed to contact Rebel Command, Hera informed them of the impending attack and told them to be ready. Ezra, in particular, was very pleased that the promised attack was finally happening.[2]
Behind the scenes[]
The mission serves as the main plot of the fourth season Star Wars Rebels episodes "The Occupation," "Flight of the Defender," and "Kindred." The three episodes are part of a longer story arc involving the Spectres' return to Lothal, continuing in "Crawler Commandeers" and "Rebel Assault."
Appearances[]
 Star Wars Rebels — "The Occupation" (First appearance)
 Star Wars Rebels — "Flight of the Defender"
 Star Wars Rebels — "Kindred"
Sources[]
 Star Wars Rebels Season 4 Trailer (Official) on the official Star Wars YouTube channel (backup link) (Posted on StarWars.com)
 Star Wars Rebels Season 4 Trailer 2 (Official) on the official Star Wars YouTube channel (backup link) (Posted on StarWars.com)
 Rebels Recon #4.2: Inside "In the Name of the Rebellion" | Star Wars Rebels on the official Star Wars YouTube channel (backup link) (Posted on StarWars.com)
 "Flight of the Defender" Episode Guide | Star Wars Rebels on StarWars.com (backup link)
 "The Occupation" Episode Guide | Star Wars Rebels on StarWars.com (backup link)
 "Kindred" Episode Guide | Star Wars Rebels on StarWars.com (backup link)
Notes and references[]
- ↑ 1.00 1.01 1.02 1.03 1.04 1.05 1.06 1.07 1.08 1.09 1.10 1.11 1.12 1.13 1.14 1.15 1.16 1.17 1.18 1.19 1.20 1.21 1.22 1.23 1.24 1.25 1.26 1.27 1.28 1.29 1.30 1.31 1.32 1.33 1.34 1.35 1.36 1.37 1.38 1.39 1.40 1.41 1.42 1.43 1.44 1.45 1.46 1.47 1.48 1.49 1.50 1.51 1.52 1.53 1.54 1.55 1.56 1.57 1.58 1.59
 Star Wars Rebels — "The Occupation"
- ↑ 2.0 2.1 2.2 2.3
 Star Wars Rebels — "Crawler Commandeers"
- ↑ Thrawn: Alliances
- ↑ 4.00 4.01 4.02 4.03 4.04 4.05 4.06 4.07 4.08 4.09 4.10 4.11 4.12 4.13 4.14 4.15 4.16 4.17 4.18 4.19 4.20 4.21 4.22 4.23 4.24 4.25 4.26 4.27 4.28 4.29 4.30 4.31 4.32
 Star Wars Rebels — "Flight of the Defender"
- ↑ 5.0 5.1 Star Wars: Timelines
- ↑ 6.00 6.01 6.02 6.03 6.04 6.05 6.06 6.07 6.08 6.09 6.10 6.11 6.12 6.13 6.14 6.15 6.16 6.17 6.18 6.19 6.20 6.21 6.22 6.23
 Star Wars Rebels — "Kindred"
- ↑ 7.0 7.1
 Star Wars Rebels — "Zero Hour"
- ↑ Star Wars Rebels: Steps Into Shadow
- ↑ 9.0 9.1
 Star Wars Rebels — "In the Name of the Rebellion"
- ↑
 Star Wars Rebels — "Property of Ezra Bridger"
- ↑
 Star Wars Rebels — "Breaking Ranks"
- ↑ A New Dawn
