- "Alright let's make this count. Lothal's depending on us."
- ―Hera Syndulla
The Attack on Lothal, also known as the Battle of Lothal, occurred during the Galactic Civil War in the year 1 BBY, when the Alliance to Restore the Republic attacked the planet Lothal in an attempt to destroy the Imperial Armory Complex, where the Galactic Empire was planning on producing TIE/d "Defender" Multi-Role Starfighters. The Rebels had attempted the attack before, with the forces of two Rebel cells, Phoenix Cell and the Massassi Group, participating, but Imperial commander Grand Admiral Thrawn had anticipated the planned attack and ambushed the Rebels at their base on Atollon. Afterwards, Alliance High Command was quite reluctant to authorize a strike, before they learned that the Empire was planning on manufacturing the even more advanced TIE/D Defender Elite at their factories. In addition, the Empire had planned to enact Protocol 13 on Lothal, the evacuation of all Imperial personnel from the planet.
As a result, Hera Syndulla was able to persuade the Rebel leadership to authorize a fighter assault on Lothal. She was promoted to General, and given command of a force of 24 fighters and bombers, a mixed group of T-65B X-wing starfighters and BTL-A4 Y-wing assault starfighter/bombers, with the goal of hitting the Lothal City fuel depot. On the ground, the rest of Hera's team, the Spectres, as well as members of the Lothal resistance group, destroyed the anti-air defenses that protected the factories. During the space battle, the Rebel force sustained a few casualties at the hands of Imperial ace Commander Vult Skerris, before Hera lured him into a trap and shot him down, triggering a chain of events that led to the destruction of a Star Destroyer. This gave Hera's forces the opening they needed to head for their targets.
However, Thrawn had been anticipating this, and had another wave of TIE fighters at the ready. The entire strike force was shot down, several of the fighters crashing into Lothal City. Among the few survivors were Hera, her astromech droid Chopper, and Mart Mattin. Hera rescued Mart from some stormtroopers that were attempting to arrest him, but the three were shortly pursued by Rukh, Thrawn's assassin, who had been sent to capture the surviving rebel pilots, particularly "Captain" Syndulla, alive. The Rebel trio managed to make it to a sewer hatch, but in the process of luring away the Imperial forces guarding it, Rukh caught up, and Hera was captured as Mart and Chopper fled on her orders. Upon making it to an exit outside of the city, Mart and Chopper were met by Kanan Jarrus, who told them that although there was nothing else the two of them could do to rescue Hera, there was something he could do.
Prelude[]
Planned attack[]
- "Phoenix Squadron is enlisting help from another rebel cell to take out the Imperial factory here on Lothal."
- ―Ezra Bridger, to members of the Lothal resistance

Lothal, a center of Imperial power in the Outer Rim
Lothal, a backwater Outer Rim planet, had become important to the Galactic Empire due to its mineral deposits.[8] The rebel cell Phoenix Cell, based in the Lothal sector on the remote planet Atollon, began preparations for a strike on the Imperial Armory Complex,[9] which churned out weapons and vehicles for the Empire's military.[8] Another rebel cell, General Jan Dodonna's Massassi Group, one of the largest cells in the galaxy, was invited to participate in the attack.[10] Over the course of months, the members of Phoenix Squadron, including the unit known as the Spectres, began preparations for the planned assault.[9] Ezra Bridger, a member of the Spectres, was from Lothal, and particularly keen to liberate his homeworld.[10] Over the past few years, since the Siege of Lothal, the Empire had placed the planet under increasingly tight security.[7] Former Lothalite governor Ryder Azadi had formed a resistance group[7] after escaping from prison.[11] Azadi's cell supported Phoenix Squadron's planned attack, and assisted their intelligence-gathering efforts.[7]
In 2 BBY,[5] around the time the Spectres broke out the pirate Hondo Ohnaka from an Imperial prison on Naraka, Lothalian Governor Arihnda Pryce, wishing to conclusively deal with the sector's "insurgency"[9] after a long period of neglecting her responsibilities there,[12] called in Grand Admiral Thrawn and his Seventh Fleet to help with the situation.[9] Pryce felt that Thrawn, who saw a bigger picture, would be more effective than the Imperial Navy's ranking officer in the sector, the old-school Admiral Kassius Konstantine. Thrawn deduced that because the rebels had freed Ohnaka, they intended to steal old Y-wings from the Imperial scrapyard Reklam Station on Yarma. Pryce intercepted the rebels as they were fleeing with the starfighters, and saw the rest of Phoenix Squadron's forces come to the rescue. However, Thrawn ordered her to let them escape, as he realized this was not the entire rebel fleet. He intended to wait for the entire fleet to gather before striking.[9]
Over the course of many missions, Phoenix Squadron and the Spectres acquired intelligence and weapons in preparation for the attack.[10] The Y-wings stolen at Reklam Station, however, went to the Massassi Group instead.[9] After discovering from a rebel agent that the Empire was building a new kind of weapon in the factories on Lothal, Kanan Jarrus, Bridger, and Chopper infiltrated the complex to find out what it was. They successfully stole the plans for the TIE/d "Defender" Multi-Role Starfighter, a highly advanced TIE model with deflector shields.[7] Not long before the two rebel units planned to strike, rebel cells across the galaxy joined forces to form the Rebel Alliance.[13]
Piece by piece[]
- "When we find our spy, and we will find them, we shall turn them from an obstacle to an asset."
- ―Thrawn on locating a possible Imperial spy
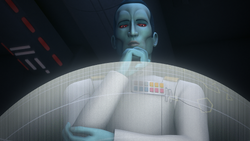
Grand Admiral Thrawn led Imperial counter-insurgency efforts against the Phoenix Squadron
As the rebels prepared to attack Lothal, however, Thrawn gathered information to stop them.[9] The infiltration of the Armory Complex led the Grand Admiral to his biggest clue to locating the rebels' base: the revelation that the infiltrators had received assistance from someone in the Imperial ranks. Thrawn intended to use the spy, when they were caught, to lead him to the rebels. This spy, one of the Fulcrum agents, happened to be ISB Agent Alexsandr Kallus, a former enemy of the Spectres[7] who had had a change of heart following an encounter with Spectres member Garazeb Orrelios on the Geonosian moon Bahryn.[14] Kallus later tipped off Phoenix Squadron about Thrawn's use of E-XD-series infiltrator droids to search for rebel bases, allowing Orrelios, Chopper, and AP-5 to prevent EXD-9 from revealing Chopper Base's location to the Empire. The incident, however, helped Thrawn narrow down the number of planets he had to search.[15]
Some time later, the Empire intercepted one of Kallus' Fulcrum transmissions, leading Thrawn to learn the spy's codename and that they were an Imperial officer. The Grand Admiral called in ISB Colonel Wullf Yularen to assist in finding the spy. The rebels, discovering that the transmission had been monitored, sent Bridger, with Chopper and AP-5 assisting, to rescue Kallus. However, shortly after Ezra got onboard the Arquitens-class cruiser that Kallus and Lieutenant Yogar Lyste were stationed on, posing as a shuttle thief, Thrawn's flagship, the Chimaera, arrived. Kallus and Lyste were called onboard. Lyste, eager to impress the Grand Admiral, brought along the captured Bridger, and the droids managed to come along when AP-5 claimed that they had a recording of the shuttle theft. In a meeting, Thrawn informed Kallus, Lyste, and Admiral Konstantine of the spy and that he was close to locating the rebel base. Thrawn had also interviewed other Imperial officers, intending to entrap the spy when they tried to warn the rebels. Kallus, meanwhile, convinced Lyste that Pryce was the spy, getting him to trail her. Using a code cylinder he stole from the Lieutenant, Kallus released Ezra from the Chimaera's brig and they infiltrated Thrawn's office, sending the Star Destroyer's clearance codes to Jarrus and Rex, the retrieval team, and erasing Atollon from Thrawn's holomap. Ultimately, Kallus implicated Lyste as Fulcrum, and the rebels escaped. The deception fooled Pryce and Konstantine, but Thrawn and Yularen were privately suspicious. One piece of evidence Kallus had forgotten about, the helmet Bridger had worn as part of his disguise, helped Thrawn deduce that the ISB agent was the real spy. He kept this information secret, however, for his own plans.[16]
Battle of Atollon[]
- "Thrawn knows? Knows about what? About the attack on Lothal?"
- ―Ezra Bridger on "Fulcrum"'s message that Thrawn knows about the attack on Lothal
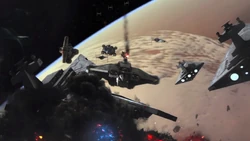
The Battle of Atollon was a major blow for the nascent Rebel Alliance
On the eve of the planned attack on Lothal, Thrawn arrived at Lothal City's Imperial Complex to warn Governor Pryce and Admiral Konstantine. Grand Moff Wilhuff Tarkin also attended the meeting, via hologram. Kallus was not invited, and used a mouse droid to spy on the meeting from the vents. Thrawn informed Pryce, Konstantine and Tarkin of the impending attack, and that General Dodonna's fleet would be assisting Phoenix Squadron. Overhearing everything, Kallus traveled to an old communications tower outside the city to transmit a warning to the rebels. There, he was ambushed by Thrawn, who used the trajectories of Kallus' transmission and the Massassi fleet to discover the location of the rebel base. Kallus managed to get a brief message through, but was arrested by the Grand Admiral and his death troopers. On Atollon, Phoenix Squadron and the recently-arrived Massassi Group received the warning in enough time to put their forces on alert. The arrival of the Imperial fleet forced the Rebels to scuttle their planned attack on Lothal.[10]
The Rebel ships were prevented from escaping by two Interdictor cruisers. Hera Syndulla devised a plan to create an opening for one ship, Bridger's Gauntlet, to escape the Imperial blockade and get reinforcements. She assigned Jarrus and Chopper to go with him; however, Jarrus decided to instead try and ask the mysterious Force wielder Bendu for help. During the ensuing space battle, many Rebel ships were destroyed. Bridger's opening finally came when Commander Jun Sato sacrificed himself and his ship, the Phoenix Nest, by ramming Admiral Konstantine's Interdictor. Shortly after Bridger escaped, Syndulla was forced to call the retreat. In hyperspace, Bridger asked Alliance leader Mon Mothma for reinforcements, but she regretfully told him that she couldn't send any. Bridger decided to go to fellow Spectre, the Mandalorian Sabine Wren, and her family for help.[10] Wren had left Phoenix Squadron some time before after reuniting with her family. She had come into possession of the Darksaber, an ancient Mandalorian weapon, and had stayed to give the weapon to the rightful leader of Mandalore.[17] Ezra arrived on Krownest to learn from Countess Ursa Wren that they were fighting a civil war, and had few resources to spare. Wren persuaded her mother to hear Bridger out, and Ursa allowed Wren to take some ships and any willing warriors to help the Rebels. She planned to execute a strike on the remaining Interdictor.[10]
Back on Atollon, Jarrus failed to persuade the Bendu to assist the Rebels, as he refused to take sides. Jarrus did, however, enrage the Force wielder by calling him a coward. The Rebels took shelter under Chopper Base's shield from Thrawn's orbital bombardment. After the bombardment, Thrawn led a ground assault to finish the Rebels off, as he was under orders from Tarkin to capture the commanders. Pryce was left in charge of the fleet. During the ground assault, the Bendu arrived in the form of a thunderstorm and began attacking the Imperials and Rebels with lightning. The remaining Rebel ships took off. Thrawn had his troops concentrate their fire, bringing down the Bendu, only for the mysterious Force wielder to vanish. Meanwhile, Bridger, Wren and their strike team arrived. As Fenn Rau and his Fang fighters kept the TIE fighters occupied, Ezra, Sabine and the Wren warriors attacked one of the Interdictor's gravity well projectors. Eventually the projector was breached, causing the warship to explode. Onboard the Chimaera, a captive Kallus took advantage of Pryce's rage at the Interdictor's destruction to arrange his escape, and was picked up by the Ghost in an escape pod. The remaining Rebel ships fled.[10]
Prioritizing[]
- "I am sympathetic to the plight of your people, Ezra. Like Lothal, my home planet of Chandrila is suffering at the hands of the Empire. But if we help these two worlds, what of Onderon, or Ryloth, or Montross? What of the thousands of other worlds who need us? Where do we start?"
- ―Mon Mothma, to Ezra Bridger
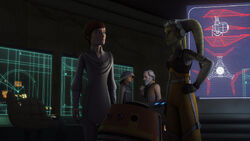
Hera petitioning Mon Mothma to intervene on Lothal
After the battle, the surviving Rebels headed to the Rebel Alliance's headquarters on Yavin 4.[10] Jarrus, Bridger, and Chopper, however, accompanied Wren back to Mandalore to help her rescue her father from the Empire. There, Wren gave the Darksaber to Bo-Katan Kryze.[19] The four Spectres did not come to the moon until after the mission was complete. Once Bridger got to Yavin 4, he was frustrated that the Rebellion did not seem to consider trying to help the people of Lothal again. Mothma explained to him that the Alliance could not afford to throw large portions of their resources into helping only a few planets, and that they had to see the bigger picture.[18]
Some weeks later, a message from Azadi arrived, warning that the Empire had developed a new TIE Defender on Lothal. The Spectres volunteered for the mission, which Mothma approved, having witnessed the Defender's threat firsthand. She warned them, however, that the Alliance would not be able to send more forces. They smuggled themselves onto Lothal aboard the Broken Horn, and met up with the Lothal resistance in the occupied town of Jhothal, escaping through its sewers with the help of resistance member Jai Kell.[20] After meeting up with Azadi, the Rebels split up to rendezvous the Imperial facilities. Syndulla and Jarrus, reconnoitering Lothal City from a distance, discovered preparations indicating that the Empire intended to put the Defender Elite into mass production. Azadi took Bridger, Wren, and Orrelios to a remote Imperial airfield, which his spies had identified as the location of a planned test flight of the prototype. During the recon mission, Ezra and Wren wound up stealing the prototype when Thrawn and Pryce arrived at the airfield while the two were attempting to steal the fighter's flight data recorder.[21]
After fleeing in the fighter and shooting down pursuing TIE interceptors, Bridger and Wren survived the crash that ensued when the prototype Elite's kill switch was activated. They fled into the wilderness with the flight recorder, hiding the Elite's hyperdrive near the site for later recovery, to be installed on Ryder's UT-60D U-wing starfighter/support craft, which did not have a working one. Ezra and Sabine reached the Rebel camp with the help of a Loth-wolf.[21] Later, Bridger, Orrellios, and Jai were sent to retrieve the hyperdrive, a mission complicated by the arrival of Thrawn's personal assassin, Rukh. He pursued the two young men, while Zeb managed to escape with the hyperdrive in a stolen Imperial Troop Transport. Ezra and Jai evaded Rukh, but not a homing beacon he covertly planted on their speeder bike. Imperial forces arrived at the Rebel camp just after Sabine had finished installing the hyperdrive on the U-wing, and Hera and Chopper escaped in the ship, making it to Yavin 4 with the flight recorder. Jai fled on a landspeeder, and the other rebels escaped the Imperials with the help of several Loth-wolves, who brought them to a location on the other side of Lothal. The white wolf revealed that it knew Kanan's birth name, Caleb Dume, before departing.[22]
At Yavin 4, the flight recorder was analyzed, and the Rebel leaders could not find any weakness in the TIE Defender Elite. It also outmatched any starfighters the Alliance fielded, and Hera argued that this meant the Rebels had to attack Lothal, to prevent the fighter from being manufactured. Mothma asked Syndulla and Chopper to step outside of the briefing room while the Alliance leaders discussed the proposal. Eventually, Mothma stepped out of the debate to inform Syndulla that, although no decision had yet been made, they had discovered that the Empire had enacted Protocol 13, the evacuation of all Imperial personnel from an occupied planet, on Lothal. This prompted Syndulla to reenter the briefing, and she told the Rebel leaders, Bail Organa and General Dodonna, that this meant they did not have any more time to waste. She argued that doing this attack would show the Empire that the Rebellion did not intend to stand down, and explained that she had a team on Lothal ready to assist. This argument persuaded the Alliance leaders, and Mothma gave Syndulla the go-ahead to plan the attack,[1] and she was promoted to general.[3] When Hera regained contact with the rest of the Spectres, who had hijacked a Mining Guild ore crawler in order to gain access to a long-range transmitter, she informed them of the impending attack, so they would be ready. Bridger, especially, was thrilled that the long-planned attack on Lothal was finally going ahead.[1]
Attack[]
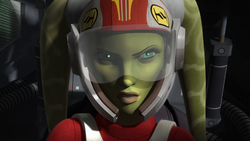
Hera Syndulla, command of the rebel strike team
Initial strike[]
On the planet's surface, the rest of the Spectres, along with Ryder and Jai, snuck up to the air defenses installed to protect the factories, and planted explosives on them. They went undetected by the Imperials, and destroyed the turrets with no problems. Hera, commanding a squadron of T-65B X-wing starfighters and BTL-A4 Y-wing assault starfighter/bombers, consisting of twenty four ships in total, arrived at Lothal to attack the Lothal City fuel depot. Their arrival was detected by the Imperial blockade. Thrawn ordered his fighters launched, and sent his best pilot, Commander Vult Skerris, out in a Defender Elite. When Pryce contacted him about the destruction of the air defenses, he reassured her that no Rebel ships would get past the blockade.[3]
Hera ordered her X-wing pilots, including Mart Mattin, Cleat, and Duke, to make sure that the slower Y-wings could get through the blockade. During the attack, Skerris shot down Cleat and Duke, prompting Hera to attack him. He chased her, and in his Defender Elite had something of an advantage. However, Hera outmaneuvered him, getting him to chase her into the sights of the Chimaera's gunners. Thrawn, realizing what kind of trap Hera was luring Skerris into, ordered the Commander to break off, but he refused as he almost had her in his sights. The Grand Admiral ordered his gunners to open fire, and the shots deactivated Hera and Skerris' shields. Hera flew over the Star Destroyer's bridge and fired on its scanning array, damaging it and creating a cloud of smoke, which she flew into. She closed her fighter's S-foils and flew through the narrow gap. Skerris lost sight of her due to the smoke, and his fighter's larger profile forced him to go around the structure. Hera was waiting and fired at him, damaging the unshielded Defender Elite, ripping off two of its wings and setting Skerris spiraling out of control. He crashed into an Arquitens-class command cruiser, causing damage to its magazine. The cruiser began to explode, and crashed into a Star Destroyer, shearing its bridge superstructure off. Hera and her pilots took the opening, and raced for Lothal.[3]
Shot down[]
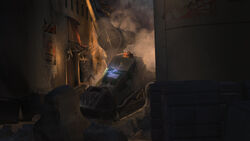
Hera's downed X-wing starfighter
However, Thrawn had a second wave of fighters waiting in Lothal's clouds, which came in firing. The Spectres watched, horrified, from outside Lothal City as the destroyed Rebel fighters plummeted. However, at least three of the fighters managed to crash-land in the city, one of them being Hera's. Chopper woke her up and got her out of her fighter, but his transmitter had been damaged in the crash, preventing them from contacting the other Rebels. A civilian advised them to flee, as Imperial forces were coming, and suggested they head for the city's east gate. Hera and Chopper quickly hid from a searching patrol transport, before fleeing deeper into the city. The other Rebels, outside the city, eventually left, knowing that the attack was finished and that, as the plains held no cover, they could be found by the Empire if they stayed there. Kanan, however, was reluctant, as he felt he could rescue Hera. He eventually split up with the other Rebels, heading back for the capital. The others headed for their base.[3]
Thrawn, upon being informed that several Rebel fighters had managed to crash in the city, sent Rukh to hunt down the surviving Rebel pilots, specifying that he wanted them alive, if possible, particularly Captain Syndulla. As Rukh, with the assistance of Pryce's forces, swept the city, he captured at least one of the pilots, Secon Daree. When Pryce was informed that the Rebel Flight Leader's starfighter had been found in the city's eastern district, but the pilot and astromech were missing, Pryce ordered the district locked down and torn apart, building by building, until Hera was found. Meanwhile, Hera and Chopper were planning to sneak past an Imperial blockade when Chopper picked up a distress signal from one of the Rebels' astromech droids. Investigating, they discovered the crash site of Mart's fighter. He had been cornered by stormtroopers, and, as he was injured, was being defended by his droid, R3-A3. The stormtroopers intended to capture R3, as they knew how valuable his memory banks could be, and eventually shot and destroyed him to immobilize him. Witnessing this, Hera told Chopper to wait and stole a troop transport. She used the transport to rescue Mart, who acquired a blaster from one of the troopers, and the three Rebels took out the stormtroopers. Mart gave Hera permission to install R3's transmitter on Chopper, as a replacement for his damaged one. After it was done, Chopper attempted to contact the other Rebels, but was unable due to Imperial jamming.[3]
Escaping the city[]
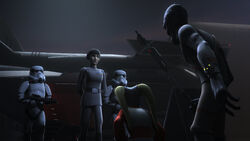
Rukh presents Hera to Governor Pryce
The three Rebels were shortly attacked by Rukh, who had detected their scent. Hera fired at him, and the three fled into the streets. Rukh pursued over the rooftops. While on the run, Mart spotted Rukh on the roofs and fired at him, leading the assassin to descend to street level and fight them. He quickly knocked out Mart, but was disarmed by Hera. However, Rukh was able to knock her to the ground and retrieve his weapon. Before he could strike Hera, he was stunned by Chopper, and Mart, who had come to, shot at him, causing Rukh to retreat back to the roofs. After Mart asked where they were going, Hera ordered Chopper to scan for the nearest sewer hatch. Upon detecting it, Chopper led the way. The Rebels continued on.[3]
Upon reaching the sewer hatch, Hera, Mart and Chopper discovered that it was guarded by two stormtroopers and an All Terrain Defense Pod. The AT-DP was standing directly on top of the hatch. Seeing a parked landspeeder in the street, Hera devised a plan to lure the walker away. Mart diverted the Imperials' attention by walking out from cover and stating that he had heard they were looking for Rebel pilots, before proclaiming himself to be one. The stormtroopers shot at him, and Mart fired back, hitting one, before fleeing down a street, causing the other trooper and the walker to pursue. Chopper, stationed on a nearby roof, was ordered by Hera to open the hatch, and he descended to the controls, plugged in and did so. Hera took control of the landspeeder. Mart hid from the pursuing Imperials behind some crates, and took out the remaining stormtrooper by jumping him from behind. As the walker started to turn around, Mart shot at it, and Hera rammed it with the stolen landspeeder, toppling it.[3]
Mart ran for the hatch when Hera ordered him to, as she stunned the AT-DP's driver. He climbed in, and waited at the top of the ladder. As Hera ran for the hatch, Rukh caught up with her atop the roofs. He jumped down into the street and approached Hera from behind, prompting Mart to yell a warning. Rukh jumped Hera, and she kicked him off. The two fought, and Rukh eventually knocked Hera down. Mart was prepared to intervene, but two TX-225 GAVr "Occupier" combat assault tanks arrived, cutting off Hera from the hatch. An Imperial gunship also arrived, and Hera ordered Mart and Chopper to leave. Mart quickly descended into the sewer, but Chopper was reluctant, hovering on his rocket booster in the opening. Hera retrieved her blaster and shot the hatch's controls, forcing Chopper to descend before the hatch door closed. Rukh disarmed Hera and forced her to her knees, holding his weapon to her back. The gunship landed, disgorging Governor Pryce. Hera remarked that she'd always wanted to meet Pryce, who responded with a disparaging remark about Hera's "small victory" before stunning her.[3]
Aftermath[]

Pryce's destruction of the Lothal fuel depot undid Thrawn's efforts to protect TIE Defender production
On his way back to Lothal City, Kanan was intercepted by the three Loth-wolves he had encountered earlier. He was initially angry about being delayed, as he felt that he did not have time. After their leader, the white wolf, said "Dume," Kanan asked them what he had to do, and the wolves told him something.[3]
Mart and Chopper followed a network of painted starbirds left by the Lothal Rebels to a hatch outside the city, where they were met by Kanan. By then, it was after daybreak. The two escapees were regretful that they were unable to save Hera, and Kanan told Mart that he couldn't have done any more than what he already did. However, there was something that Kanan could do. The three Rebels set off on Kanan's speeder bike.[3]
At the Imperial Complex, Governor Pryce interrogated Hera for information about the location of the Alliance Fleet but she refused to yield anything. Unwilling to abandon their leader, the other Spectres mounted a mission to rescue General Syndulla. Ezra came up with a plan to infiltrate the Imperial Complex using Loth-bat gliders. Despite rescuing Hera, Kanan Jarrus was killed when Governor Pryce ordered her AT-AT walkers to blow up the fuel depot in an attempt to destroy the Spectres.[2]
The destruction of the fuel depot dealt a major blow to Thrawn's TIE Defender initiative since it destroyed the Empire's fuel supply and also damaged parts of the TIE Defender factory.[6] Thrawn, who had been visiting Coruscant to lobby the Emperor to continue supporting his project,[2] chastised Governor Pryce for her incompetence and vowed to deal with her when he returned to Lothal. To cover up the disaster, Pryce staged a parade to celebrate the death of Kanan Jarrus, a Great Jedi Purge survivor. The Spectres soon learnt about the damage to the Imperial war production on Lothal and were reinvigorated.[6]
Behind the scenes[]
The attack on Lothal was first mentioned in Steps Into Shadow, the season three premiere of Star Wars Rebels. Preparation for the planned attack served as a major plot element throughout the season, culminating in the season finale, "Zero Hour," in which the Rebels were ambushed before they could carry it out. The attack finally occurred in the fourth season episode "Rebel Assault."
Appearances[]
- Star Wars Rebels: Steps Into Shadow (First mentioned)
 Star Wars Rebels — "An Inside Man" (Mentioned only)
 Star Wars Rebels — "Visions and Voices" (Mentioned only)
 Star Wars Rebels — "Trials of the Darksaber" (Mentioned only) (First identified as attack on Lothal)
 Star Wars Rebels — "Through Imperial Eyes" (Indirect mention only)
 Star Wars Rebels — "Double Agent Droid" (Mentioned only)
 Star Wars Rebels — "Twin Suns" (Mentioned only)
 Star Wars Rebels — "Zero Hour" (Mentioned only)
 Star Wars Rebels — "In the Name of the Rebellion" (Mentioned only)
 Star Wars Rebels — "The Occupation" (Mentioned only)
 Star Wars Rebels — "Flight of the Defender" (Mentioned only)
 Star Wars Rebels — "Crawler Commandeers" (Mentioned only)
 Star Wars Rebels — "Rebel Assault" (First appearance)
 Star Wars Rebels — "Jedi Night" (Mentioned only)
- Thrawn: Treason (Mentioned only)
- Thrawn: Treason audiobook (Mentioned only)
 Star Wars Rebels — "DUME" (Mentioned only)
Sources[]
- Star Wars: Rogue One: The Ultimate Visual Guide
 Rebels Recon #3.20: Inside "Twin Suns" | Star Wars Rebels on the official Star Wars YouTube channel (backup link) (Posted on StarWars.com)
 Rebels Recon #3.21: Inside "Zero Hour" | Star Wars Rebels on the official Star Wars YouTube channel (backup link) (Posted on StarWars.com)
 Star Wars Rebels Season 4 Trailer (Official) on the official Star Wars YouTube channel (backup link) (Posted on StarWars.com)
 Star Wars Rebels Season 4 Trailer 2 (Official) on the official Star Wars YouTube channel (backup link) (Posted on StarWars.com)
 Rebels Recon #4.3: Inside "The Occupation" & "Flight of the Defender" | Star Wars Rebels on the official Star Wars YouTube channel (backup link) (Posted on StarWars.com)
 An Opening – "Rebel Assault" Preview | Star Wars Rebels on the official Star Wars YouTube channel (backup link) (Posted on StarWars.com)
 Rebels Recon #4.4: Inside "Kindred" & "Crawler Commandeers" | Star Wars Rebels on the official Star Wars YouTube channel (backup link) (Posted on StarWars.com)
 Star Wars: Build Your Own X-Wing 64 (Starfighter Aces: Mart Mattin – Iron Squadron Leader) (First identified as Battle of Lothal) (First identified as fighter assault on Lothal)
Notes and references[]
- ↑ 1.0 1.1 1.2
 Star Wars Rebels — "Crawler Commandeers"
- ↑ 2.0 2.1 2.2
 Star Wars Rebels — "Jedi Night"
- ↑ 3.00 3.01 3.02 3.03 3.04 3.05 3.06 3.07 3.08 3.09 3.10 3.11 3.12 3.13 3.14 3.15 3.16 3.17 3.18 3.19 3.20 3.21 3.22 3.23 3.24 3.25 3.26 3.27 3.28 3.29 3.30 3.31 3.32 3.33 3.34 3.35 3.36 3.37 3.38 3.39 3.40 3.41 3.42 3.43 3.44 3.45 3.46 3.47 3.48 3.49 3.50 3.51 3.52 3.53 3.54 3.55 3.56 3.57 3.58 3.59 3.60 3.61 3.62 3.63 3.64 3.65 3.66 3.67 3.68 3.69 3.70 3.71 3.72 3.73 3.74 3.75 3.76 3.77 3.78 3.79 3.80 3.81 3.82 3.83 3.84 3.85 3.86 3.87 3.88 3.89
 Star Wars Rebels — "Rebel Assault"
- ↑ Thrawn: Alliances
- ↑ 5.0 5.1 5.2 Star Wars: Timelines
- ↑ 6.0 6.1 6.2
 Star Wars Rebels — "DUME"
- ↑ 7.0 7.1 7.2 7.3 7.4 7.5 7.6
 Star Wars Rebels — "An Inside Man"
- ↑ 8.0 8.1 Star Wars Rebels: The Siege of Lothal
- ↑ 9.0 9.1 9.2 9.3 9.4 9.5 9.6 Star Wars Rebels: Steps Into Shadow
- ↑ 10.0 10.1 10.2 10.3 10.4 10.5 10.6 10.7 10.8
 Star Wars Rebels — "Zero Hour"
- ↑
 Star Wars Rebels — "Legacy"
- ↑ Thrawn
- ↑
 Star Wars Rebels — "Secret Cargo"
- ↑
 Star Wars Rebels — "The Honorable Ones"
- ↑
 Star Wars Rebels — "Warhead"
- ↑
 Star Wars Rebels — "Through Imperial Eyes"
- ↑
 Star Wars Rebels — "Legacy of Mandalore"
- ↑ 18.0 18.1
 Star Wars Rebels — "In the Name of the Rebellion"
- ↑ Star Wars Rebels: Heroes of Mandalore
- ↑
 Star Wars Rebels — "The Occupation"
- ↑ 21.0 21.1
 Star Wars Rebels — "Flight of the Defender"
- ↑
 Star Wars Rebels — "Kindred"

