| | |
- "Ahsoka, surely you understand this is a pivotal moment in the Clone Wars. The heart of the Republic is under attack."
- ―Obi-Wan Kenobi, to Ahsoka Tano
The Battle of Coruscant, also known as the first Battle of Coruscant or Siege of Coruscant, was a crucial battle that took place in 19 BBY on the surface and in orbit of the planet Coruscant, the capital world of the Galactic Republic, during the waning days of the Clone Wars. As the war began to progress to its closure, in which it appeared that the Republic's ultimate victory was inevitable with their opposition, the Confederacy of Independent Systems, trapped in a series of sieges throughout the Outer Rim Territories. In an attempt to turn the war in their favor, as the Republic's experienced officers and Jedi Generals were preoccupied with the Outer Rim Sieges, Separatist leaders Head of State Count Dooku and Supreme Martial Commander of the Separatist Droid Armies General Grievous launched a massive and unprecedented assault on the Republic capital, who were ordered by the Dark Lord of the Sith, Darth Sidious—publicly known as Supreme Chancellor Sheev Palpatine—to kidnap the Chancellor as part of his plot to bring Jedi Knight Anakin Skywalker closer to the dark side of the Force.
After they arrived in Coruscant's orbit without warning, Grievous's massive fleet, flagged by the Providence-class Dreadnought Invisible Hand, was able to overwhelm and destroy most of the ill-prepared Coruscant Home Defense Fleet. As the two fleets engaged one another, the Separatist general managed to slip down to the planet's surface along with tens of thousands of other battle droids, where he was able to complete his mission and bring Chancellor Palpatine aboard his flagship following a prolonged chase through the Galactic City's Federal District. On the verge of their ultimate victory with the Chancellor taken prisoner, which would thereby force the Republic to open negotiations with the Confederacy, Grievous was instead ordered by Dooku to remain in orbit and engage the Republic fleet at close quarters. However, despite their efforts, Republic reinforcements from across the galaxy, including the Open Circle Fleets, arrived and proceeded to engage the Separatist fleet, with the intent of preventing their escape while also laying waste to as many warships as possible.
Amid the chaotic engagement, two Jedi Generals, Obi-Wan Kenobi and Anakin Skywalker, taking advantage of its confusion, flew into the center of the battle as they boarded Grievous's command ship following a prolonged struggle with several squadrons of droid starfighters. Upon their infiltration of the Invisible Hand, Kenobi and Skywalker were able to navigate themselves throughout the warship's interior to the Chancellor's location aboard the main observation platform, where they were confronted by the Sith Lord Dooku, who was subsequently executed by Skywalker at Palpatine's behest after a brief duel. However, while making their escape, the two Jedi were captured and brought to the Kaleesh general aboard the command bridge, which resulted in a brief skirmish as they forced the general to flee the command ship and returned the Chancellor to the safety of the Republic.
Following Palpatine's return to safety alongside the losses of Count Dooku and a third of their deployed fleet, Grievous became the Confederacy's new Head of State upon Dooku's death as he ordered the immediate withdrawal of his remaining forces and proceeded to flee into the Outer Rim. With Grievous's retreat, the Chancellor assured the Republic that the war would instead continue as long as the general still lived. As a result, the task of locating Grievous became the Jedi Order's highest priority as they began to conduct extensive searches throughout the galaxy.
Prelude[]
On the verge of victory[]
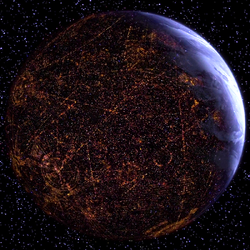
For over a thousand years, Coruscant served as the seat of power and capital of the Galactic Republic.
Sometime after the outbreak of the Clone Wars,[31] at the First Battle of Geonosis in 22 BBY,[4] Jedi Master Mace Windu had suspected that the Confederacy of Independent Systems had developed an intentive desire to reach[32] the Galactic Republic's capital world[4] of Coruscant, located in the galaxy's Core Worlds. At such an early stage in the war, understanding that the Confederacy had continuously extended their reach throughout the vastness of the Outer Rim Territories, Windu recounted how power often followed in concentric circles. He further postulated that, following the confederate government's acquisition of a foothold in the Outer Rim, they would proceed to follow through with their intentions and make their advancements on the interior regions, including Coruscant.[32]
In 19 BBY,[4] as the war began the progress to its closure, in which it became apparent that the Republic's ultimate victory was inevitable,[9] the Confederacy had launched a major offensive across the Outer Rim under the direct command of Supreme Martial Commander of the Separatist Droid Armies General Grievous. With the Republic and its military pushed to the brink, the Jedi High Council, in response, deployed many of their battle-hardened forces and experienced Jedi Generals and officers to bolster their beleaguered clone troopers and engage the confederate government.[1] However, while the engagements of the Outer Rim Sieges had proven to be attritional to the Confederacy, leading to the government's seeming entrapment, with military spending and requisition bills passing through the Galactic Senate, accompanied by an increase in clone troopers, the momentum of the war appeared to be with the Republic.[9]
Although the Republic saw many victories in their engagements, the government's deployment of its experienced and battle-ready forces had subsequently left the Interior and its capital of Coruscant with comparatively few defensive measures, such as by the ill-prepared Coruscant Home Defense Fleet, commanded by[5] Commander[9] Honor Salima, which had not been instructed on the procedures for possible full-scale attacks on the planet. Republic strategists also developed minimal worries as they believed that the Confederacy would not dare attempt such a desperate assault, which allowed them to focus their efforts on the Outer Rim Sieges while also leaving their capital sparsely defended. Furthermore, the citizens of Coruscant also had very little worries of such attacks, believing that the confederate government's ultimate surrender was near.[5]
Planning a countereffort[]
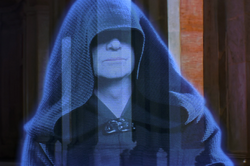
Darth Sidious had orchestrated an assault on Coruscant in order to lure Anakin Skywalker closer to the dark side.
Prior to the attack and sometime after his loss of the Subjugator-class heavy cruiser Malevolence, Grievous had demanded he receive command and ownership over the Providence-class Dreadnought Invisible Hand from Trade Federation Viceroy Nute Gunray. In response, Gunray refused to comply with the general's demands, but later received direct orders from the Dark Lord of the Sith and the Confederacy's shadow leader, Darth Sidious, to transfer the dreadnought's command to Grievous, much to the general's pleasure.[33] Afterward, as the Kaleesh general utilized the Invisible Hand in a series of skirmishes, Grievous and Confederate Head of State, Count Dooku, were ordered by Sidious, Dooku's master,[27] to conduct a massive assault on the Republic's capital, with the intention of capturing Supreme Chancellor Sheev Palpatine, the Sith Lord's public identity. As such, Sidious hoped the battle would be able to lure Dooku's nemesis Jedi Knight Anakin Skywalker to the battle and kill Dooku in order to bring him closer to the dark side of the Force,[3] while the Count had believed that the battle was arranged for him to claim victory over the Jedi Knight and so they could turn Skywalker together.[9]
Dooku and Grievous also intended on using the battle as a way to secure a both a dramatic and decisive victory for the confederate government, as the Chancellor's capture would subsequently force the officers of Republic High Command to negotiate with the Confederacy and surrender deep concessions to them, while also gaining a massive propagandic victory.[5] As a result, it was believed that Sidious provided Grievous with the coordinates for the strategically valuable Nexus Route in order for him to facilitate the assault,[9] using the Invisible Hand as his flagship.[3]
The battle[]
Strike on Coruscant[]
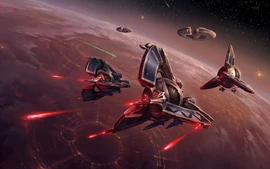
Tri-fighters and other Separatist vessels during the battle.
Upon their arrival alongside a massive Separatist fleet of over 1,000 warships flagged by the Invisible Hand, Grievous launched a massive and unprecedented assault on the Republic capital, in which all inhabitants on the planet's surface had realized upon the Invisible Hand's departure from hyperspace that the Kaleesh general was leading the attack, where his command ship proceeded to engage the capital ships and Star Destroyers of the Republic Navy's planetary defense fleet. With the inexperienced Coruscant Home Defense Fleet caught off guard and overwhelmed, the Separatist fleet was able to reduce a substantial amount of the defending Star Destroyers to flaming wreckage, while the dreadnought claimed multiple kills within minutes of the assault's outbreak.[27] Droid fighters on the surface supported the battle droids, spraying fire on the ground preventing Yoda and Mace Windu from moving, so Grievous could act.[6]
Yoda would, however, use the Force to make attacking ships crash into each other.[34] As the two fleets engaged one another in orbit, the Kaleesh general proceeded with his mission to capture the Supreme Chancellor as he evaded the planet's defense forces and landed on Coruscant's surface in the Federal District alongside a strike force.[5] During the battle, the Galactic Senate Building and its surrounding areas would be consumed in flames. A Alpha-3 Nimbus-class V-wing starfighter[35] piloted by clone trooper pilot Contrail[18] flew across the skies above the burning district.[35]
The battle that raged above had also resulted in disastorous impacts on the vast Galactic City across the surface. With each battleship that collided with the structures, the cityscape became scarred with a ten-kilometer crater, as well as subsequent shockwaves that leveled the structures within the vicinity of each crash. In response, confident rescue-service pilots from the Coruscant Rescue Ops worked tirelessly in countless civil emergency vehicles as they retrieved the crewmembers of doomed starships from the battle above, while also guiding the plummeting hulks to reduce the loss of civilian life and damage to the city.[23] As a result of the extensive damage dealt to the planet's typically impenetrable shields following constant bombardments from the Separatist fleet, the Coruscant Rescue Ops were placed on twenty-four hour alert as all members were required to report to their districts,[36] where fire teams in F-143 emergency speeders were deployed to patrol the skies above and douse and divert burning vessels that fallen through the atmosphere after losing repulsor power with their tractor beams,[9] or operate the busy service and refuelling stations.[36]
Capture of Palpatine[]
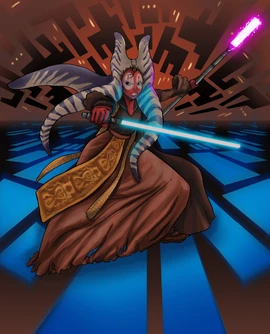
During his pursuit of Chancellor Palpatine, Jedi Master Shaak Ti was engaged and incapacitated by Grievous, leading to the loss of her lightsaber.
After landing in the Galactic City, Grievous began his advancement on the Chancellor's position, who had been heavily guarded by Republic security forces and several Jedi, including[16] Jedi Master[37] Roron Corobb.[16] Palpatine's apartment had been escorted by Shaak Ti and Roron Corobb, along with clone troopers, who ordered him to leave. Although Palpatine ignored their concerns, deciding not to flee in the face of the Separatists attack, and then Grievous appeared, accompanied by his MagnaGuards.[37] In his efforts and despite the Republic's actions to repel the general, Grievous was able to dispatch several layers of the Chancellor's security personnel and Corobb alongside, but had later come into a brief encounter with Jedi Master Shaak Ti,[16] who also engaged a number of his IG-100 MagnaGuards with an electrostaff in one hand and her lightsaber in the other.[38] Despite Ti's efforts, Grievous had managed to triumph over the Jedi Master, and she was relinquished of her lightsaber following her incapacitation by the general's use of electrical cables.[16]
As such, the Kaleesh was able to capture the Chancellor and return to the Invisible Hand in orbit.[5] With the Separatists on the verge of their ultimate triumph over the Republic,[9] the officers of Republic High Command began to fear that, should the Confederacy escape with Palpatine, an immense psychological fallout would allow, along with the exposure of Coruscant's vulnerability. The Chancellor would possibly be subject to a show trial broadcast throughout the galaxy, which could thereby result in his subsequent execution. Alternatively, the Confederacy could bring High Command to the negotiating table, where the Republic would need to offer the confederate government deep concessions in return for Palpatine. To prevent either outcome, the Invisible Hand was made the Republic's primary target.[5]
Continued engagement[]
- "Right now, people on Coruscant need us."
"No. The Chancellor needs you."
"That's not fair."
"I'm not trying to be." - ―Obi-Wan Kenobi and Ahsoka Tano
However, despite victory within reach, Grievous had instead received orders from Dooku to remain in the planet's orbit and continue to engage the Republic defense fleet at close quarters,[9] which had managed to organize itself into attack formations following the general's return to the Invisible Hand.[5] As a result, the battle above Coruscant had become increasingly chaotic, with battle lines becoming blurred as they overlapped into three dimensions in the thousands of capital ships' attempts to gain elevation over their opponents by utilizing the planet's atmosphere as a foundation. Furthermore, with the close proximity of either sides' warships to each other, the weapon systems of both the Republic and Confederacy's starships, such as the Invisible Hand's array of mass-driver cannons, were utilized to great and devastating effect during broadside engagements as vessels crossed paths.[9]
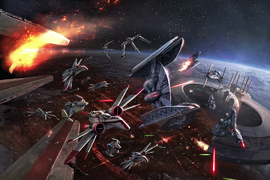
The space battle raged between starfighters and capital ships.
After Grievous's return, the Coruscant Home Defense Fleet's vessels received orders from Commander Honor Salima to close the Confederacy's hyperspace jump point and blockade the Invisible Hand in order to prevent its extrication and provide time for the arrival of Republic reinforcements from all across the galaxy. Following the arrival of reinforcements, including hundreds of warships from the Open Circle Fleet, Grievous had rallied his remaining capital ships as they began to trade fire with the Venator-class Star Destroyers,[5] while also employing a Brawl tactic in order to exploit the limited reactions of the droid crews and commanders[39] as they fought with an intentive desire to maximize the Confederacy's casualties, resulting in a free for all between the two forces. The Republic fleet also sought to destroy as many of their warships as possible, as well as prevent their withdrawal, forcing the Separatist capital ships of Lucrehulk-class Battleships,[5] Munificent-class star frigates, and Recusant-class light destroyers,[5] including the Patriot Fist,[24] to battle the Republic for their very survival, resulting in heavy casualties on both sides.[5] Meanwhile, starfighter squadrons of either fleet had fought to exploit openings and increase damage to vessels without shielding systems or with damaged shields.[9]
While the two fleets continued their engagements of one another, Jedi General Saesee Tiin, alongside a force of clone troopers had launched from the Star Destroyer Impavid to the Confederacy's Providence-class Dreadnought Prosperous, resulting in the destroyer's capture by the Republic.[15] As the Republic fought to ensure the Confederacy's inability to withdraw, specifically the Invisible Hand, the confederate government's battle plan had become less apparent as a result of the battle, but had instead appeared that their intentions were to cripple the Republic's fleet, with the space above the planet becoming choked by shattering hulks and flaming wreckage. However, despite the strategies employed by both fleets, the chaotic engagement itself had swiftly descended into local battles between nearby warships alongside support from starfighters, which filled the gaps of space between the capital ships. Furthermore, signs of coherent control from the military commanders of either force had begun to collapse, with targets of military worth becoming neglected as warships fired on those of convenience or proximity.[9]
Jedi rescue[]
- "This is where the fun begins!"
- ―Anakin Skywalker
Race to the Invisible Hand[]
- "Clone Flight Squad Seven launched from the carrier Ro-Ti-Mundi. Our mission was to escort Jedi Generals Obi-Wan Kenobi and Anakin Skywalker to the Separatist flagship Invisible Hand and cover them while they executed a boarding action. Once we hit space I ordered Squad Seven's V-19s to take point. The Seps were on us as soon as shook the dust from our wings. The V-19s punched a hole through the droid tri-fighters that tried to block our advance. Lost two pilots. I brought up my ARC-170's to tail the Jedi and ordered the other heavy hitters to do the same."
- ―Clone Pilot Oddball gives his account of the Battle of Coruscant
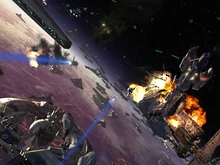
A pair of missiles pursue Obi-Wan Kenobi's starfighter.
As Master Skywalker met with his former Padawan, Ahsoka Tano, who was preparing to launch an assault against Darth Sidious' former and original apprentice the renegade Sith Lord Darth Maul and his forces on the planet Mandalore, Skywalker learned that the Separatists had kidnapped Chancellor Palpatine and both he[2] and his mentor Jedi Master Obi-Wan Kenobi were forced to come to Coruscant[3] with their fleet group,[40] flying out in their Eta-2 Actis-class light interceptors once they arrived above Coruscant but divided his forces so Tano could defeat Maul and save Mandalore.[3] To assist the Jedi Generals in their mission to rescue Palpatine, elite clone trooper pilots of Clone Flight Squad Seven under clone pilot Davijaan, otherwise known as "Oddball," launched from the Venator-class Star Destroyer Ro-ti-Mundi. Oddball ordered his squad's V-19 Torrent starfighters to take point, which allowed the V-19 torrents to punch a hole through the Separatist tri-fighters, and while two pilots were lost during this, the squad kept moving.[5]
Oddball brought his Aggressive ReConnaissance-170 starfighters to tail the Jedi.[5] As they piloted their fighters towards[3] the Invisible Hand,[26] they found hundreds of vulture droids and tri-fighters swarming around the General's command ship. The Jedi engaged the enemy fighters with the help of the clone fighter squad.[3] At the same time, support frigates were also defending the Invisible Hand, and Recusant-class light destroyers, Lucrehulk-class Battleships, and Munificent-class star frigates battled against Republic ships. The Republic craft made an aggressive push to try to trap as many enemy capital ships as they could, but due to everything in the battle the ship fighting became a slugging match, and there were heavy casualties on all sides. Starships made close passes to each other, and multiple of the larger ships started to vent atmosphere. Smaller frigates completely broke apart, and their fragments became hazards in space. During the battle, small groups of vacuum-suited clone jetpack troopers flew through space to board damaged Separatist vessels to take their bridges.[5]
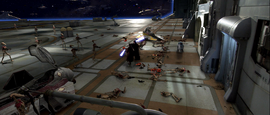
The Jedi board the Invisible Hand.
In Skywalker's and Kenobi's struggle towards the Separatist flagship, the clones started to take casualties in the dogfight, and Skywalker wished to go back and help. Kenobi, however, would not let him, insisting that they had to stick to the mission.[3] Flight Squad Seven boosted their afterburners to keep up with the Jedi, and Oddball later guessed that it was Skywalker causing the Jedi to go so fast. The Jedi and clones were then attacked by a swarm of Vulture droids, and the droid starfighters fired missiles at them,[5] but Skywalker managed to evade them by rolling, which caused the missile's' flight paths to intersect.[3]
Kenobi, however, was not able to avoid the missiles targeting him, and they eventually exploded, releasing a horde of buzz droids that attached themselves to his ship's hull. They destroyed his astromech droid R4-P17, and the droids were rapidly disabled Kenobi's Jedi interceptor as well, however, Skywalker managed to save his friend by firing on the buzz droids as well as smashing into Kenobi's ship and crushing them. In doing so, however, he also heavily damaged Kenobi's interceptor. One of the surviving buzz droids managed to climb aboard Anakin's interceptor, but his astromech R2-D2, at the guidance of Kenobi and Skywalker, managed to deactivate it by zapping it in the center eye with one of his electrical tools.[3] Flight Squad Seven had troubles of their own with the Buzz droids, with the droids disabling one ARC-170 by cutting its engines and sending it out of action. Another ARC-170 lost its weapons to the droids, and was forced to return to Ro-Ti-Mundi. Oddball did notice the Jedi were having buzz droid problems, but by the time the squad had caught up, the Jedi had dealt with them.[5]
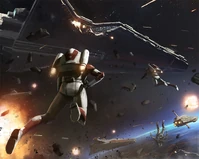
During the battle, groups of clone jetpack troopers with vacuum fitted suits boarded enemy craft.
As they hurtled toward Grievous' flagship, Skywalker, after being reminded by Kenobi and R2 that the flagship's shields were still up, destroyed the atmospheric containment shield protecting the hangar bay entrance. With Kenobi's ship's engines failing, the two fighters breached the vessel's defenses and crashed in the hangar, and there the Jedi made quick work of the security droid resistance.[3] The Jedi reaching the ship also meant that Flight Squad Seven's mission was complete. Oddball directed his squadron to eliminate necessary targets and stay close in case the Jedi needed cover on their way out of the ship.[5]
Back with the Jedi, Artoo located Palpatine's homing beacon, and they headed towards the signal emanating from the upper observation deck, but Grievous knew that the Jedi would come aboard his flagship, as Count Dooku had predicted it beforehand. He was requested on the bridge via the ship's captain and was told that the Jedi were now being tracked.[3]
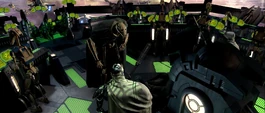
Grievous on the bridge of his command ship.
As the two Jedi headed towards Palpatine, they boarded a turbolift upon a quick evasion from a trio of destroyer droids, where Kenobi and Skywalker found a group of security battle droids. They requested for the Jedi Knights to drop their weapons, however, this backfired when it caused them to drop their own guard instead, giving the Jedi Knights an opportunity to cut them all down. After a brief misadventure when the lift they were using was abruptly stopped, Kenobi and Skywalker were assisted by Artoo in getting to the top of[3] the Invisible Hand,[26] where they found Palpatine being held captive. Similarly, Artoo was briefly captured by two patrolling B2-series super battle droids shortly thereafter, although Artoo managed to escape by spraying them with oil, and then igniting the oil when activating his thrusters to fly off, burning them to inoperability.[3] This was simply another example of the astromech's heroics because if he had failed at any point in the battle, the engagement would have ended in a disaster for the Republic.[5]
Duel with a Sith[]
- "Get help. You're no match for him. He's a Sith Lord."
"Chancellor Palpatine, Sith Lords are our speciality." - ―Palpatine and Obi-Wan Kenobi
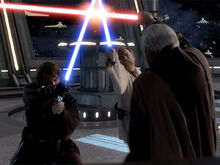
The duel on the Invisible Hand.
Before the Jedi were able to release Palpatine, Darth Tyranus, publicly known as Count Dooku, arrived with two B2 super battle droids. He jumped down from the balcony and engaged the Jedi in a fierce duel. However as a result of his old body, he found himself unable to fight both Skywalker and Kenobi at once, so he Force pushed Kenobi away from the duel so he could focus on fighting Skywalker. However, Dooku still began to tire as Skywalker drove him back up the stairs to the balcony. Kenobi, quickly recovering, brought down the Sith Lord's escort and continued to attempt an attack on him from behind.[3]
Dooku, however, simply kicked aside Skywalker and incapacitated Kenobi more permanently by slamming him into a railing with the Force and causing debris to fall on him. Angered, Skywalker kicked Dooku back off the balcony and once again engaged him. Sensing that Skywalker was holding back his anger and hate, Dooku taunted him, hoping to disrupt his concentration. However, it had the opposite effect. It infuriated Skywalker to the point where he tapped into the dark side. He attacked Dooku with his rage and hatred, throwing fast, heavy attacks against the Sith Lord. Dooku could barely deflect his opponent's blows, let alone fight back, and was even singed by his own blade at one point. Finally, Skywalker managed to overpower Dooku's defense and cut off his hands. Grabbing Dooku's lightsaber with his offhand, he held both blades in a scissor position around the now defenseless Sith Lord's neck.[3]
Still bound to his chair, Palpatine commended Skywalker's victory, before ordering the Jedi Knight to kill Dooku, thus betraying his apprentice. Shocked by his own master's order and betrayal, Dooku looked at Palpatine with a look of shock on his face, only to be met with a more sinister smile by his master. Skywalker was hesitant at first, as killing a defenseless opponent—which Dooku now was—was against the Jedi way. However, with Sidious goading him on and saying do it, he gave in to his hatred and beheaded Count Dooku.[3] This move left the Confederacy of Independent Systems without its leader, founder, and main political figure.[5]
Continued battle[]
The Invisible Hand vs the Guarlara[]
- "All batteries, fire, fire!"
- ―Lushros Dofine, after engaging the Guarlara
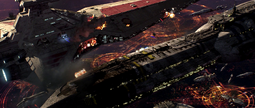
The Guarlara and the Invisible Hand exchange turbolaser fire.
As the duel ended, the Invisible Hand was intercepted by the Venator-class Star Destroyer Guarlara, engaging in a brief firefight against each other, with the Invisible Hand taking extensive damage in the process,[5] causing the ship to momentarily plummet towards the planet below before control was regained by its crew. With many essential systems failing, the Invisible Hand had become a decaying space wreck and Skywalker's priority was now to escape. Gathering the unconscious Kenobi against Palpatine's request to leave him behind, they headed for the turbolifts. Skywalker discovered that the elevator wasn't functional and ordered R2-D2 to reactivate the elevator.[3]
Later, the Invisible Hand had become trapped by Home Fleet Strike Group Five under the command of Republic Lieutenant Commander Lorth Needa, who demanded Grievous to surrender. However, the Kaleesh explained to the lieutenant that the Chancellor was currently onboard his ship, but Needa did not believe Grievous's claims and gave the general ten minutes to prove his words before the massed ships of Strike Group Five were to open fire on the dreadnought.[11]
Kenobi regained consciousness soon after, and the trio headed for the hangar, but before they could reach it Grievous learned that they were in hallway 328. The cyborg ordered that the ray shields be activated; as such, the shields dropped on the Jedi and Palpatine, trapping them. Skywalker was sure that R2-D2 would arrive and release the shields, but as the astromech came screeching in, droidekas unfolded and aimed at him, and a super battle droid even kicked him down to his back after being zapped in the wrist blaster. Surrounded and outnumbered, Kenobi humorously asked if Skywalker had a backup plan. The Jedi, along with the Chancellor and R2-D2, were captured and taken to the bridge and brought before Grievous.[3]
Confrontation with Grievous[]
- "Ah, yes, the negotiator: General Kenobi. We've been waiting for you. That wasn't much of a rescue."
"You're welcome."
"And, Anakin Skywalker, I was expecting someone with your reputation to be a little... older."
"General Grievous, you're shorter than I expected."
"Jedi scum!" - ―General Grievous and Anakin Skywalker meeting for the very first time
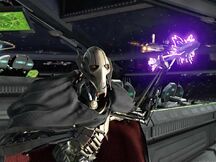
General Grievous using an electrostaff.
Amid the battle in space, Republic officers used a Brawl tactic against the enemy fleet, which would prove to exploit the weakness of the droid captains aboard Separatist craft.[39] After the Jedi, Palpatine, and Artoo were brought aboard[3] the Invisible Hand's[26] bridge, the cyborg general mocked Skywalker and his nemesis on their failed rescue and took their lightsabers from an OOM command battle droid, noticing that Anakin Skywalker was in front of him, finally meeting him face-to-face, both mocking one another, Skywalker angering Grievous in the process. Boasting about adding their lightsabers to his collection, Kenobi assured Grievous that this time he wouldn't escape. R2 suddenly distracted the guards at Skywalker's command with his tools, and Skywalker and Kenobi were able to summon their lightsabers back as Grievous ordered his MagnaGuards, IG-101 and IG-102, to dispose of the Jedi. After a quick battle, the Jedi easily defeated the droids and freed Palpatine from the grip of two security droids. Grievous ordered the crew to keep the ship in orbit, but soon the pair of Jedi closed in on the cyborg, intent on capturing him. Grievous, however, grabbed an electrostaff that one of his MagnaGuards had dropped and threw it into the damaged bridge viewport, shattering it.[3]
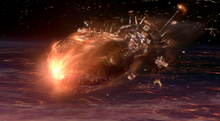
The Invisible Hand splits in half.
Grievous allowed himself to be sucked out into space to escape the Jedi and later re-entered the ship through a hatch. The Neimoidians and OOM pilot battle droids quickly abandoned the bridge, and some of the pilot droids were cut down by the Jedi.[3] In an attempt to foil the Jedi's escape, Grievous launched every escape pod on his flagship, fleeing in one, and his pod was recovered by the Lucrehulk-class Battleship[12] Profusion. The Invisible Hand's hull sagged under the pressure of Coruscant's gravity well,[5] and began a meteoric plunge toward Coruscant.[3]
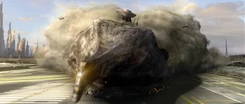
The Invisible Hand lands on Coruscant toward the end of the battle.
The ship's internal gravity quickly switched polarities due to the gravity well,[5] but despite everything Skywalker took control of the helm, and attempted to pilot the wreck to a safe landing on Coruscant. Rapidly losing structural integrity, the entire rear half of the Invisible Hand tore off due to the atmospheric stress[3] and the loss of the ship's tensor fields. Oddball witnessed the ship fall and break in half, and he later said that he didn't expect that the Jedi would survive.[5] In spite of the heavy damage, Skywalker, Kenobi, and Artoo managed to successfully crash-land the ship on a long[3] emergency[5] runway in Galactic City. With the loss of their flagship, the failure of their main objective, and the death of Count Dooku;[3] Grievous and the surviving elements of the depleted Separatist armada retreated in disgrace. Not all ships could follow however, as a third of the armada[5] deployed to Coruscant[28] had been lost, whether it was due to engine damage, critical ship failures or destruction. More ships under the command of organics like Neimoidians or Muuns surrendered, but droid starfighters did not. It took hours for clone pilots to clear out the rest of the vulture droids, tri-fighters, and Hyena bombers.[5]
Aftermath[]
- "Soon I will have a new apprentice, one far younger and more powerful."
- ―Darth Sidious, conferring with General Grievous after the battle
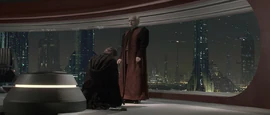
Anakin Skywalker becomes Darth Sidious' new apprentice.
Palpatine was quickly returned to the Republic, where he was greeted by various senators and Master Windu. After landing on the capital, Obi-Wan returned to the Jedi Temple, and Skywalker went with the group of politicians. Palpatine praised the heroics of the Jedi who had rescued him and mentioned how they had killed Count Dooku, but how Grievous had once again escaped. Palpatine informed Windu that the Senate would continue the war as long as Grievous lived since he now had taken Count Dooku's place as the leader of the Separatist Alliance, so Windu made sure the Jedi's top priority would be finding the General. Skywalker briefly talked with Senator Bail Organa, as Artoo reunited with C-3PO. Skywalker then secretly met with his wife, Padmé Amidala, and it was their first meeting in some time, as the Jedi Knight had been away fighting the Outer Rim Sieges. There Padmé revealed that she was pregnant, and she questioned what they would do because she knew Skywalker was a Jedi and marriage was against the Jedi Order's rules but her husband told her not to worry about it for now because this was the happiest moment of his life.[3]
Dooku's death at the hands of Skywalker precluded the Jedi from learning more about Darth Sidious. When Tano informed Kenobi during the Siege of Mandalore that Maul had knowledge about his old master, Kenobi asked them to capture Maul so he could reveal Sidious' public identity to the Jedi Council.[41]
At some point after the battle, Oddball gave a post-mission summary of flight squad seven's mission. The pilot went over their launch to the destruction of the Invisible Hand. The pilot mentioned that after he saw the CIS flagship break in half that he believed that the Jedi would not escape.[5]
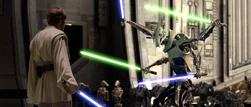
Grievous and Kenobi had one last duel on Utapau
The Separatists were dealt a crippling loss from Coruscant,[5] with an entire third of the fleet they had deployed into the battle lost.[28] Worse than that though was the loss of their leader, Count Dooku. After his death, Grievous became the Confederacy's new Head of State,[5] but it greatly destabilized the Separatist control structure. Without the assurances of victory from Dooku, the members of the Separatist Council, particularly Viceroy Nute Gunray, began to doubt the abilities of their new leader to keep them safe for much longer. Meanwhile, the Jedi High Council made tracking down Grievous and bringing him to justice their utmost priority in hope of finally ending the war. The Jedi Order would go on to track him to Utapau, where they launched an assault in which Kenobi confronted and killed Grievous[3] only a few days after the Battle of Coruscant.[5]
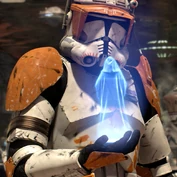
The control chips implanted in the clones forced them to obey Order 66.
During the Battle of Utapau, Palpatine successfully achieved his goal of converting Skywalker to the dark side of the Force and took the fallen Jedi Knight as his new and last apprentice, thus replacing Count Dooku, in return for saving his wife from her death. The Chancellor dubbed Skywalker as "Darth Vader" and executed Order 66, branding the Jedi as traitors and creating media that the Jedi were behind the whole Clone Wars. With the Jedi Order destroyed, Palpatine transformed the Republic into the Galactic Empire and named himself as its Galactic Emperor.[3]
The Battle of Coruscant had shown that dangers existed close to Coruscant, and this meant Palpatine faced almost no opposition to expanding the military and making a central authority. The Clone Wars had finally ended and while the galaxy had technically achieved peace, it was at the cost of freedom.[5] As recounted in Hondo Ohnaka's Galactic Explorer's Guide, falling debris from the orbital combat left scars that marred Coruscant's cityscape for decades.[42]
Behind the scenes[]
- "[Lucas] has also altered the beginning of the film. Instead of starting with seven battles on seven planets, Episode III now opens with a huge space battle. Our heroes crash-land into a 'bad guy ship,' perhaps Neimoidian, where there will be lots of 'cliffhangers, from one near-death experience to another Indiana Jones and the Temple of Doom aboard a ship.' The ship might be breaking apart. He asks the artist to work on a 'grand control room and a grand office.' The heroes will be trying to rescue a kidnapped character. For their escapades, he asks the artists to come up with dangerous situations, or what are generally referred to as 'gags'...He then reveals that Anakin and Count Dooku will have a huge deal aboard the ship. The entire opening sequence should last about twenty minutes."
- ―Jonathan W. Rinzler on Episode III's opening battle
The Battle of Coruscant was created for the 2005 film Star Wars: Episode III Revenge of the Sith, the final installment of the Star Wars prequel trilogy.[3]
In the DVD commentary for Revenge of the Sith, George Lucas said that he wanted the Battle of Coruscant to serve as a bridge between the prequel and original trilogy, utilizing ARC-170s as the precursor to X-wings, and including vulture droids from Star Wars: Episode I The Phantom Menace.[44] Anakin Skywalker's and Obi-Wan Kenobi's fraternal relationship through the battle is unmistakable from the 1939 classic film Gunga Din.[45]
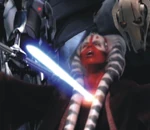
Shaak Ti dying at the hands of Grievous in a deleted scene.
Originally, the Battle of Coruscant was first developed as one of a montage of planets, as the initial story of Episode III was to open with a series of Clone Wars battles across the galaxy.[46] Another unused idea was that Shaak Ti was intended to die during the battle, impaled through her heart by General Grievous aboard the Invisible Hand. Though this scene was present in the storyboards and early drafts for the film, it was deleted from the final cut of the film.[47] Likewise, an idea dropped in the early stages of writing had Palpatine revealing to Anakin that Dooku paid the Tusken Raiders to kill his mother so Skywalker's hatred could be fueled to kill Dooku.[48]
Appearances[]
Non-canon appearances[]
- LEGO Star Wars: Revenge of the Sith (Scholastic)
- William Shakespeare's Tragedy of the Sith's Revenge: Star Wars Part the Third
 LEGO Star Wars: Droid Tales — "Crisis on Coruscant"
 Star Wars Blips — "Fan Droids" (Appears in hologram)
- LEGO Star Wars: The Skywalker Saga
Sources[]
Notes and references[]

