- "The power within will soon serve the Emperor."
- ―Darth Vader, referring to the Malachor Sith Temple
The Mission to Malachor was the last decisive event undertaken during the Great Jedi Purge, occurring during a mission by Jedi Kanan Jarrus and Ezra Bridger as well as Ahsoka Tano, and the astromech droid Chopper to the planet Malachor to seek knowledge that would help them defeat the Sith and their Inquisitors. During the course of their mission, the Jedi came into conflict with the Inquisitors of the Galactic Empire but were aided by an unlikely ally, the former Sith Lord Maul. Joining forces, Maul and the Jedi worked together to obtain a Sith holocron and to plant it in the Malachor Sith Temple's obelisk.
However, Maul then turned on his allies and blinded Kanan with a swing of his lightsaber. The Jedi' problems were further complicated by the arrival of the Sith Lord Darth Vader, who had come to take the secrets of the temple for the Emperor. Together, Kanan and Ezra managed to remove the holocron from the temple's obelisk, which triggered an implosion that damaged much of the temple. While the two Jedi managed to escape on the Phantom with Chopper, Ahsoka stayed behind and confronted her former master, dueling him as the temple collapsed around them. With Tano assumed dead, the Great Jedi Purge came to an end. However, in fact Ahsoka had survived the implosion.
Prelude[]
- "To defeat your enemy, you have to understand them."
- ―Ahsoka Tano
Shortly after the Battle of Fortress Vader, Darth Vader entered a portal constructed by Darth Momin to resurrect his wife Padmé Amidala. While walking through visions, he saw himself and his former Padawan, the Togruta Ahsoka Tano, meeting each other in a temple and dueling with their lightsabers as the words of "it was foretold that you would be here," "I am no Jedi," and "you will die" resounded in his mind.[5]
Before the mission occurred, the Jedi rebels Kanan Jarrus and Ezra Bridger had been hunted by the Seventh Sister and the Fifth Brother; making it nearly impossible for them to help Phoenix Cell to establish a base. Looking for answers, Jarrus and Bridger sought guidance from Tano. She advised they travel to the Jedi Temple on Lothal to speak with Master Yoda. While Yoda counseled Ezra against fighting the Galactic Empire, Bridger was determined to continue helping the Rebellion. Yoda then advised Bridger to find Malachor, which, upon clarification with Tano, Bridger realized was a planet.[6] Millennia earlier, the planet had been the site of a great battle between the Jedi and the Sith which had ended in both sides being destroyed.[1]
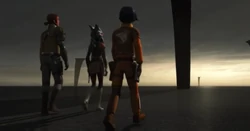
Ahsoka, Kanan, and Ezra arrive on Malachor
After helping the Phoenix Squadron to establish Chopper Base on the planet Atollon, Jarrus, Bridger, Tano, and Chopper traveled on the Phantom to Malachor.[7] Despite Rex's offer to assist them, Tano insisted that this mission was for them alone. She affirmed that the planet contained "forbidden knowledge" that would help them to defeat the Sith and their Inquisitors.[1]
The mission[]
Getting separated[]
As the Phantom descended into Malachor's atmosphere, Chopper picked up an unidentified second ship. The Jedi and Tano quickly realized that they were not alone on Malachor. This second visitor turned out to be an Inquisitor known as the Eighth Brother, who was pursuing a "shadow" which later turned out to be the former Sith apprentice Maul. While Chopper tracked the second ship, the Jedi and Tano inspected a ring of monoliths that were inscribed in an unfamiliar "ancient tongue."[1]
After Ezra accidentally touched one of the monoliths, the ground beneath the three collapsed. The Jedi and Tano quickly found themselves in an underground tunnel and sighted a large pyramidal Sith temple ahead. While passing through an ancient battlefield littered with ossified bodies and lightsabers, they were ambushed by the Eighth Brother. During the ensuing skirmish, the Inquisitor used his double-bladed spinning lightsaber to fire at Ezra, causing the ground beneath him to collapse, separating him from Ahsoka and his master.[1]
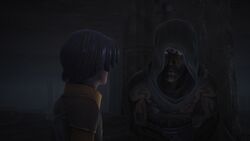
Ezra meets the former Sith Lord Maul
While Ahsoka and Kanan pursued the Eighth Brother, Ezra tried to find his way out of the tunnel. Shortly thereafter, he encountered Maul who introduced himself as "Old Master." While Bridger was initially distrustful of the stranger and rightfully suspected that he was a Sith, Maul managed to convince him by telling him that he was also seeking the same knowledge, in order to avenge the crimes that the Sith had perpetrated against his late mother and brother. Ezra was able to sympathize with Maul's plight due to his own grievances against the Empire for taking away his home and parents.[1]
Together, the two Force-wielders managed to make their way through the Sith temple. After a challenging trial involving the use of Force, Ezra and Maul managed to obtain the Sith holocron. Meanwhile, Kanan and Ahsoka managed to captured the Eighth Brother with the help of Chopper, who used the Inquisitor's own TIE Advanced v1 starfighter against him. Together, Kanan and Ahsoka led their captive to the Sith temple, but were soon ambushed by the Eighth Brother's comrades: the Fifth Brother and the Seventh Sister. They soon engaged the Inquisitors in a lightsaber duel.[1]
A temporary alliance[]
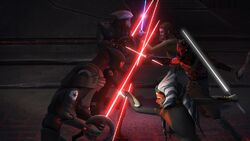
Ahsoka and Kanan helping Maul fight the Inquisitors
At this point, Maul and Ezra stumbled upon the two opposing parties. Using his lightsaber, Maul helped Kanan and Ahsoka to drive the Inquisitors away. While Kanan and Ahsoka distrusted Maul due to his past record, Ezra argued that Maul could be trusted and recounted how they had worked together to obtain the Sith holocron. Following a tense meeting, Maul managed to convince Kanan and Ahsoka to work together by pointing out that the Inquisitors would have alerted Darth Vader to their presence. Maul then convinced his allies into helping him carry out his plan to plant the holocron in the temple's obelisk; claiming that it would give them the knowledge to destroy the Sith.[1]
With Maul intending to destroy the Sith, the Jedi and Ahsoka agreed to assist him on his mission. While Ezra was convinced by Maul, Kanan still harbored his suspicions of the former Sith. As the four travelers climbed the obelisk, Kanan took the opportunity to pull Ezra aside and warn him that Maul could not be trusted. Ezra in turn accused Kanan of holding him back and responded that Maul knew his potential. On the way up, the two Jedi were ambushed by the Eighth Brother, who knocked back Kanan and attempted to steal the Sith holocron. Before the Inquisitor could harm Ezra, Maul arrived at an opportune moment and drove off the Inquisitor.[1]
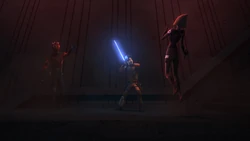
The Seventh Sister shortly before her death
With the Inquisitors after them, Maul convinced the Jedi and Tano to split up. Despite Kanan's objections, Ezra decided to accompany Maul to the top of the obelisk. During the journey, Maul took the opportunity to sow discord between the Padawan and his master. Shortly after, they were attacked by the Seventh Sister and her ID9 seeker droids. Fighting together, the Jedi and former Sith managed to dispatch the seeker droids and overpower the Inquisitor. While Maul held the Seventh Sister suspended in mid-air, he encouraged Ezra to kill her. When Ezra refused, Maul killed the Inquisitor himself and chided the boy for his hesitation.[1]
With the defeat of the Seventh Sister, Maul and Ezra proceeded to Kanan and Ahsoka's location to aid them in their fight against the two remaining Inquisitors. However, before they could join the fight, Maul stopped when he sensed Darth Vader approaching the temple. Feeling Vader's imminent arrival, Maul hastily told Ezra to continue alone to the top of the obelisk while he went to the aid of Kanan and Ahsoka, and the young Jedi complied. Arriving at the scene, Maul joined the assault on the Fifth and Eighth Brother. Ahsoka managed to slash the Fifth Brother's lightsaber, causing him to drop it and allowing Maul to kill the Inquisitor with a slash through the torso. Meanwhile, Kanan managed to damage the Eighth Brother's lightsaber. The surviving Brother then attempted to flee using his spinning lightsaber to fly through the air, but the weapon malfunctioned and the Inquisitor plummeted to his death below. Having eliminated the Inquisitors, Maul then turned on his allies.[1]
Showdown with Darth Vader[]
- " It was foretold that you would be here. Our long-awaited meeting has come at last."
"I'm glad I gave you something to look forward to." - ―Darth Vader and Ahsoka Tano
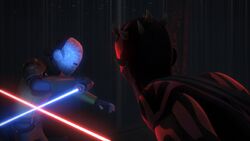
Kanan fighting Maul after being blinded
When Kanan demanded to know where Ezra was, Maul took the opportunity to slash at the Jedi Knight with his lightsaber, cutting Kanan across the face and blinding him. Before Maul could finish off Kanan, Ahsoka attacked him with her two lightsabers. During the duel, Maul revealed that the temple was actually a powerful battle-station capable of destroying all life and that he planned to use it to exact his revenge on all his enemies. Despite being blinded, Kanan managed to muster enough energy to don a Jedi Temple Guard's helmet and rejoined the battle. Seeing him, Tano proceeded to taunt Maul, telling him that he would have to defeat Kanan before he could challenge her. After telling Tano to find Ezra, Kanan prepared to fight Maul, and, although he could not see, he sensed Maul's attack and managed to throw Maul off the edge of the temple. He then contacted Chopper and told the astromech droid to bring the Phantom to pick them up.[1]
Meanwhile, Ezra managed to plant the holocron in the temple's obelisk. He was immediately greeted by a female entity known as "Presence," who revealed the temple's true function. When Ezra expressed revulsion, Presence told the young Jedi that she would instead share the power with someone else more worthy. At that moment, Darth Vader himself arrived on his TIE Advanced x1 starfighter. The Sith Lord then attacked Bridger and quickly bested him in combat; destroying Ezra Bridger's lightsaber in the process.[1]
Before Vader could finish off Ezra, Ahsoka arrived and confronted the man who had once been her Jedi mentor. Following a hostile reunion, Tano vowed to avenge Anakin Skywalker by killing Vader, who claimed to have "destroyed" him. While Ahsoka and Vader dueled, Kanan and Chopper arrived on the Phantom. Working together, Ezra and Kanan managed to remove the Sith holocron from the temple's obelisk, causing the battle-station to abort its firing mechanism. Unfortunately, this action de-stabilized the battle-station's power systems, and the temple began to collapse.[1]
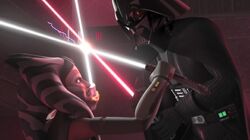
Ahsoka fighting her former master
Meanwhile Vader had, after a short duel, managed to Force-push Ahsoka off of a precipice. Turning his attention back to retrieving the holocron, he quickly returned to the temple obelisk. As the temple continued to collapse, Ezra and Kanan attempted to make their way back to the Phantom. However, Vader caught up with them before they could board the ship, and began pulling both the holocron and the two Jedi towards him with the Force. Fortunately for the two Jedi, Ahsoka had recovered from her fall and ambushed Vader. Her attack caught Vader off guard, and she managed to slice away a significant portion of his mask. This damage also affected Vader's voice modifier, and the revealed portion of his face, combined with the distorted but recognizable voice of Anakin Skywalker, confirmed to Ahsoka that Vader was in fact her former master.[1]
Unable to leave the man who had once been Anakin, Ahsoka chose to stay behind with Vader. Despite a brief moment of silence, Vader reaffirmed his position and attacked her once more. After Force pushing Bridger away to prevent him from entering the crumbling temple, Tano stayed to fight Vader[1] as the room collapsed around them. Tano eventually targetted the floor to destroy it and send Vader falling down, which Vader took as a chance to strike at Tano while she was open. Suddenly, however,[8] a portal appeared from nowhere, with a hand reaching out from it[9] and pulling Tano away before the blade struck her. Tano vanished from Vader's line of sight before he fell as the floor crumbled away[8] and the Sith temple imploded.[1]
Aftermath[]
- "There's nothing we can do now. It's over. It's over."
- ―Kanan Jarrus to Ezra Bridger

Ezra reaches out from the World between Worlds and grabs Ahsoka
Kanan, Ezra, and Chopper managed to escape and headed back to Atollon. The two distraught Jedi and Chopper returned to Chopper Base where they informed the other Spectres and Rex about the loss of Ahsoka. Kanan was compelled to cope with his new blinded state. Meanwhile, Ezra's encounter with Maul on Malachor and the apparent loss of Ahsoka triggered the young Jedi's interest in the dark side of the Force. While in his room, Bridger took the opportunity to open the Sith holocron; a feat that could only be accomplished by someone who had tapped into the dark side. Meanwhile, Maul was able to escape Malachor with goals of continuing his relationship with Bridger. Vader also survived[1] his fall[8] and limped out of the temple.[1]
Tano also survived the duel on Malachor. The hand that reached out to her and saved her from Vader's strike belonged to none other than a future Bridger:[8] in 1 BBY,[2] Bridger accessed the World Between Worlds via a portal located in the Lothal Jedi Temple. Upon entering the realm, Bridger was led to a portal to Malachor[8] in 3 BBY[2] by Morai, a convor with ties to both the Force wielder called the Daughter and Tano. Bridger reached out and saved Tano, who thanked him but realized she would need to return to her own time. After an attack from Darth Sidious, Ahsoka became separated from Ezra and escaped back to Malachor,[8] where she would descend into the ruins of the Sith Temple. After watching Vader limp away, Morai joined her.[1] Tano became lost to the shadows and rubble of the Sith temple.[10] Within, Morai led Tano through a flooded floor[11][12][13] to a staircase,[14] which led to another portal for the World Between Worlds.[15] Morai flew out of the temple and was spotted by Vader.[16] Tano's supposed death was considered the last act of the Great Jedi Purge, with Vader believing her dead.[3]
Behind the scenes[]
The Mission to Malachor first appeared in "Twilight of the Apprentice," a one-hour season finale that combined the 19th and 20th episodes of the second season of the Disney XD television series Star Wars Rebels. This mission marked the debut of two new characters: the Eighth Brother (who was voiced by Robbie Daymond) and Presence (who was voiced by Nika Futterman; who also served as Asajj Ventress' voice actor in The Clone Wars TV series). In addition, guest actors Sam Witwer and Matt Lanter reprised their roles as Darth Maul and Anakin Skywalker respectively.[1]
Dave Filoni, the supervising director of both Star Wars: The Clone Wars and Star Wars Rebels, had thought about the final confrontation between Darth Vader and Ahsoka Tano ever since he created Ahsoka for The Clone Wars.[17] Over the years, Filoni illustrated the conflict between Tano and Vader with different endings until he proposed a sword fight between them to Lucasfilm Story Group's Kiri Hart, who approved his decision.[18] However, one of the earlier planned endings, according to Filoni during Celebration Europe 2016, had Vader killing Ahsoka but not before she slashes his helmet and sees Anakin Skywalker's scarred visage before expiring.[19]
While developing the episode, before engaging on a duel with Ahsoka, Vader was supposed to engage Maul in a duel, which would have ended with Maul's death at Vader's hands, given that Maul's appearance in Rebels was intended to be a one-shot. However, the idea became unwieldy as there were too many storylines and there wasn't enough emotional material between Maul and Vader, resulting in Maul being spared until the season three episode "Twin Suns."[20]
The Star Wars Book erroneously states that the mission took place in 4 BBY.[21]
Appearances[]
- Darth Vader (2017) 25 (Vision to Darth Vader)
 Star Wars Rebels — "Twilight of the Apprentice" (First appearance)
- Maul: A Star Wars Rebels Cinestory Comic
- Star Wars Rebels: Steps Into Shadow (Indirect mention only)
 Star Wars Rebels — "The Holocrons of Fate" (Mentioned only)
 Star Wars Rebels — "A World Between Worlds"
- The Odyssey of Star Wars: An Epic Poem (Mentioned only)
Sources[]
Notes and references[]
- ↑ 1.00 1.01 1.02 1.03 1.04 1.05 1.06 1.07 1.08 1.09 1.10 1.11 1.12 1.13 1.14 1.15 1.16 1.17 1.18 1.19 1.20 1.21 1.22 1.23 1.24 1.25 1.26 1.27 1.28 1.29 1.30 1.31 1.32 1.33 1.34 1.35 1.36 1.37 1.38 1.39 1.40 1.41 1.42 1.43 1.44 1.45 1.46 1.47 1.48 1.49 1.50 1.51 1.52 1.53 1.54 1.55 1.56 1.57 1.58 1.59 1.60 1.61 1.62 1.63 1.64 1.65 1.66
 Star Wars Rebels — "Twilight of the Apprentice"
- ↑ 2.0 2.1 2.2 Star Wars: Timelines
- ↑ 3.0 3.1 The Odyssey of Star Wars: An Epic Poem
- ↑ Star Wars Rebels: Steps Into Shadow
- ↑ Darth Vader (2017) 25
- ↑
 Star Wars Rebels — "Shroud of Darkness"
- ↑
 Star Wars Rebels — "The Mystery of Chopper Base"
- ↑ 8.0 8.1 8.2 8.3 8.4 8.5
 Star Wars Rebels — "A World Between Worlds"
- ↑
 Star Wars: Destiny — Spark of Hope (Card: Alter Fate) (backup link)
- ↑ Star Wars: Absolutely Everything You Need to Know, Updated and Expanded
- ↑
 Star Wars: Card Trader (Card: 3 (Ahsoka Tano) - Artist Series - Dave Filoni)
- ↑
 Star Wars: Card Trader (Card: 4 (Ahsoka Tano) - Artist Series - Dave Filoni)
- ↑
 Star Wars: Card Trader (Card: 7 (Ahsoka Tano) - Artist Series - Dave Filoni)
- ↑
 Star Wars: Card Trader (Card: 8 (Ahsoka Tano) - Artist Series - Dave Filoni)
- ↑
 Star Wars: Card Trader (Card: 10 (Ahsoka Tano) - Artist Series - Dave Filoni)
- ↑
 Star Wars: Card Trader (Card: 9 (Ahsoka Tano) - Artist Series - Dave Filoni)
- ↑ Star Wars Rebels Season Two Blu-ray, behind-the-scenes featurette "From Apprentice to Adversary: Vader vs. Ahsoka"
- ↑
 Fates Fulfilled: Dave Filoni Reflects on Star Wars Rebels Season Two, Part 1 on StarWars.com (backup link)
- ↑ The Art That Inspired Ahsoka and Darth Vader's Epic Duel in Star Wars Rebels by Whitbrook, James on io9.gizmodo.com (September 14, 2016) (archived from the original on August 9, 2020)
- ↑ Star Wars news - Darth Vader KILLED Darth Maul in original Rebels plot on Express (March 17, 2017) (archived from the original on July 23, 2019)
- ↑ The Star Wars Book

