- "Why did you kill Taun We?"
"Part of the job. You should thank me. What their Prime Minister has planned for you is far worse than why I'm here." - ―Omega and Fennec Shand
Early in the Imperial Era, the young clone Omega was rescued from an abandoned facility on Bora Vio. Omega, a creation of the Kaminoan cloners, was highly valuable due to being one of only two clones in existence with the unaltered DNA of Jango Fett, who had served as the clone template for the Grand Army of the Republic. After her escape with Clone Force 99, a group of renegade clone commandos, shortly after the formation of the Galactic Empire, the Kaminoans wanted her back so they could create superior clones to keep the Empire's business. However, after the Empire tracked down the "Bad Batch" on Bracca, Prime Minister Lama Su sent the bounty hunter Cad Bane to retrieve the girl, over the objections of Chief Medical Scientist Nala Se as they had already hired Fennec Shand for the task. Having developed an attachment to Omega, Nala Se sent Shand to disrupt the rendezvous where Bane was scheduled to hand over Omega after learning that Lama Su wanted her terminated once the necessary genetic material had been extracted. Omega was able to escape while Shand and Bane fought each other, stealing a Kaminoan flight pod and sending a signal which allowed the Batch to track her down and pick her up.
Prelude[]
Creation of the clones[]
Around 32 BBY,[4] the cloners of the remote,[5] Wild Space[6] planet[5] Kamino were approached by Jedi Master Sifo-Dyas about creating an army for the Galactic Republic.[5] Sifo-Dyas was murdered and the project hijacked by the Sith, who wanted to use the clones for their long-brewing revenge against the Jedi.[7] The Sith Lord Tyranus hired bounty hunter Jango Fett to serve as the clone template. In addition to his substantial fee, Fett also requested one unaltered clone for himself, whom he named Boba and raised as a son.[5] Over the course of their cloning work, however, the Kaminoans created another clone without the age acceleration and ingrained obedience standard to the clone troopers. This clone, a female named Omega, was unaware of the truth of her creation,[1] working as a medical assistant to Chief Medical Scientist Nala Se.[8] Nala Se developed an attachment to the young clone[1] which stood in stark contrast to her view of the regular clone troopers as products and property.[9]

The Kaminoans helped to create the clone army.
The Clone Wars that Sifo-Dyas had foreseen[7] began in 22 BBY[10] at the First Battle of Geonosis, during which Jango Fett, who had been working for the Separatists at the time, was beheaded by Jedi Master Mace Windu.[5] As the war dragged on, the Kaminoans were forced to stretch their remaining samples of Fett's DNA to create more clones, resulting in a decrease in quality.[11] The war came to an end in 19 BBY[10] through Order 66, the Sith's revenge on the Jedi: the command activated inhibitor chips implanted in the clone troopers which forced them to turn on and kill their Jedi commanding officers for alleged treason.[8] In the aftermath, the Republic was reorganized into the Galactic Empire by now-Emperor Sheev Palpatine — truly Darth Sidious, the Dark Lord of the Sith — supposedly to return stability to the galaxy.[12]
A new era[]
The new Empire had no interest in continuing the Republic's contracts with the Kaminoans, ostensibly on the grounds of cost. Only days after the Empire's formation, Omega escaped Kamino with the Bad Batch, a group of irregular clone commandos[8] who had been among the rare clones immune to Order 66,[13] although they lost the only non-immune member of the squad, the sniper Crosshair, to Imperial brainwashing.[8] In the aftermath, the Empire proceeded with Project War-Mantle, which was intended to determine the effectiveness of recruited soldiers. Crosshair was placed in command of an Elite Squad of recruits. The success of the squad's first mission concerned Prime Minister Lama Su and Nala Se, and the scientist was authorized to move on to the next phase of experiments to create a superior clone.[14] However, the experiments required fresh genetic material from either Boba Fett, codenamed "Alpha" by the Kaminoans, or Omega,[1] and neither would return to Kamino willingly.[14] As the Kaminoans had lost track of Boba's whereabouts after the onset of the Clone Wars, that left Omega.[1]

Fennec Shand failed to capture Omega on Pantora.
Nala Se hired the bounty hunter Fennec Shand to retrieve Omega,[1] giving her details on the Bad Batch's modified Omicron-class attack shuttle, the Marauder. Shand was able to locate the fugitives when they stopped on Pantora for a supply run, but after a chase, squad leader Hunter rescued Omega from Shand before the Batch fled the moon. Although Omega had escaped, Shand reported she would continue her pursuit.[15] The Batch's efforts to identify Shand led them to the informant Ciddarin Scaleback,[16] whom they began working for as mercenaries in the aftermath.[17] However, Scaleback was unable to identify Shand's employer because she had taken a direct commission for the job,[16] and the squad had no idea who wanted Omega or why.[15]
Confrontation on Bracca[]
After multiple missions for Cid, the Batch was tracked down by their friend and fellow rogue clone Captain Rex, who had them meet him on Bracca to surgically remove their inhibitor chips due to the danger they posed. In the aftermath of the surgeries, Hunter was spotted on the wrecked Venator-class Star Destroyer where the operations had been performed by a Scrapper Guild patrol, who reported the intruders to the Empire.[13] Crosshair led forces to eliminate the Batch, who had lingered on Bracca because Hunter had wanted to try and recover valuable salvage from the wreckage in order to square a debt the squad owed to Cid. Concerned that the Imperial forces would damage Omega and ruin their contingency plan, Lama Su hired another bounty hunter, Cad Bane, to retrieve Omega from Bracca. Nala Se objected as they had already hired Shand, but the Prime Minister argued that the only thing that should concern them was ensuring that one of the bounty hunters returned the girl intact.[18]
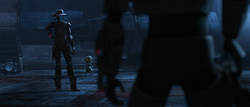
Cad Bane defeated Hunter and seized Omega.
After a skirmish with Crosshair and his forces in the wreckage, Hunter and Omega were separated from the others as they headed back to the Marauder. When they arrived at the shuttle, they encountered Bane, who had killed the clones set to guard the ship. Hunter attempted to defend Omega from the bounty hunter, but lost a blaster duel with Bane and was severely injured, allowing Bane and his droid, Todo 360, to easily take Omega. However, Todo's booster leg was blown off when Hunter's shot went awry. When Echo, Tech and Wrecker arrived back at the Marauder, they found Hunter, reviving him and hustling him onto the ship while under fire from Imperial clones. As they escaped, Hunter explained that Omega had been taken by a bounty hunter.[18] With his wound seen to, Hunter insisted that they had to find Omega instead of escaping into hyperspace, but Echo pointed out that Omega's abductor was already gone, so they fled the Bracca system.[1]
When Bane reported from the Justifier that he had seized Omega, Lama Su had him travel to an abandoned Kaminoan facility on Bora Vio in the Lido system to make the handoff. Stating that Nala Se's concern for Omega was a liability, the Prime Minister sent his aide Taun We to the rendezvous. He further ordered that once Omega was returned, she was to be terminated after the necessary genetic material had been extracted. This led Nala Se to go behind Lama Su's back and contact Shand, sending her to Bora Vio to rescue Omega from Bane's clutches and keep her away from Lama Su. Meanwhile, the Batch hunted for their wayward charge themselves. Echo was able to identify Bane from old Republic records, noting he had had multiple run-ins with the Jedi. Doing another analysis of Omega's DNA, Tech deduced the reason Omega was so valuable and filled in the rest of his squad, leading them to realize the Kaminoans were the ones who wanted her. The squad checked with Scaleback to see if she knew anything about Bane, but she had no way to locate him, so they were on their own.[1]
The rescue[]
Making trouble[]
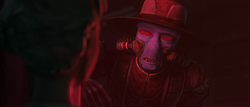
Cad Bane holds Omega aboard his starship.
Onboard the Justifier, Omega was shut in a force field-secured cell, having unsuccessfully demanded that Bane and Todo let her go after she woke up. While Bane was in the cockpit flying to Bora Vio, Todo sat on the floor in front of Omega's cell, attempting to repair his leg. Seeing an opportunity, Omega told the droid that she could help fix it, citing experience repairing the repulsors of medical droid AZI-3 and reminding him that as per his own words she was only a prisoner. Eventually, after a lack of success, Todo agreed to let Omega repair his leg on the condition that she return to her cell afterwards. Omega easily fixed Todo's leg, but it needed to be realigned, which required working on his head. She used the opportunity to deactivate Todo, apologizing but noting it was only temporary. The girl then began searching the cabinets for her wrist comm, which had been confiscated and which Todo had said was stored there.[1]
The Justifier dropped out of hyperspace at Bora Vio and descended into the planet's atmosphere while Omega was frantically searching, having had some trouble figuring out how to open the cabinets. Due to the reduced visibility caused by Bora Vio's clouds, Bane summoned Todo to the cockpit, but the deactivated droid did not respond. Bane eventually found the facility and landed, before heading into the hold to check on his apparently malfunctioning droid. Becoming frantic as the bounty hunter approached, Omega located her comlink in the nick of time and fled the ship. Bane discovered that Omega was missing and reactivated Todo, who was shocked to learn that she had escaped and did not admit his role.[1]

Bane recaptures Omega and puts her in cuffs.
Omega ran into the facility, frantically attempting to reach the Batch on her comlink. The clones picked up her signal on the Marauder, but could not respond due to the distance of the transmission, so Echo worked to boost it. Hiding amidst the planet's pervasive mist, Omega was thrilled to receive a reply from Hunter, telling him she had escaped. He asked her where she was, and she admitted she did not know. Wrecker told her they were coming for her, but Echo pointed out the signal was too faint to get a lock on her position. Taking over the comms, Tech told her to find a panel, and Omega located one by a door which was similar to the ones in Tipoca City. Activating it per Tech's instructions, which partially opened a door, Omega was told to find a way of causing a power surge so the Batch could home in on her location. However, Bane located the girl, and she called for help as she tried to get away from the bounty hunter. Bane ripped the comlink off of her wrist and stomped on it to destroy it, before putting the girl in binders and dragging her away, saying she was lucky his clients wanted her alive and telling her she would find out who they were soon enough.[1]
Enter Shand[]
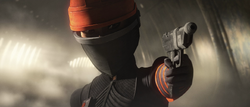
Fennec Shand confronts Bane.
Onboard the Justifier, Todo reported that the starship's sensors had picked up an approaching craft, and Bane ordered him to go investigate. The new arrival was Shand, who made sure to sabotage the Justifier while it was unattended before entering the facility. Locating Taun We in the mist, Shand killed the Kaminoan and took the unmarked credits she had been carrying. The blaster shots were heard by Omega and Bane, and the girl assumed her friends had come to rescue her. However, the two soon encountered the corpse on the floor, and Omega was shocked to see the Kaminoan aide, insisting that she needed help. Bane pushed her back and said there was nothing that could be done as Shand revealed herself. Recognizing the rival hunter, Bane asked why she was interfering, shoving Omega towards the wall. Shand explained that Omega had been her target first, offering to exchange the credits for the girl. Bane said it sounded fair, suggesting Shand go first. Before an exchange could occur, Todo arrived and seized the case of credits, leading the two hunters to get into a firefight with each other.[1]
Bane threw a thermal detonator at Shand, but she kicked it in Todo's direction, knocking the droid out the window with the case of credits, which fell open and spilled the chips to Bane's horror. Omega took the opportunity to escape the crossfire and run further down the hallway. Shand pursued, briefly driving Bane into a side hallway. Bane ordered Todo to find Omega. As Shand chased her, Omega slipped through a doorway and fled down a side hallway, heading deeper into the facility. Growling that Shand should know when to quit, Bane passed through a doorway to find that the rival hunter was missing. He advanced forward cautiously, but stumbled upon an explosive she had planted, which flung him back and knocked him unconscious.[1]
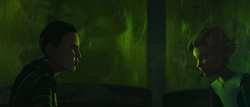
Shand tries to persuade Omega to come with her.
Omega located a chamber with tanks filled with long-abandoned experiments, which unsettled her. Finding a control panel, she activated it and used it to send a signal from the facility's damaged but still-operational long-range transmitter. The signal was picked up by the Marauder in deep space, and Echo was able to pinpoint its exact position, leading the shuttle to jump into hyperspace. Locating his unconscious master, Todo attempted to rouse Bane, but after failing, rushed off, promising to secure the target. Shand shortly located Omega in the chamber, telling her she could not rely on anyone but herself. Omega asked Shand why she had killed Taun We, and the bounty hunter said Omega should thank her, considering that what Lama Su wanted with her was worse then Shand's reasons for being there. Shand said she was trying to help Omega, but the girl pointed out that she had said the same thing on Pantora. Todo arrived but was quickly taken down by Shand. Omega used the distraction to slip back to the control panel, and as Shand tried to tell her there was no time to send another signal and that they had to leave, Omega detached the tank Shand was standing next to, causing it to fall on her and shatter as Omega fled the room. Shand was disgusted by the naked corpse and fluid that fell on her, taking a moment before continuing pursuit.[1]
Escape[]
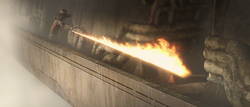
Bane pins Shand down with his wrist-mounted flamethrower.
Finding a balcony on a lower level, Omega leaned over the railing and saw a lower level with flight pods. She headed along the balcony in search of a way down, spotting a ladder before she was found by a revived Bane, who growled that playtime was over. Shand, however, arrived and attacked him, knocking one of his blaster pistols out of his hand with a bola before throwing Omega down the corridor and engaging Bane in hand-to-hand combat, disarming him of his other pistol. Omega began to head towards the ladder, but Bane took Shand out of the fight before approaching her. However, Shand recovered and attacked Bane again, and Omega got to her feet and ran to the ladder. She managed to find a way to descend the ladder despite her binders, but when she was only partway down, she was confronted by Todo, who had recovered and deduced she was heading for the flight pods. Omega kicked Todo away a few times as he attacked her, but eventually chose to jump atop the droid, riding him down to the lower level. She fell off and rolled, sustaining slight injuries while Todo, who was damaged, was momentarily trapped upside-down, stuck standing on his head.[1]
As Bane and Shand continued their fight above, Omega got to her feet and stumbled towards the flight pods, boarding one of the ancient vehicles. Todo recovered and followed her, but was too late to stop her escape, landing on the outside of the pod as she activated it. The droid panicked as he realized what she was about to do, and was knocked away as the pod launched, tearing off an outside panel while shouting that she would regret this. Bane managed to knock Shand unconscious after a fierce struggle, and was contacted by Todo, who reported that their target was escaping. Seeing Omega's pod fly away, Bane ordered Todo back to the ship. Shand revived, and Bane drove her into a nearby hallway with his wrist flamethrowers, but she used another bola to bind his arms before leaping forward and kicking him over the railing. Bane used his jet boots to save himself, but upon returning to the balcony, he was extremely angry, finding it difficult to free himself.[1]
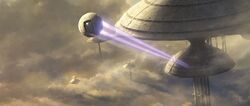
Omega attempts to escape aboard an old flight pod.
Omega's pod malfunctioned and stopped working while flying through Bora Vio's atmosphere due to the damage inflicted by Todo, and she panicked as it plunged into the clouds. However, the Marauder arrived and rescued the pod, docking it with the ship's bottom airlock. When the airlock opened, Wrecker looked in to see if Omega was inside. Omega was relieved to see her friends, and after she was brought onboard, the Batch jettisoned the flight pod and departed Bora Vio. Bane returned to the Justifier in pursuit, but he and Todo discovered that the ship had been sabotaged, leaving them stranded and preventing them from pursuing either the Batch or Shand, who departed on her ship, the Outcast.[1]
Aftermath[]
Onboard the Marauder, Hunter asked Omega if she was all right, and Omega tearfully asked why the Kaminoans were after her. Echo told Hunter that he had a responsibility to tell Omega, and Hunter told the girl that she was more valuable to the Kaminoans than all of the other clones they had created, including the Batch. Omega wanted to know how she was different, so Hunter told her. Later, while everyone else was sleeping, Omega confided to Hunter that she was afraid of the possibility of becoming an experiment in a tube. Hunter told her that the Batch would defend her against anyone who tried to take her, but she was doubtful that they would be able to fight all of their potential pursuers. Omega's worries were somewhat alleviated when Hunter promised her that she would never return to Kamino.[1]
Nala Se tells Shand that she would only need to keep Omega away from Lama Su.
After departing Bora Vio, Shand was contacted by Nala Se for an update. Shand reported that Omega had been rescued by the Bad Batch, and that it would cost the Kaminoan extra if she wanted the group tracked. Stating that it was acceptable as long as Omega was kept out of Lama Su's hands, Nala Se told Shand she was transferring her payment. Shand told Nala Se that she knew how to contact her if she changed her mind.[1]
Due to the bounty hunters after her, upon their return to Cid's Parlor on Ord Mantell, Hunter decided that Omega would stay with Scaleback while the squad carried out their next mission. Omega was upset, but after discovering a talent for dejarik, she was able to earn enough money to pay off the Batch's debt. Although he was not impressed by the attention her matches had drawn, Hunter decided to put her strategic talents to the test and challenged her to a game, promising not to leave her behind again if she won.[2] Omega continued to accompany the Batch on future missions.[19]
Hunter was later captured by the Empire during a mission on the planet Daro,[20] and was transported to Kamino by Crosshair as part of a scheme by the sniper to attempt to recruit the Bad Batch back into Imperial service. When the squad came to rescue him, Hunter apologized to Omega for breaking his promise, but she replied that he had done the same for her.[21]
Sometime after the event, Bane told the Weequay pirate Hondo Ohnaka of the time he had encountered Shand on Bora Vio.[22]
Appearances[]
 Star Wars: The Bad Batch — "Bounty Lost" (First appearance)
- The Bad Batch: Hunted!
 Star Wars: The Bad Batch — "Common Ground" (Indirect mention only)
 Star Wars: The Bad Batch — "Return to Kamino" (Indirect mention only)
Sources[]
 "Bounty Lost" Episode Guide | The Bad Batch on StarWars.com (backup link)
- Star Wars: The Secrets of the Bounty Hunters (Indirect mention only)
- Star Wars: Timelines
 Bora Vio in the Databank (backup link)
Notes and references[]
- ↑ 1.00 1.01 1.02 1.03 1.04 1.05 1.06 1.07 1.08 1.09 1.10 1.11 1.12 1.13 1.14 1.15 1.16 1.17 1.18 1.19 1.20 1.21 1.22 1.23 1.24 1.25 1.26 1.27 1.28 1.29 1.30 1.31 1.32 1.33 1.34 1.35 1.36 1.37 1.38 1.39 1.40 1.41 1.42 1.43 1.44 1.45 1.46 1.47
 Star Wars: The Bad Batch — "Bounty Lost"
- ↑ 2.0 2.1
 Star Wars: The Bad Batch — "Common Ground"
- ↑ Star Wars: Timelines
- ↑ Star Wars: Episode II Attack of the Clones states that the Kaminoans began creating the Grand Army of the Republic ten years before the events of the movie, which are dated to 22 BBY by Star Wars: Galactic Atlas.
- ↑ 5.0 5.1 5.2 5.3 5.4 Star Wars: Episode II Attack of the Clones
- ↑ Exegol, the Unknown Regions and Wild Space
- ↑ 7.0 7.1
 Star Wars: The Clone Wars — "The Lost One"
- ↑ 8.0 8.1 8.2 8.3
 Star Wars: The Bad Batch — "Aftermath"
- ↑
 Star Wars: The Clone Wars — "Conspiracy"
- ↑ 10.0 10.1 Star Wars: Galactic Atlas
- ↑
 Star Wars: The Clone Wars — "Clone Cadets"
- ↑ Star Wars: Episode III Revenge of the Sith
- ↑ 13.0 13.1
 Star Wars: The Bad Batch — "Battle Scars"
- ↑ 14.0 14.1
 Star Wars: The Bad Batch — "Replacements"
- ↑ 15.0 15.1
 Star Wars: The Bad Batch — "Cornered"
- ↑ 16.0 16.1
 Star Wars: The Bad Batch — "Rampage"
- ↑
 Star Wars: The Bad Batch — "Decommissioned"
- ↑ 18.0 18.1
 Star Wars: The Bad Batch — "Reunion"
- ↑
 Star Wars: The Bad Batch — "Devil's Deal"
- ↑
 Star Wars: The Bad Batch — "War-Mantle"
- ↑
 Star Wars: The Bad Batch — "Return to Kamino"
- ↑ Star Wars: The Secrets of the Bounty Hunters

