| | |
- «There will be no bargain, young Jedi. I shall enjoy watching you die.»
- ―Jabba the Hutt to Luke Skywalker
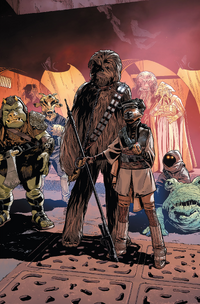
The Rescue of Han Solo, also known as the Battle of the Great Pit of Carkoon, the Battle of Carkoon, the Sail barge disaster, or simply the Fall of Jabba, was a mission carried out during the Imperial Era in the year 4 ABY by members of the Alliance to Restore the Republic to rescue Han Solo, who was frozen in carbonite, from Jabba the Hutt. Solo's friends in the Rebel Alliance set out to find and rescue the former smuggler from Jabba's Palace on Tatooine. Solo was freed by his friends, but the crime lord ordered that they be executed. This led to a battle at the Great Pit of Carkoon between the small group of Rebels and Jabba's forces. One of the rebels, Princess Leia Organa, killed Jabba, while Luke Skywalker and the others fought off Jabba's guards. With Jabba dead, the rebels escaped and returned to the Rebel fleet.
Prelude[]
- "If I told you half the things I've heard about this Jabba the Hutt, you'd probably short circuit!"
- ―C-3PO to R2-D2

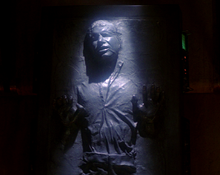
Han Solo frozen in carbonite
After Darth Vader set a trap for Luke Skywalker on Bespin, Han Solo was frozen in carbonite and given to the bounty hunter Boba Fett, so he could collect the bounty Jabba the Hutt had placed on Solo.[10]
Following the Galactic Empire's takeover of Cloud City, Lando Calrissian offered to Leia Organa and Luke Skywalker to go alongside Chewbacca to Tatooine to see if Fett had already handed the frozen Solo to Jabba, Lando expressed his hopes that he hadn't: otherwise, it would make a rescue mission impossible, let alone getting him alive out of Jabba's Palace.[11]
However, they found that Solo had yet to be delivered to Jabba;[11] Fett had delayed his journey in order to take part in the hunt for his old enemy Nakano Lash,[12] becoming embroiled in the conflict surrounding her.[13] Later, Fett stopped on the moon of Nar Shaddaa in order to make sure Solo would survive his time in carbonite, but he lost Solo while he was away from Doc Ragon's building, kicking off a war between bounty hunters.[14] Ultimately, Fett regained Solo during the Attack on the Executor and delivered him to Jabba.[15]
Solo's friends were contacted by Beilert Valance, who wanted to help in saving Solo. Valance attacked Jabba's Palace to trick Jabba into unleashing his Megadroid, which would have made Skywalker and company's plan much harder. While Jabba initially assumed Valance was there to save Solo, whose frozen form he saw during the attack, Fett convinced Jabba to let Valance fight the Megadroid, having secretly helped Valance's effort: should the Megadroid have been activated and deployed, Fett suspected he would lose his station amongst Jabba's enforcers. In a Death Match on Tatooine, the Megadroid was destroyed by Valance thanks to the intervention of the rest of T'onga's crew.[16] Calrissian infiltrated the palace as a guard, and Skywalker traveled to Tatooine, possessing a new lightsaber.[4]
The rescue[]
Infiltrating Jabba's palace[]
Arrival of the droids[]
- "I don't think they're going to let us in, Artoo. We'd better go."
- ―C-3PO to R2-D2, before entering the palace

C-3PO talks to Jabba's gatekeeper droid.
In preparation for his arrival, Skywalker sent the protocol droid C-3PO and the astromech droid R2-D2 (inside whom he had hidden his lightsaber) to Jabba's palace, under the pretense of negotiating for Solo. After being greeted and interrogated by a gatekeeper droid, they were stopped by Gamorrean guards, led by Bib Fortuna. Upon telling Fortuna that they would only give the message to Jabba himself, they were brought before the crime lord. R2 played a message from Skywalker, who offered the droids as gifts in an attempt to gain an audience with Jabba, much to 3PO's surprise. The Hutt, however, refused the offer, but still kept the droids, who were taken to EV-9D9 to be assigned jobs within the palace. 3PO became the Hutt's new translator, while R2 was assigned to be a server aboard the Khetanna.[4]
Entering Jabba's palace[]
- "I am taking Captain Solo and his friends. You can either profit by this or be destroyed. It's your choice, but I warn you not to underestimate my powers."
- ―Luke Skywalker, to Jabba Desilijic Tiure

Disguised as Boushh, Leia Organa entered the palace with Chewbacca
Leia Organa enlisted the help of Maz Kanata, who recommended to disguise herself as the bounty hunter Boushh.[17] Organa traveled to the Hutt's palace, bringing with her Chewbacca, under the pretense of negotiating for the bounty on the Wookie's head. Bringing a thermal detonator to ensure that he accepted her deal of 50,000 credits, the two eventually settled on a payment of 35,000.[4]
Later that night, when most of the court seemed to be asleep, Organa snuck into Jabba's main audience chamber and freed Solo from his carbonite imprisonment. When Han awoke, Leia, still disguised as Boushh, said that he had hibernation sickness, and that his eyesight would return in time. When Han asked who had come to rescue him, Leia revealed that she was "someone who loves him," and they kissed. However, just as the two were about to escape from the palace, they heard, to their horror, the sound of Jabba laughing. A curtain on a wall was drawn back, revealing Jabba and several members of his court, having anticipated Organa's attempt to free Solo. The smuggler attempted to negotiate with the crime lord, offering to pay triple what he owed, but Jabba refused, fed up with Solo's delays. He ordered the captain to be taken to his prison, where he was reunited with Chewbacca.[4]

After Jabba enslaved Leia, Luke arrived to negotiate with the Hutt
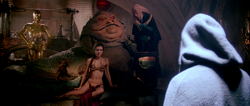
Meanwhile, Jabba had different plans for Organa and ordered his guards to bring her to him. Organa warned the Hutt that he would regret capturing the rebels, but Jabba was unfazed. Much to Organa's disgust, Jabba licked her face.[4] Having decided to enslave Organa, Jabba commanded his servants Jess and Damaris to take her to the women's quarters to be cleaned and dressed in a dancing-girl costume. Organa was then chained to Jabba's throne and forced to sit at his side at all times. As the night wore on, Organa kicked and shoved at Jabba whenever he tried to draw her closer, but they eventually grew tired and fell asleep along with the rest of his court.[18]
The next morning, Skywalker ventured to the palace himself.[19] After bypassing the Gamorrean guards[20] and Fortuna with a mind trick, he found himself in the audience chamber. Once Jabba awoke, Skywalker attempted to coerce the crime lord into releasing his friends with a mind trick, only to discover that Hutts were immune to such manipulations. His primary plan having failed, Skywalker telekinetically grabbed a blaster from the surrounding bounty hunters with the intention of making Jabba cooperate by force. However, Jabba activated a trapdoor that dropped him into the rancor pit, though he dragged a Gamorrean guard with him.[4]
The rancor pit[]
- «Bring me Solo and the Wookiee. They will all suffer for this outrage.»
- ―Jabba Desilijic Tiure, responding to Pateesa's unexpected death

The ferocious rancor Pateesa was unleashed against Luke Skywalker.
The two tumbled into the pit, and a gate on the far side of the pit lifted. As Pateesa emerged, the guard tried to escape, but the effort was futile; the beast ate the Gamorrean in one bite. The rancor then turned his attention to Skywalker, who, though unable to avoid the creature's grip, managed to grab a bone from the floor. As the rancor lifted Skywalker to his jaws, the young Jedi lodged the bone in Pateesa's mouth, distracting him long enough to drop Skywalker. He temporarily hid in a nook in the wall before running under the rancor to the gate he had come from, but that end of the pit did not entail an exit either.[4]
With Pateesa approaching quickly, Skywalker noticed a switch on his side of the gate. As the rancor passed under the gate, the Jedi threw a skull at the control, causing the gate to close on the creature's neck, killing it immediately. Shocked, Malakili, Giran, and another guard entered the pit. While the guard secured Skywalker, Malakili confirmed Pateesa's death, and wept with Giran. Enraged, Jabba had Solo and Chewbacca brought to him, and sentenced them, along with Skywalker, to be cast into the Great Pit of Carkoon.[4]
Carkoon[]
- "Threepio, you tell that slimy piece of worm-ridden filth he'll get no such pleasure from us! Right?"
"Jabba, this is your last chance. Free us or die." - ―Han Solo and Luke Skywalker to Jabba at the Great Pit of Carkoon

Luke Skywalker is pushed towards the pit by a vibro-ax.
The prisoners were taken to the pit on a Bantha-II cargo skiff, with another skiff for security. As Organa had been spared from execution, Jabba brought her and several of his guests along to watch from his luxury barge, the Khetanna. On the plank of the skiff, Skywalker warned Jabba that it was his last chance to avoid death, a threat the crime lord brushed off. Saluting to R2-D2, the young Jedi jumped off the plank, catching hold of the plank as he fell and springboarding himself back onto the skiff. As he landed, R2 launched his master's lightsaber into his master's waiting hand. Skywalker promptly activated the weapon and began disabling the guards on the skiff, knocking several into the pit in the process.[4]
Calrissian also helped to disable a few guards, but was knocked overboard by a shot from the Khetanna. Further complicating matters, Fett rocketed to the commandeered skiff and promptly engaged Skywalker. The Jedi quickly cut the bounty hunter's blaster in half as it was aimed at him, only for Fett to launch a whipcord at Skywalker; however, he quickly cut the cord, and in the same swipe deflected another blast from the sail barge, temporarily disabling Fett.[4]

The battle over the Sarlacc unfolds
As the other skiff swung around, the young Jedi lept over to it and began disabling the guards onboard, oblivious to Fett rising and aiming his gauntlet blaster at Skywalker. Solo, who had grabbed a vibro-ax to help Calrissian, was alerted to Fett standing behind him by Chewbacca, and frantically swung the ax around, causing Fett's jetpack to misfire and sending him tumbling into the Sarlacc pit.[4]
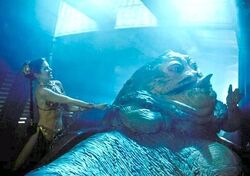
Meanwhile, onboard the Khetanna, Organa, taking advantage of the chaos, shut the windows on the barge and proceeded to choke Jabba with her chain, an act that took all of her strength and forced her to unconsciously draw upon the dark side of the Force for help.[6] Solo, in the meantime, had reached the ax over the deck of the skiff to help Calrissian, only for another shot from the sail barge to cripple the skiff, sending Calrissian further out of reach. Solo, now with Chewbacca holding his feet, continued to reach out to Calrissian, but the Sarlacc had wrapped one of its tentacles around his feet, and began dragging him towards its maw.[4]
Skywalker, noticing the heavy fire the skiff was taking from the Khetanna, had jumped over to it and fought his way to the upper deck, disabling the gunner and several other guards. Meanwhile, with the Sarlacc pulling at his friend's feet, Solo, after being handed a blaster by Chewbacca, and having gained just enough sight to aim properly, shot the tentacle, which relinquished its grip on Calrissian and allowed him to grab the vibro-ax, after which Solo helped him onto the skiff's deck.[4]

Leia Organa strangles Jabba.
R2, meanwhile, broke Organa's chains after she had strangled her erstwhile captor, and noticing Salacious B. Crumb was ripping out C-3PO's photo receptors, shocked the monkey-lizard, freeing the protocol droid. Organa, in the meantime, worked her way to the upper deck, where she pointed the barge's main cannon at the deck while Skywalker finished off the guards, damaging his mechanical hand in the process. The droids then tossed themselves overboard, getting half-buried in the sand, while Skywalker and Organa swung to the skiff after activating the cannon. The group of rebels picked up the droids using magnetic clamps on the skiff, and sped off as the Khetanna exploded.[4]
Aftermath[]
Power vacuum on Tatooine[]
- "Jabba ruled with fear. I intend to rule with respect."
- ―Boba Fett
With Solo rescued, the Rebels—with the exception of Skywalker, who journeyed to Dagobah to reunite with Yoda—returned to the Alliance fleet.[4] Calrissian then took part in the Battle of Taanab,[2] which earned him a promotion to general. Afterward, they joined a briefing about the looming Battle of Endor.[4]

Fett seized control of Jabba's Palace, where he established himself as the new crime lord on Tatooine.
Jabba's death heralded the disappearance of anything that resembled law on Tatooine, and in order to determine the exact nature of his death and settle the debate over the matter of his will, the Hutt Clan had the wreckage of the Khetanna examined. What they found was only a holorecording of Organa choking Jabba in his last moments. Most of the circulated copies of this footage and their vendors were hunted down by the Hutt Clan to prevent proof of their own vulnerability from circulating. His courtiers who had stayed at his palace thought a new Hutt would come to take his place, but when one failed to appear, they eventually wandered off, with the beastmaster Malakili being one of the last to leave.[6] Fortuna survived and took control of Jabba's palace.[7]
For the better part of a year after the rescue, Jabba's rivals in the Red Key Raiders took the blame for Jabba's death.[22] Jabba's death left enormous power vacuums in the Kessel spice trade, leaving trade routes once guarded by Hutt-hired mercenaries vulnerable.[23] Fett was believed to be dead, but was able to escape the sarlacc.[24] However, he lost his armor to Jawas and got captured by Tusken Raiders.[21] Law would eventually return in the form of Cobb Vanth, a sheriff who found Fett's Mandalorian armor in a Jawa sandcrawler,[25] and used it to bring law to the lawless world in Mos Pelgo.[26]
Boba Fett along with Fennec Shand stormed the palace, where Fortuna, greeted Fett, expressing his surprise to see the former bounty hunter despite the rumors of his demise. His only response was to shoot the Twi'lek crime lord and took his place on the throne with Shand by his side.[7] He assumed the reins of Jabba's old empire as the new Daimyo on Tatooine and endeavored to consolidate it under his leadership as the new crime lord and abstained from coersion and displaying material wealth, preferring to rule through respect instead of fear or privilege.[21]
Legacy[]
- "I wouldn't have believed anyone could escape a Hutt's chains with her life, much less take the Hutt's life instead."
"I wouldn't have, either, until we did it." - ―Ransolm Casterfo and Leia Organa
Many of the Hutt's slaves were also freed due to Jabba's death, leading one of the species most prominently enslaved by the Hutts, the Niktos, to admire Organa for her slaying of the crime lord, giving her the name "Huttslayer."[6]
Over the years following Jabba's death, a Huttese song known as "Jabba Flow," composed by the Shag Kava band, was named after Jabba[27] as was a non-alcoholic beverage known as "Jabba Juice."[28]
Behind the scenes[]
The Rescue of Han Solo first appeared in the beginning of the 1983 film Star Wars: Episode VI Return of the Jedi, the final installment of the Star Wars original trilogy.[4] Though popularly assumed that George Lucas thought up the opening, it was, in reality, the idea of director Richard Marquand and script writer Lawrence Kasdan. The fact was eventually revealed via transcripts of meetings from The Making of Return of the Jedi.[29]
In the rough draft of Return of the Jedi, the sequence was relatively different. Some characters, such as Boba Fett, weren't included. In this version, all guards on the skiff which Luke and Han were transported were knocked into the sarlacc pit after a fistfight against the Rebels only for Jabba to order his Captain of the Guard to shoot them without caring for their own men. The Khetanna exploded like in the finished version, Jabba and his court, including Bib Fortuna, survived the explosion only to be all knocked into the pit and devoured by the sarlacc.[30]
Lawrence Kasdan came up with the suggestion of killing Jabba during the rescue, while Lucas had the idea of having Leia Organa strangling him with her chain as an homage of Francis Ford Coppola's 1972 classic film The Godfather, mirroring the scene in which Luca Brasi gets garrotted to death by Virgil Sollozzo and his men.[30]
Appearances[]
Non-canon appearances[]
- Star Wars Epic Yarns: Return of the Jedi
- LEGO Star Wars: The Skywalker Saga
 LEGO Star Wars: Droid Tales — "Gambit on Geonosis" (In flashback(s))
Sources[]
Notes and references[]
- ↑ Moving Target: A Princess Leia Adventure
- ↑ 2.0 2.1 Ultimate Star Wars
- ↑
 The Book of Boba Fett — "Chapter 2: The Tribes of Tatooine"
- ↑ 4.00 4.01 4.02 4.03 4.04 4.05 4.06 4.07 4.08 4.09 4.10 4.11 4.12 4.13 4.14 4.15 4.16 4.17 4.18 4.19 4.20 4.21 4.22 4.23 4.24 4.25 4.26 4.27 4.28 4.29 4.30 4.31 4.32 4.33 4.34 4.35 4.36 4.37 4.38 4.39 4.40 4.41 4.42 4.43 4.44 4.45 4.46 4.47 4.48 4.49 4.50 4.51 4.52 4.53 4.54 4.55 4.56 4.57 4.58 4.59 4.60 4.61 4.62 4.63 4.64 4.65 4.66 4.67 4.68 4.69 4.70 4.71 4.72 4.73 4.74 4.75 4.76 4.77 4.78 4.79 4.80 4.81 4.82 4.83 4.84 4.85 4.86 4.87 4.88 4.89 4.90 4.91 4.92 4.93 4.94 4.95 Star Wars: Episode VI Return of the Jedi
- ↑ Star Wars: Timelines
- ↑ 6.0 6.1 6.2 6.3 6.4 Bloodline
- ↑ 7.0 7.1 7.2
 The Mandalorian — "Chapter 16: The Rescue"
- ↑
 Bib Fortuna in the Databank (backup link)
- ↑ Star Wars: Card Trader
- ↑ Star Wars: Episode V The Empire Strikes Back
- ↑ 11.0 11.1 Star Wars (2020) 2
- ↑ Bounty Hunters 1
- ↑ Bounty Hunters 5
- ↑ War of the Bounty Hunters Alpha 1
- ↑ War of the Bounty Hunters 5
- ↑ Bounty Hunters 42
- ↑
 Star Wars Forces of Destiny — "Bounty Hunted"
- ↑ Dune Sea Songs of Salt and Moonlight
- ↑ Return of the Jedi: Beware the Power of the Dark Side!
- ↑ Star Wars: Return of the Jedi junior novelization
- ↑ 21.0 21.1 21.2
 The Book of Boba Fett — "Chapter 1: Stranger in a Strange Land"
- ↑ Star Wars: The Rebel Files
- ↑ Star Wars: The Rise of Skywalker: The Visual Dictionary
- ↑
 The Mandalorian — "Chapter 14: The Tragedy"
- ↑
 The Mandalorian — "Chapter 9: The Marshal"
- ↑ Aftermath: Life Debt
- ↑
Live #Ham4Ham 5/4/16 -- May The Fourth Be With You on the Hamilton YouTube channel (backup link)
- ↑ What You Can Eat and Drink in STAR WARS: Galaxy's Edge by Amy Ratcliffe on nerdist.com (February 27, 2019) (archived from the original on February 28, 2019)
- ↑ The Making of Return of the Jedi
- ↑ 30.0 30.1 Star Wars: The Annotated Screenplays

