- "Phoenix Squadron, keep those fighters busy. Green Squadron, attack the lead destroyer."
- ―Captain Hera Syndulla, to Alliance squadrons
The Dark Omen was an Imperial I-class Star Destroyer that served in the 7th Fleet of the Imperial Navy under Grand Admiral Thrawn. The Dark Omen participated in the Battle of Atollon against the Rebel Alliance under the command of Captain Corf Ferno. During the battle, the Star Destroyer was slightly damaged by BTL-A4 Y-wing assault starfighter/bombers from Green Squadron above Atollon. Along with conducting an orbital bombardment of Chopper Base, the Dark Omen engaged rebel ships as they escaped through a gap between it and the Chimaera. The Dark Omen continued to participate in the Galactic Civil War, taking part in the Battle of Endor and the Defense of Kuat.
Description[]
- "Admiral Konstantine, deploy the fleet to these coordinates."
- ―Grand Admiral Thrawn orders his Star Destroyers, including the Dark Omen to Atollon
The Dark Omen[6] was an Imperial I-class Star Destroyer.[1] It measured at 1,600 meters long[2] and was outfitted with four port and four starboard quad turbolaser turrets, ventral cannons, a hangar bay,[1] two ISD-72x shield generator domes,[4] and a solar ionization reactor.[3] Additionally, the Dark Omen was equipped with a hyperdrive system,[1] and three destroyer-I ion engines with four smaller Gemon-4 ion engines.[3] The Star Destroyer was also stocked with a tractor beam targeting array[5] situated above the starship's bridge and between the two deflector shield domes.[1]
History[]
Battle of Atollon[]
Onset of the Battle of Atollon[]
- "Commander Sato. We have Imperial Star Destroyers incoming."
- ―A rebel pilot warns Commander Sato about the incoming squadron of Star Destroyers
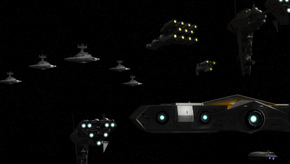
The Dark Omen (lead destroyer) and four other Star Destroyers arrive over Atollon.
The Dark Omen served in the Galactic Empire as part of the Imperial Navy during the Galactic Civil War. By the time of the Lothal campaign,[1] the Dark Omen was under the command of Captain Corf Ferno as part of Grand Admiral Thrawn's 7th Fleet.[6] After Thrawn pinpointed the location of the Rebel Alliance's Chopper Base on[1] the Lothal sector planet[8] Atollon, he had Admiral Kassius Konstantine dispatch[1] a squadron[6] of five Imperial I-class Star Destroyers from Lothal,[1] a planet in the Lothal sector.[9] The Star Destroyers included Ferno's Dark Omen,[6] which was the lead destroyer[1] of the squadron.[6]
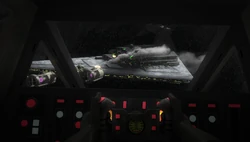
With the arrival of Imperial forces in the Atollon system, the Alliance's Phoenix Cell, which was headquartered at Chopper Base and was preparing to launch an attack on Lothal alongside their reinforcements from the Massassi Group rebel cell[1] from the Outer Rim moon[10] Yavin 4,[11] scrambled to evacuate their base of operations and disperse their fleet. Thrawn's flagship, the Chimaera, subsequently arrived. As a result of rebel maneuvers, Grand Admiral Thrawn ordered his ships to deploy TIE fighters and to reinforce the center of their formation. Captain Hera Syndulla ordered the RZ-1 A-wing interceptors of Phoenix Squadron to clear the Imperial fighters while she commanded the BTL-A4 Y-wing assault starfighter/bombers of Green Squadron to attack the Dark Omen.[1]
Continued actions at Atollon[]
- "Green group, clear out for another pass."
- ―Green Leader instructs his squadron to make another bombing run on the Dark Omen
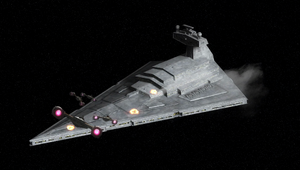
The Dark Omen sustains minimal damage from an attack by Green Squadron.
After Phoenix Squadron cleared a path, a contingent of Green Squadron bombers broke through Imperial lines and made a run for the Dark Omen. Green Leader ordered the bombers to arm their proton torpedoes and to follow him during the bombing run, after which the BTL Y-wing starfighters managed to fly over the Dark Omen's dorsal hull and release a total of four warheads, causing three explosions. The rebel bombers then moved to the ship's portside to conduct another bombing pass but were forced to break off when one of their bombers was destroyed by attacking TIE fighters and the Dark Omen's port batteries.[1] Overall, the Dark Omen was lightly damaged by Green Squadron.[6]
Following the joint destruction of Admiral Konstantine's Interdictor and the rebel flagship, the Alliance Quasar Fire-class cruiser-carrier Phoenix Nest, Jedi Lieutenant Commander Ezra Bridger escaped to summon reinforcements. Thrawn reorganized his formation following this, and all of his Star Destroyers launched an orbital bombardment of Chopper Base[1] to break rebel morale[6] after rebel forces had fled to the surface of Atollon. Despite the bombardment, Chopper Base's deflector shield generator held firm.[1]
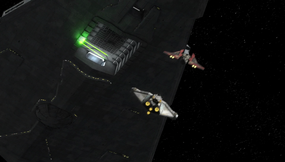
The Dark Omen fires upon rebel ships escaping the blockade.
After the subsequent ground assault by Thrawn to capture the rebel leadership and the destruction of the Interdictor cruiser Constrainer by Mandalorian reinforcements brought by Bridger, the last remaining rebel ships fled Atollon's surface and moved towards the Imperial blockade. The rebel ships pushed through a gap between the Chimaera and the Dark Omen. Although several rebel ships, including a CR90 corvette, were destroyed in this final push, the remaining rebel starships escaped the blockade and jumped into hyperspace.[6]
Atollon's aftermath[]
- "While Captain Ferno would eventually be promoted through the ranks and escaped relatively unscathed, since his ship was not present at Lothal due to ongoing repairs, Captain Gilad Pellaeon–who survived the disastrous Lothal engagement–does not appear to have been immediately promoted in the same way, despite his obvious talents."
- ―Beaumont Kin in The Rise and Fall of the Galactic Empire, writing of the aftermath of the battles of Atollon and Lothal
Following the Battle of Atollon, the 7th Fleet and Rebel Alliance forces participated in the Liberation of Lothal, which led to its liberation from the Galactic Empire. The Dark Omen was not present during the battle as it was undergoing repairs away from Lothal. As a result, Captain Ferno's career was relatively intact and would eventually be promoted through the ranks. Following the Battle of Yavin and the destruction of the DS-1 Death Star Mobile Battle Station, a vacuum was created in the Joint Chiefs of the Imperial Military. As a result, Ferno was promoted by Supreme Commander Grand General Cassio Tagge to Vice Admiral and placed in command of the last remnants of the 7th Fleet, which at that point consisted of only a few capital ships and support vessels that were not present during the Battle of Lothal. Ferno and his fleet were then dispatched to patrol areas of the Outer Rim.[7]
Ambush at Derra IV[]
- "Though the Rebel Alliance were not able to ascertain exactly what happened at Derra IV, we know now that the Vigilance took the lead–given it was Sloane's plan–but was ably supported by the Dark Omen and, most importantly, the Interdictor cruiser Retention that helped isolate the convoy and enabled its destruction."
- ―The passage regarding Derra IV in Kin's The Rise and Fall of the Galactic Empire
For a period of time prior to the Battle of Hoth[7] in 3 ABY,[12] the Rebel Alliance had been transporting supplies through the Derra system in the Outer Rim. The Alliance convoys contained a range of weapons and equipment, food and medicine that were in need by various Rebel Alliance cells throughout the galaxy. After Imperial Vice Admiral Rae Sloane and the 7th Fleet were able to establish a list of the most probably candidates for rebel shipping routes in the Expansion Region, Imperial forces closed in on Derra and located a rebel convoy. As it was Sloane's plan, the admiral and the ISD Vigilance were placed in command, and was capably supported by the Dark Omen and the Interdictor cruiser Retention. Retention aided in isolating the convoy, resulting in its destruction during the ambush.[7]
Battle of Endor[]
- "Admiral Sloane and the Vigilance were present, as were Admiral Versio’s Eviscerator, Vice Admiral Ferno’s Dark Omen, and Admiral Montferrat with the Devastator. These ships and their commanders had seen extensive action against the Rebel Alliance across the entirety of the war."
- ―Beaumont Kin writing on the presence of experienced ships and commanders at Endor in The Rise and Fall of the Galactic Empire

The Dark Omen was one of a number of Star Destroyers present at Endor.
In 4 ABY,[12] Vice Admiral Ferno and the Dark Omen were present at Endor and participated in briefings along with the massing Imperial forces in preparation for the coming Battle of Endor. The Dark Omen and accompanied by other commanders and ships also considered experienced including Admiral Sloane's Vigilance, Admiral Jhared Montferrat's Devastator, ISB Admiral Garrick Versio's Eviscerator. Additionally, they were complemented by slightly less experience officers and ships such as Commodore Scaanos and his Steadfast and Captain Inalis with the Interrogator. Other officers and capital ships included Fleet Admiral Firmus Piett and the dreadnought flagship Executor,[7] the battlecruiser Pride of Tarlandia,[13] and other ships such as the Annihilator,[14] the Harbinger,[15] the Subjugator,[14] and the Vehement.[13] Records of the briefings were kept by Dark Omen.[7]
The battle started when the Rebel Alliance Navy, consisting of various Mon Calamari Star Cruisers and an assortment of combat craft and capital ships arrived above Endor and flew towards the DS-2 Death Star II Mobile Battle Station. Once deduced that the Death Star II's deflector shields were still activated and that the ground strike team covertly inserted prior to the battle had not succeeded in destroying the Death Star's shield generator, the Alliance realized that they were brought into a trap. After disengaging and moving away from the second Death Star, the Alliance fleet was ambushed by the massed Imperial naval forces which consisted of the Star Dreadnought Executor[16] and over thirty Star Destroyers[17] and other warships.[6]
The Imperial fleet launched many of their starfighters at the rebel forces first, while the Imperial capital ships kept their distance to prevent the Alliance fleet from escaping as Galactic Emperor Sheev Palpatine wanted to demonstrate the power of the Death Star, ordering Moff Tiaan Jerjerrod to fire on the rebel fleet. After an intense naval and ground battle, the Executor succumbed to annihilation and the second Death Star was destroyed after rebel starfighters destroyed the battlestation's reactor. Following the collapse of the command structure, Admiral Sloane took command of the Imperial fleet and ordered a retreat.[7]
Defense of Kuat[]
- "As it became apparent that the breakout was doomed, communications intensified between the Dark Omen and Moff Maksim and resulted in the surrender being issued."
- ―Beaumont Kin on the final actions in the Defense of Kuat as written in The Rise and Fall of the Galactic Empire

The Dark Omen fought in the multi-week long Defense of Kuat.
With the Rebel Alliance now reorganized as the New Republic, they realized shortly after Endor that if their forces could at least blockade the Kuat shipyards or even capture it, then they would deprive the Empire of needed reinforcements and possibly shorten the war. Rae Sloane, now a Grand Admiral, dispatched reinforcements led by Vice Admiral Ferno to the Kuat system to shore up Imperial defenses. Command of Imperial forces at Kuat generally fell to Moff Pollus Maksim, but control of the fleet was taken by the Dark Omen. The Defense of Kuat lasted for weeks as New Republic Defense Fleet forces initially attempted to hammer each other from long distances before incrementally pivoting to targeting vital sections of Kuat Drive Yards infrastructure such as fuel depots and supply monorails. Fighting was usually strenuously attritional due to the strategy New Republic Admiral Gial Ackbar and Commodore Kyrsta Agate employed, as they attempted to force the Empire in defending as much as possible while weaking the shipyards enough so that the Imperial fleet could not perform concurrent repairs.[7]
Imperial vessels fell to capture and Star Destroyers defending the shipyards were actively cannibalized to provide more weapons to attack New Republic forces. Moff Maksim and local fleet commanders had numerous discussions on whether they should continue defending the shipyards or if they should attempt to break out through the blockade and escape. The surviving ships attempted to escape while Maksim remained on Kuat, unwilling to put his life at risk on a Star Destroyer. The Imperial fleet's remnants moved into battle formation and readied to charge the New Republic. With the arrival of the Starhawk-class Battleship Mark I Concord preventing breaching any gaps in the New Republic's formation, communications between Moff Maksim and the Dark Omen intensified and eventually a surrender was issued.[7]
As a result, the shipyards fell, and the New Republic captured the remains of seventeen Star Destroyers and an assortment of support ships. Vice Admiral Ferno was captured and imprisoned, while the defeat at Kuat was devastating to the Imperial war effort. With the most vital industrial center out of their control, morale collapsed across the Empire's forces and Grand Admiral Sloane made contact with New Republic Chancellor Mon Mothma to discuss possible peace terms.[7]
Legacy[]
- "Similarly, the initial attack on Atollon had been led by the tactically astute Captain Corf Ferno aboard the Dark Omen. When Thrawn decided–unwisely–to lead the ground offensive, he could have returned command of the space battle to that ship."
- ―Beaumont Kin provides his opinion of Thrawn's failures during Atollon in The Rise and Fall of the Galactic Empire
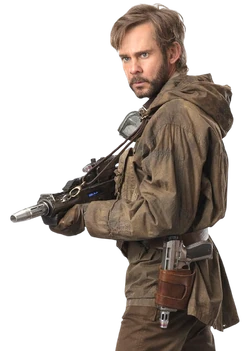
Historian Beaumont Kin wrote about Ferno and the Dark Omen in The Rise and Fall of the Galactic Empire.
In 35 ABY,[18] the historian and Resistance paramilitary member Beaumont Kin mentioned and cited the Dark Omen in several instances in[7] his[19] book, The Rise and Fall of the Galactic Empire. The book contained an image of Grand Admiral Thrawn during his exile on the extragalactic planet of Peridea[7] in around 9 ABY[20] that was recovered from the Dark Omen. One record regarding the 7th Fleet's reorganization following the disappearance of Grand Admiral Thrawn was recovered from the Dark Omen and placed in the Imperial Archives Section: Fleet Compositions. The file was titled 7th Fleet Reorganization. A reference to records of the Endor briefing recovered from the Dark Omen and the wreckage of the Devastator and Steadfast was cited in the book. Two records from the Dark Omen regarding the Defense of Kuat were also recovered from the Imperial Archives Section: Imperial Navy Operations, specifically the Defense of Kuat – Command Hierarchy and Defense of Kuat – Force Power Projection. The records were used as citations in Kin's book.[7]
Commanders and crew[]
Atollon[]
The Dark Omen was led by Captain Corf Ferno during the Battle of Atollon.
The Dark Omen was part of the 7th Fleet under the command of Grand Admiral Thrawn. Captain Corf Ferno served as the ship's commanding officer during the Battle of Atollon,[6] and led the attack[7] despite Admiral Kassius Konstantine being placed in command of the Star Destroyer squadron's voyage to Atollon until Thrawn arrived. When Thrawn was planetside to oversee the ground attack against Chopper Base and Admiral Konstantine was killed, Lothal sector Governor Arihnda Pryce commanded the entire Imperial fleet at Atollon.[1]
Derra IV[]
During the Imperial ambush in the Derra system, the Dark Omen was placed under Vice Admiral Rae Sloane's overall command as she led the action against the rebels.[7]
Endor[]
At Endor, the Dark Omen was directly commanded by Vice Admiral Corf Ferno. Overall, Galactic Emperor Palpatine was the supreme leader of the Imperial forces and relayed orders to commanders, with Moff Tiaan Jerjerrod leading all Imperial forces. The Imperial naval detachment was led by Fleet Admiral Firmus Piett aboard the flagship Executor, and all surviving Imperial fleet forces retreated once Vice Admiral Sloane gave the order.[7]
Kuat[]
- "Command of the Empire’s forces at Kuat fell largely to Moff Pollus Maksim, though control of the fleet itself appears to have fallen to the Dark Omen."
- ―Beaumont Kin, in The Rise and Fall of the Galactic Empire
Vice Admiral Ferno and the Dark Omen continued to serve Rae Sloane in her time as Grand Admiral. The Dark Omen fell under the overall command of Moff Pollus Maksim when it was dispatched by Sloane to bolster Imperial defenses, although Ferno's Dark Omen had control of the fleet.[7]
Behind the scenes[]
The Dark Omen was first pictured in the mid-season trailer for the third season of the animated television series Star Wars Rebels on January 4, 2017.[21] The ship made its episodic debut in "Zero Hour,"[1] the final episode of the season. The episode was released in two parts, the twenty-first and twenty-second episodes of the season overall, on March 25, 2017.[22] It went unnamed in the episode until the 2021 reference book Star Wars: Battles that Changed the Galaxy provided the ship's name.[6]
Appearances[]
 Star Wars Rebels — "Zero Hour" (First appearance)
Sources[]
 Star Wars Rebels Season 3 – Mid-Season Trailer (Official) on the official Star Wars YouTube channel (backup link) (Posted on StarWars.com) (First pictured)
 Rebels Recon #3.20: Inside "Twin Suns" | Star Wars Rebels on the official Star Wars YouTube channel (backup link) (Posted on StarWars.com)
 Showdown with Thrawn – Zero Hour Preview | Star Wars Rebels on the official Star Wars YouTube channel (backup link)
 "Star Wars Rebels Season Three Episode Guide" — Star Wars Insider 174 (Picture only)
 Star Wars Rebels Recap: Seasons 1-3 on the official Star Wars YouTube channel (backup link) (Posted on StarWars.com)
- Star Wars: Battles that Changed the Galaxy (First identified as Dark Omen)
- Star Wars: The Rise and Fall of the Galactic Empire
Notes and references[]
- ↑ 1.00 1.01 1.02 1.03 1.04 1.05 1.06 1.07 1.08 1.09 1.10 1.11 1.12 1.13 1.14 1.15 1.16 1.17 1.18 1.19 1.20 1.21 1.22 1.23 1.24 1.25 1.26
 Star Wars Rebels — "Zero Hour"
- ↑ 2.0 2.1 "Zero Hour" establishes that the Dark Omen is an Imperial-class Star Destroyer, which measures 1,600 meters in length according to
 Imperial Star Destroyer in the Databank (backup link).
- ↑ 3.0 3.1 3.2 3.3 3.4 "Zero Hour" depicts the Dark Omen with what
 Star Wars: Card Trader (Card: Star Destroyer - Blueprints) identifies as a solar ionization reactor. It also identifies with what "Zero Hour" also depicts the Dark Omen as having three destroyer-I ion engines and four smaller Gemon-4 ion engines.
- ↑ 4.0 4.1 "Zero Hour" depicts the Dark Omen with what
 Star Wars: Build the Millennium Falcon 20 (Starship Fact File: Imperial I-class Star Destroyer) identifies as two ISD-72x shield generator domes.
- ↑ 5.0 5.1 "Zero Hour" depicts the Dark Omen with what the Droids in Distress book identifies as a tractor beam targeting array.
- ↑ 6.00 6.01 6.02 6.03 6.04 6.05 6.06 6.07 6.08 6.09 6.10 6.11 6.12 6.13 6.14 6.15 6.16 Star Wars: Battles that Changed the Galaxy
- ↑ 7.00 7.01 7.02 7.03 7.04 7.05 7.06 7.07 7.08 7.09 7.10 7.11 7.12 7.13 7.14 7.15 7.16 7.17 7.18 7.19 7.20 7.21 7.22 7.23 7.24 7.25 Star Wars: The Rise and Fall of the Galactic Empire
- ↑ Dawn of Rebellion
- ↑ Nexus of Power
- ↑ Ultimate Star Wars, New Edition
- ↑ Rogue One: A Star Wars Story
- ↑ 12.0 12.1 Star Wars: Timelines
- ↑ 13.0 13.1 "The Levers of Power" — The Rise of the Empire
- ↑ 14.0 14.1 Lost Stars
- ↑
"Starships of the Empire and the Rebellion" — Star Wars Encyclopedia
- ↑ Star Wars: Episode VI Return of the Jedi
- ↑ Star Wars: On the Front Lines
- ↑ Star Wars: The Rise and Fall of the Galactic Empire states that thirty years have passed since the end of the Galactic Civil War and months have passed since the Battle of Exegol. As Star Wars: Timelines dates the end of the war to 5 ABY and the Battle of Exegol to 35 ABY, the in-universe The Rise and Fall of the Galactic Empire must have been published in 35 ABY.
- ↑ Star Wars: The Rise of Skywalker: The Visual Dictionary
- ↑ Star Wars: Timelines (Exclusive Edition) places the events of "Part One: Master and Apprentice" around 9 ABY. Therefore, the events of Ahsoka must take place around the same year.
- ↑
 Star Wars Rebels Season 3 – Mid-Season Trailer (Official) on the official Star Wars YouTube channel (backup link) (Posted on StarWars.com)
- ↑
 "Star Wars Rebels Season Three Episode Guide" — Star Wars Insider 174
