

The VPN (Virtual Private Network) Auto-connect feature automatically connects your device to a VPN server whenever you have access to the internet. It ensures uninterrupted data protection and conveniently removes the need for manual activation.
If you’re not familiar with it just yet, don’t worry — Auto-connect is a fairly simple feature to grasp. Below, we’ll walk you through everything about VPN auto connection, including how to easily activate this feature on different devices and its benefits.
Table of contents
What is Auto-connect?
VPN Auto-connect is a feature that automatically establishes a secure VPN connection when your device connects to Wi-Fi, mobile networks, or Ethernet.
It helps ensure your data is encrypted, keeping it safe from online threats on public Wi-Fi and other unsecured networks — even if you forget to connect to a VPN. Auto-connect also saves you the hassle and extra time required to manually fire up your VPN app and connect to a server.
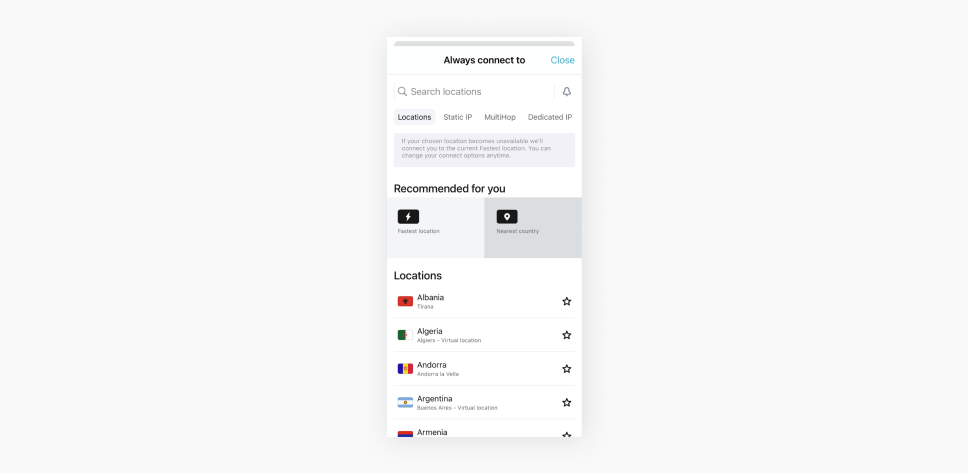
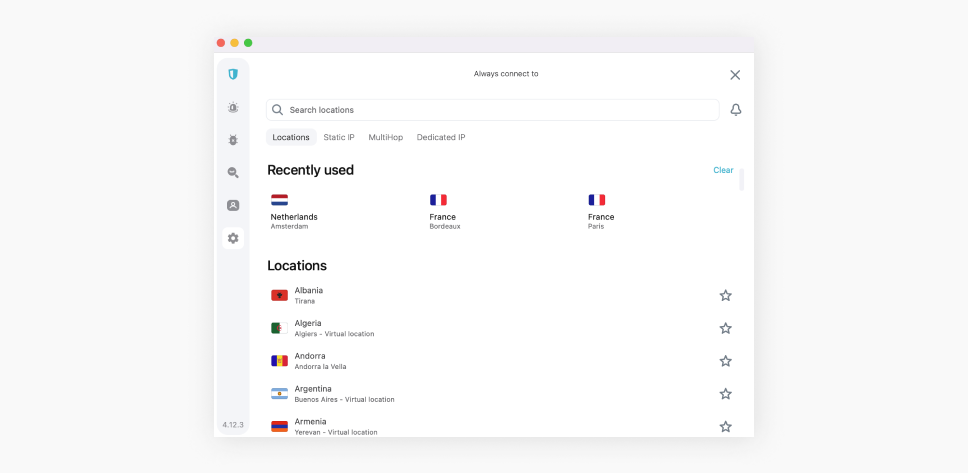
Some VPN providers allow you to customize this feature. For instance, Surfshark lets you pick the server the VPN connects to automatically. Your options include:
- The fastest server
- The nearest server
- A specific country and city
- A Static IP (Internet Protocol)
- MultiHop servers
- A Dedicated IP (if purchased)
Activating Auto-connect
You should keep your VPN on whenever you’re online to protect your data and privacy. Without VPN protection, you’re more susceptible to cyberthreats such as hacking, data interception, and third-party surveillance.

Activating the Auto-connect feature takes just a few minutes, and the procedure is nearly identical on all devices. Here’s how you can set up a VPN auto connection on different devices:
Setup on iOS
- Download and install the Surfshark iOS app from the App Store. Next, open the app and log into your Surfshark account.
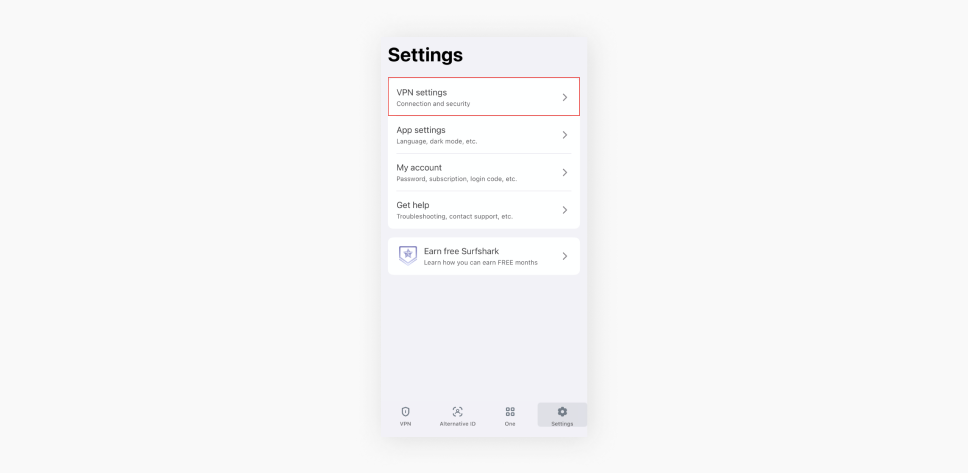
- Go to Settings by clicking on the gear icon at the bottom right corner of the app.
- Select VPN settings.
- Look for Auto-connect and toggle the switch to the on position. The toggle will turn green when it’s active.
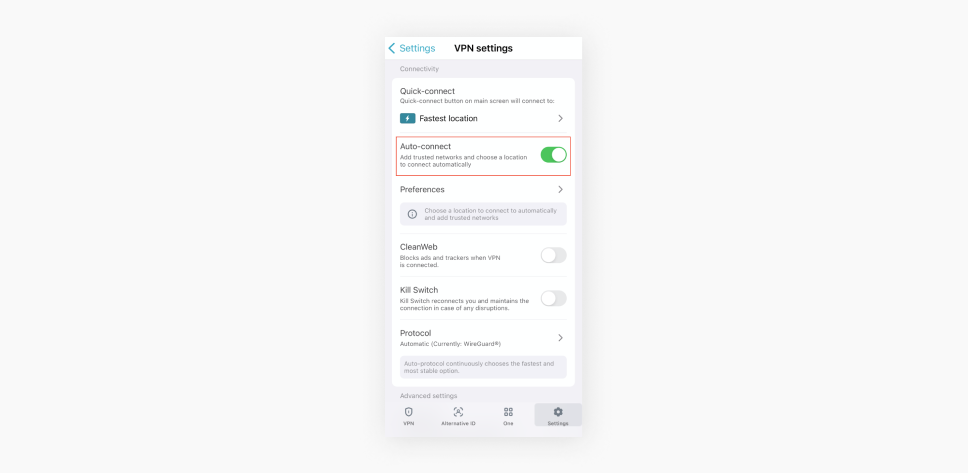
- Next, tap on Preferences.
- In the new window, find Preferred auto-connect location and click on Fastest location.
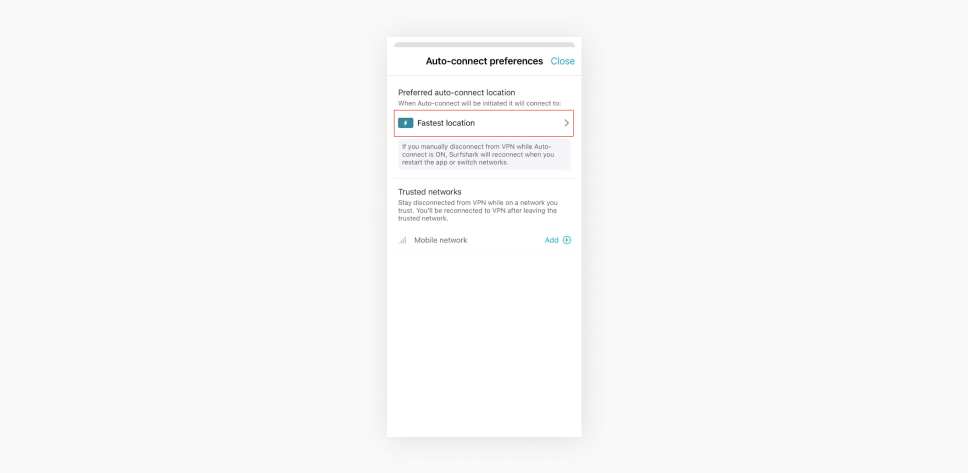
- Select the server you’d like to connect to automatically. Choose from servers in specific countries and cities, the fastest location, or the nearest country. You can also opt for Static IP or MultiHop servers.
Setup on Android
- Search for the Surfshark app on the Google Play store. Download, install, and launch the app.
- Log in to your Surfshark account.
- Head to Settings by tapping on the gear icon in the lower right corner of the app.
- Hit VPN settings.
- Scroll to Auto-connect and toggle the switch to the on position. The toggle will light up green when it’s active.
- Click on Preferences.
- Once directed to the next window, locate Preferred auto-connect location and select Fastest location.
- Pick the server you’d like to connect to automatically. Your options include:
- A server in a specific location — down to your preferred country and city
- A server in the fastest location
- A server in the nearest country
- A Static IP
- MultiHop servers
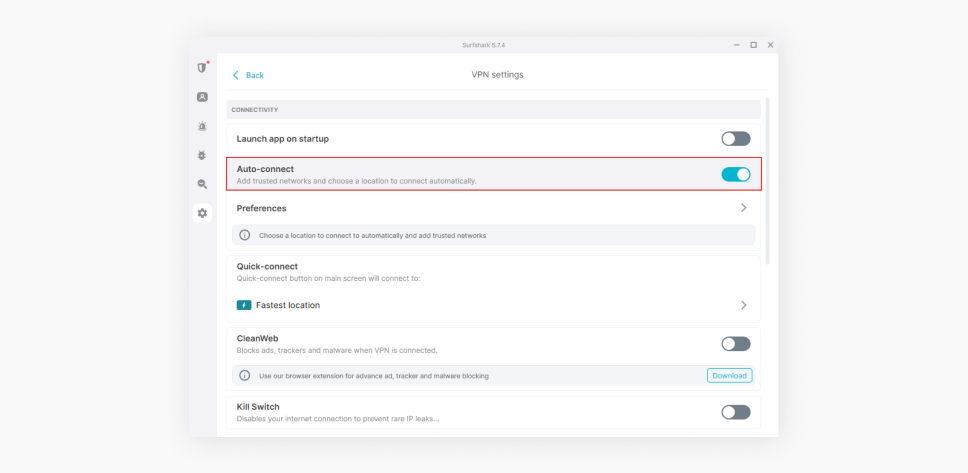
Setup on macOS
- Open the Surfshark app on your macOS device. If you don’t have the Surfshark app, you can download it from the App Store.
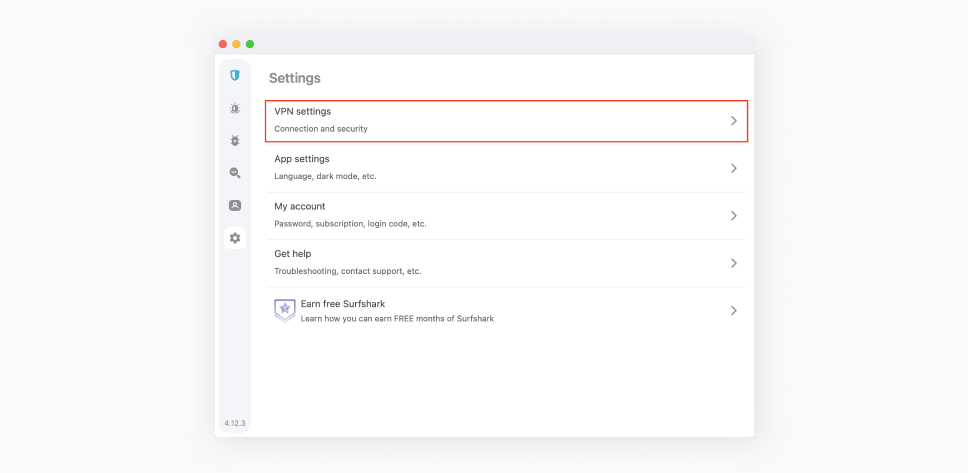
- Go to Settings by clicking on the gear icon on the left side of the app.

- Next, click on VPN settings.
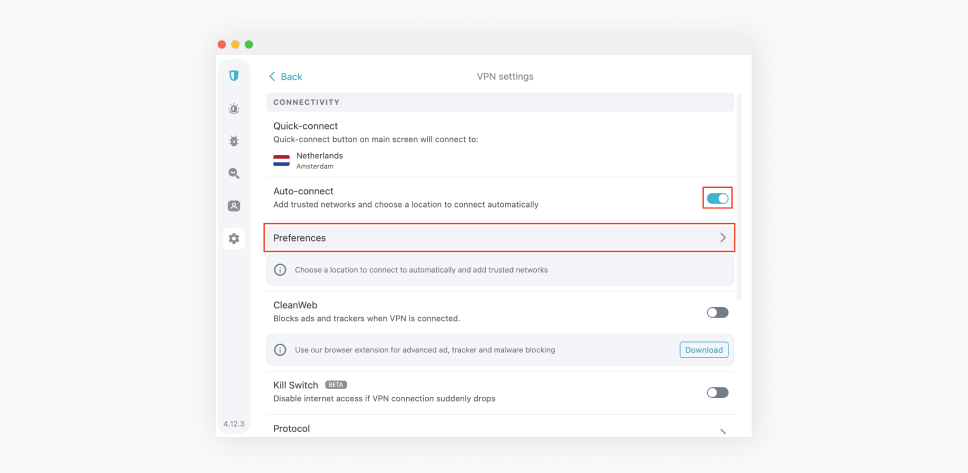
- Toggle on the button next to Auto-connect. The toggle will turn green when it’s active.
- Scroll down to Preferences and click on it.
- In the next window, find Preferred auto-connect location and select Fastest location.
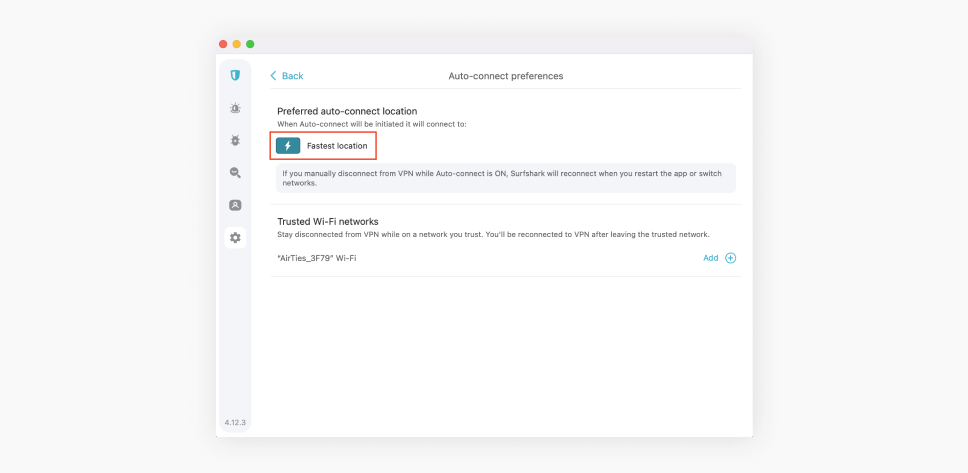
- Choose the server you’d like to connect to automatically. You can search for servers in specific locations, choose the fastest location, or pick the nearest country. Alternatively, you can opt for Static IPs and MultiHop servers.
Setup on Windows
If you’re using a Windows device, setting up Surfshark VPN’s Auto-connect feature is even simpler with Start with Windows. This feature automatically launches the Surfshark app when your computer boots up, eliminating the need to search for and open it manually.
- Download and install the Surfshark VPN app for Windows 11 and 10. For Windows 7 and 8, download the Windows Legacy version Surfshark app. You can skip this step if you’ve already installed the app and enabled Start with Windows.
- Once logged in, you’ll see the Surfshark app’s main dashboard. Click on the gear icon on the left to go to Settings.
- Click on VPN settings.
- Scroll down to find the Auto-connect option and toggle the switch to activate it. The toggle will turn green when active.
- Select Preferences.
- Next, find Preferred auto-connect location. Click on the Fastest location button underneath it.
- Choose a server you’d like to connect to automatically from Surfshark’s 3200+ servers in 100 countries. Alternatively, pick a server in the fastest location or the nearest country. Other options include using Static IPs and MultiHop servers.
Setup on Linux
- Launch the Surfshark VPN application on your Linux device. If you haven’t installed it yet, you can find the Linux installation script here.
- Once logged in, you’ll see the Surfshark app’s main screen. Navigate to Settings by clicking the gear icon located on the left side of the app.

- In the Settings menu, select VPN settings.
- Locate the Auto-connect option and enable it by toggling the switch. The switch will turn green when activated.
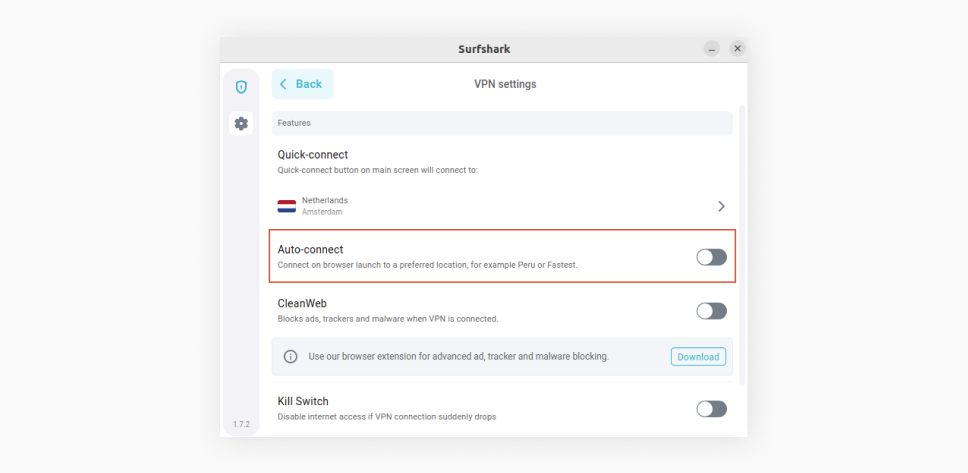
- Next, select Preferences.
- Under the Preferred auto-connect location, click on the Fastest location button.
- Pick a server for automatic connection upon browser launch. Your options include servers in over 100 countries, the Fastest location, Static IPs, and MultiHop servers.
The importance of an automatic VPN connection
With an automatic VPN connection, you can conveniently enjoy continuous privacy protection. Here’s how it makes a difference:
- Always-on encryption: with the auto-connect feature enabled, the VPN instantly establishes a secure connection whenever your device is online. So, your internet traffic is always encrypted, whether you’re browsing, shopping online, or working remotely — keeping you safe from snoops and hackers.
- Minimized security gaps: it only takes seconds to manually connect to a VPN, switch devices, or change networks, but those brief periods could still expose you to cybercriminals’ exploitation. Auto-connect significantly reduces this window, ensuring there aren’t security gaps that could lead to breaches.
- Automatic VPN activation: even the best of us can slip up and forget to switch on the VPN. By automatically initiating a secure VPN connection when you’re online, the feature removes the burden of manual activation.
- Protected public Wi-Fi connection: public Wi-Fi networks at hotels, airports, and malls often lack the necessary protection, leaving your data vulnerable to attacks like fake hotspots, DDoS (distributed denial of service), and cookie theft. With auto-connect activated, your data is instantly encrypted whenever you join these networks, reducing the risk of such attacks.
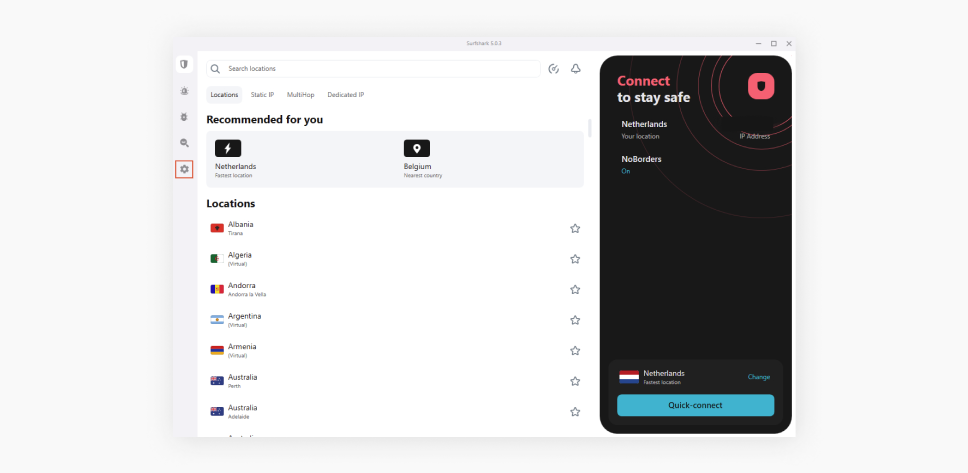
- Optimized performance: certain VPNs let you configure the Auto-connect feature to instantly connect to the fastest server. This ensures you can enjoy faster speeds without having to manually switch servers. For instance, Surfshark’s Auto-connect feature lets you automatically connect to a server in the fastest location.

Exploring additional VPN features
Auto-connect is an extremely useful feature, but it’s only one piece of the puzzle in keeping your data safe. Here are some of Surfshark’s other features that contribute to providing comprehensive protection:
- Bypasser (split-tunneling): allows you to choose which data to protect with VPN encryption and which will be transmitted without it. It’s particularly useful for accessing local websites or online services while still using the VPN for everything else.
- Route via VPN (reverse Bypasser): conversely, this feature lets you specify the websites or apps that should be routed through the VPN server while leaving others unaffected.
- Kill Switch: automatically cuts off your internet connection if your VPN connection drops. This ensures you don’t stay online without VPN protection, shrinking the risk of leaking data or exposing your online activities to bad actors.
- Pause VPN: allows you to put the VPN on hold for five minutes, 30 minutes, or two hours. The VPN connection automatically resumes afterward.
- Dynamic MultiHop: this double VPN feature lets you connect via two different VPN servers simultaneously, doubling the security of your data. You can pick any two servers from Surfshark’s 3200+ servers in 100 countries.
VPN auto connection: a must-have feature made easy
Whether you prioritize uninterrupted VPN encryption, value the convenience of automatic activation, or need enhanced protection on public Wi-Fi, the Auto-connect feature plays a critical role in keeping your data secure at all times. Additionally, setting up and customizing it to suit your specific needs is incredibly easy, making it a no-brainer to use the feature.

FAQ
Why does my VPN automatically reconnect?
Your VPN automatically reconnects because you’ve enabled the Auto-connect feature. This feature instantly and continuously encrypts your data by establishing a VPN connection whenever your device connects to the internet.
How do I stop my VPN from automatically connecting?
To stop your VPN from automatically connecting, you need to disable the Auto-connect feature. To do this, go to Settings, select VPN settings, and scroll down to Auto-connect. Toggle the Auto-connect switch to turn it off.
Is it OK to be connected to my VPN all the time?
Yes, connecting to a VPN anytime you’re online is not only OK but recommended. A VPN encrypts all data to and from your device to shield it from prying eyes. It also masks your IP address to protect your identity and privacy.
Why can’t I turn off my VPN?
To turn off your VPN, open the VPN app on your device. Find the Disconnect button on the home screen and tap on it. If you’ve set up the VPN on your router, you’ll need to adjust the router settings to remove the VPN from your Wi-Fi network. The exact steps vary depending on your router’s model and the VPN service you’re using.
Is Auto-connect safe?
Yes, Auto-connect is safe as it ensures instant and continuous data encryption. Automatically connecting your device to a VPN server whenever you’re online also removes the need for manual activation. Besides convenience, this prevents accidental data exposure if you forget to activate your VPN.
Is Auto-connect to Wi-Fi safe?
No, automatically connecting to Wi-Fi isn’t safe. While convenient, enabling this feature could leave you vulnerable to various threats like malware and evil twin attacks, where cybercriminals set up fake Wi-Fi networks with names similar to legitimate ones. It’s best to disable the Wi-Fi Auto-connect feature and manually select your Wi-Fi networks.
How do you know if your VPN is really working?
The easiest way to know if your VPN is working is to check your IP address before and after connecting to the VPN — they shouldn’t be the same. You can use Surfshark’s IP address checker to verify the change. The tool shows your IP address, ISP, and approximate location. If your IP address remains the same, it’s safe to say that your VPN is not connecting.


